Okta SCIM
TileDB Cloud Self-Hosted can connect to Okta for single sign-on support. You can also optionally configure Okta’s SCIM (System for Cross-domain Identity Management) functionality to enable automatically provisioning users and adding them to organizations.
SSO
To enable SSO, you need to first create an Okta OpenID Connect integration for your installation.
In the Okta administrative dashboard, go to Applications and select Create App Integration. A dialog box will appear to initially set up the application.

Select the sign-in method OIDC - OpenID Connect, and the Web Application type, and select Next. You will be taken to the New Web App Integration screen.
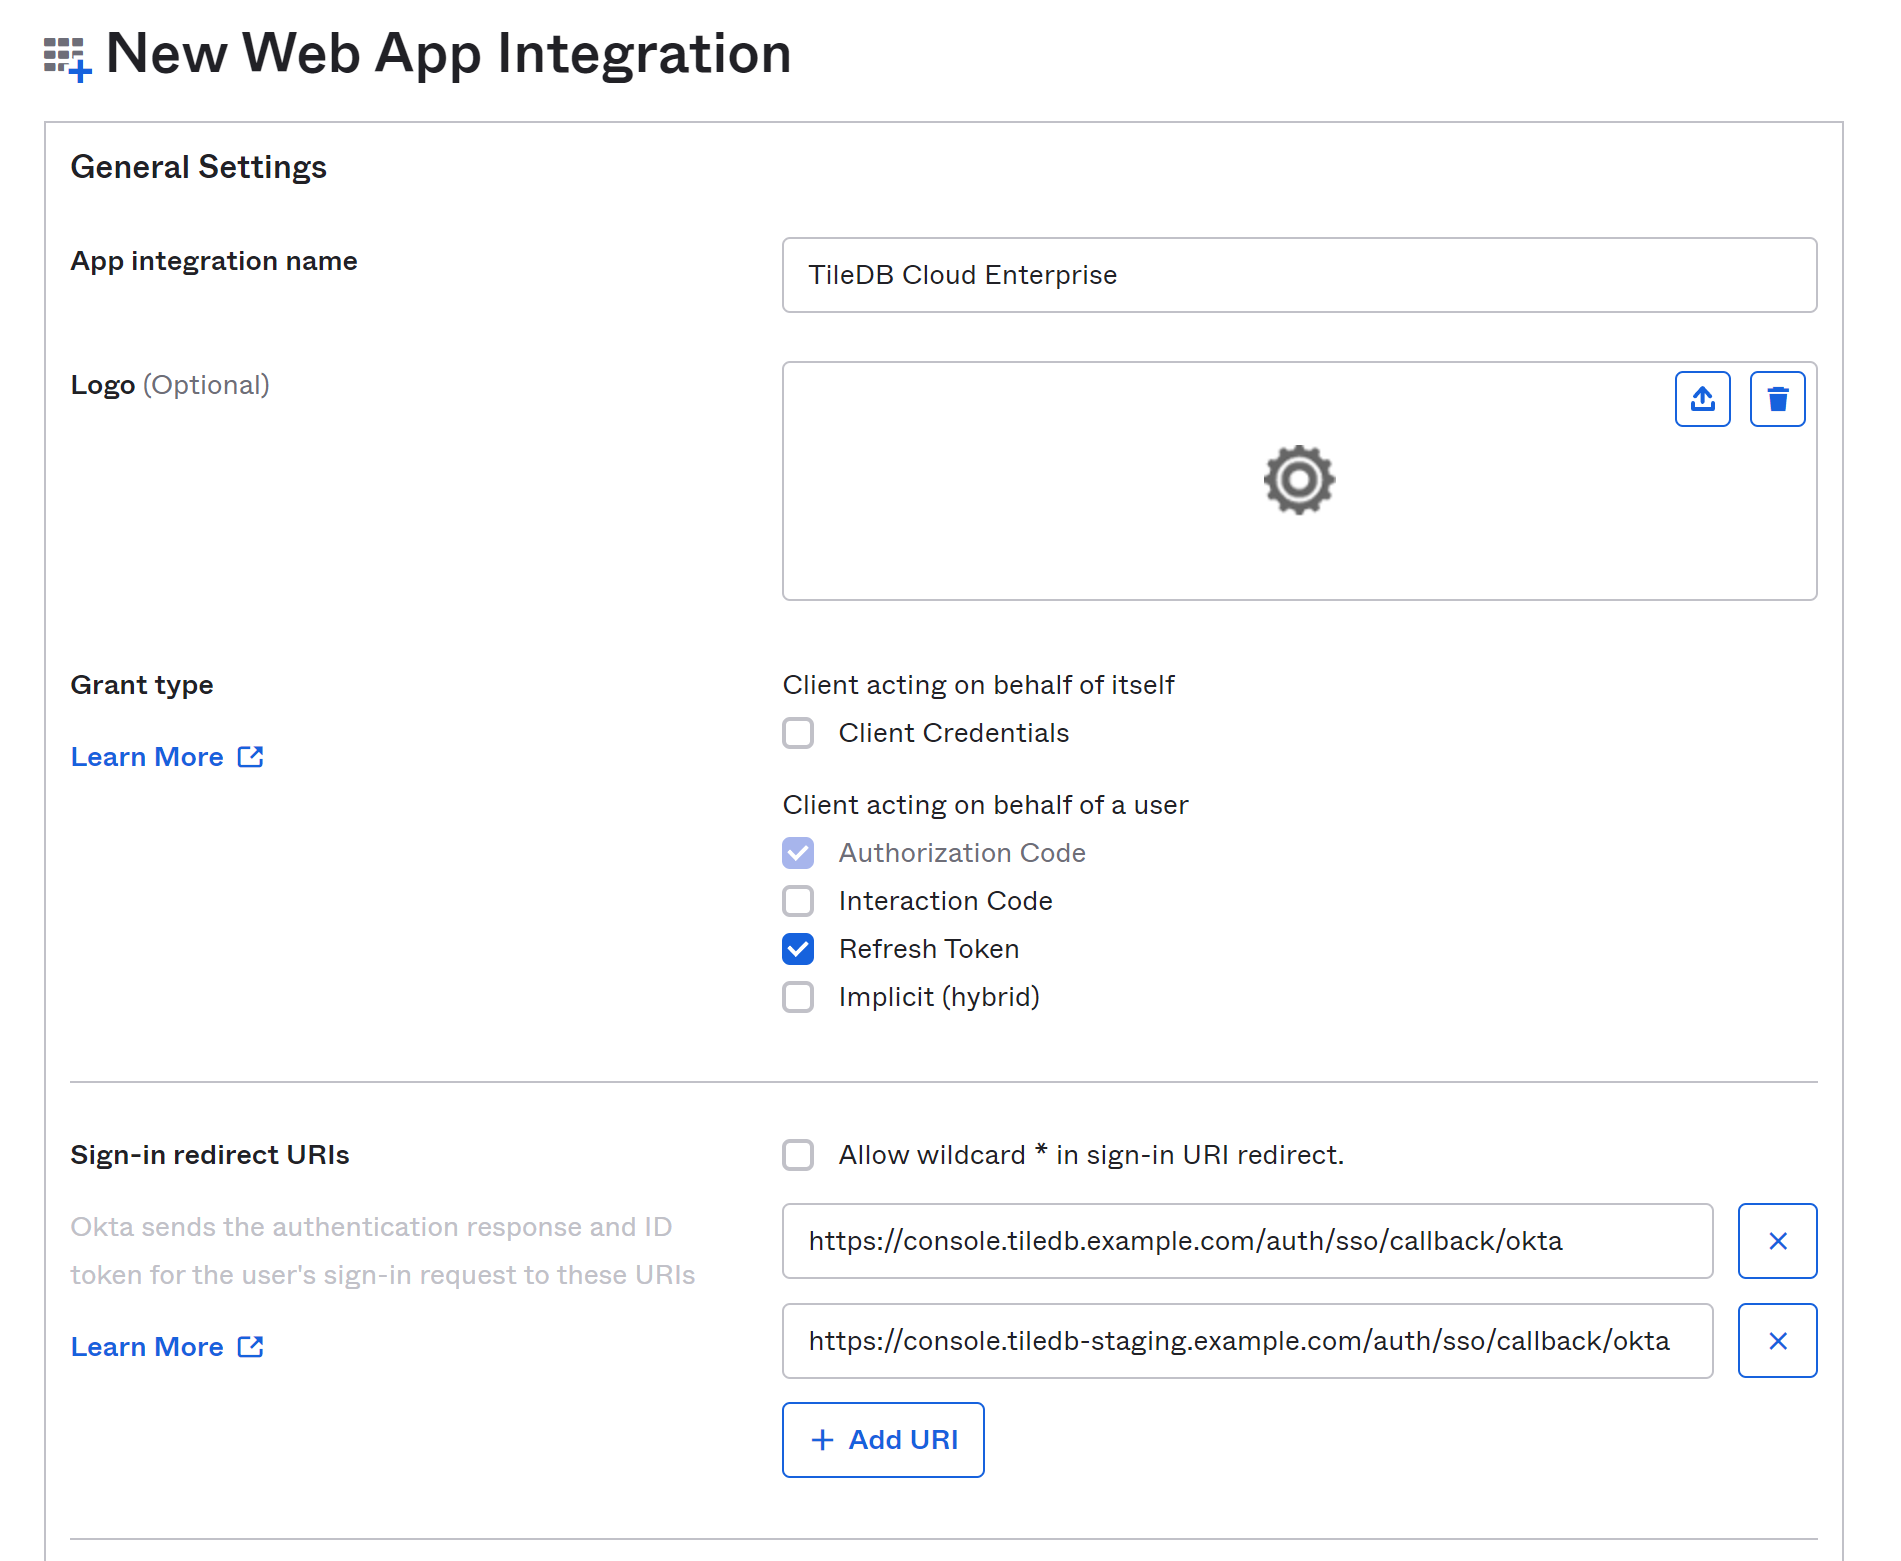
Give your application a name (and optionally a logo). Next to Grant type, check the Refresh Token box.
Add a Sign-in redirect URI. This should be the URL of your TileDB Cloud Console followed by /auth/sso/callback/okta. For instance, if your console lives at https://console.tiledb.example.com/, the redirect URI should be https://console.tiledb.example.com/auth/sso/callback/okta. You may optionally add your console’s home page as a sign-out redirect URI (for example, https://console.tiledb.example.com/). Leave Trusted origins empty.
If you have multiple installations that will be using the same Okta instance for authentication, or you have another instance that you use for testing or deployment testing, you can add that installation’s URL as an additional sign-in redirect URI.
At the bottom of the page, decide which users in your Okta organization should have access to TileDB Cloud. Only those selected users will be able to log in.
If you are planning on using provisioning with SCIM, you should limit this to only the same users you provision to avoid account conflicts.
Select Save to create the integration.
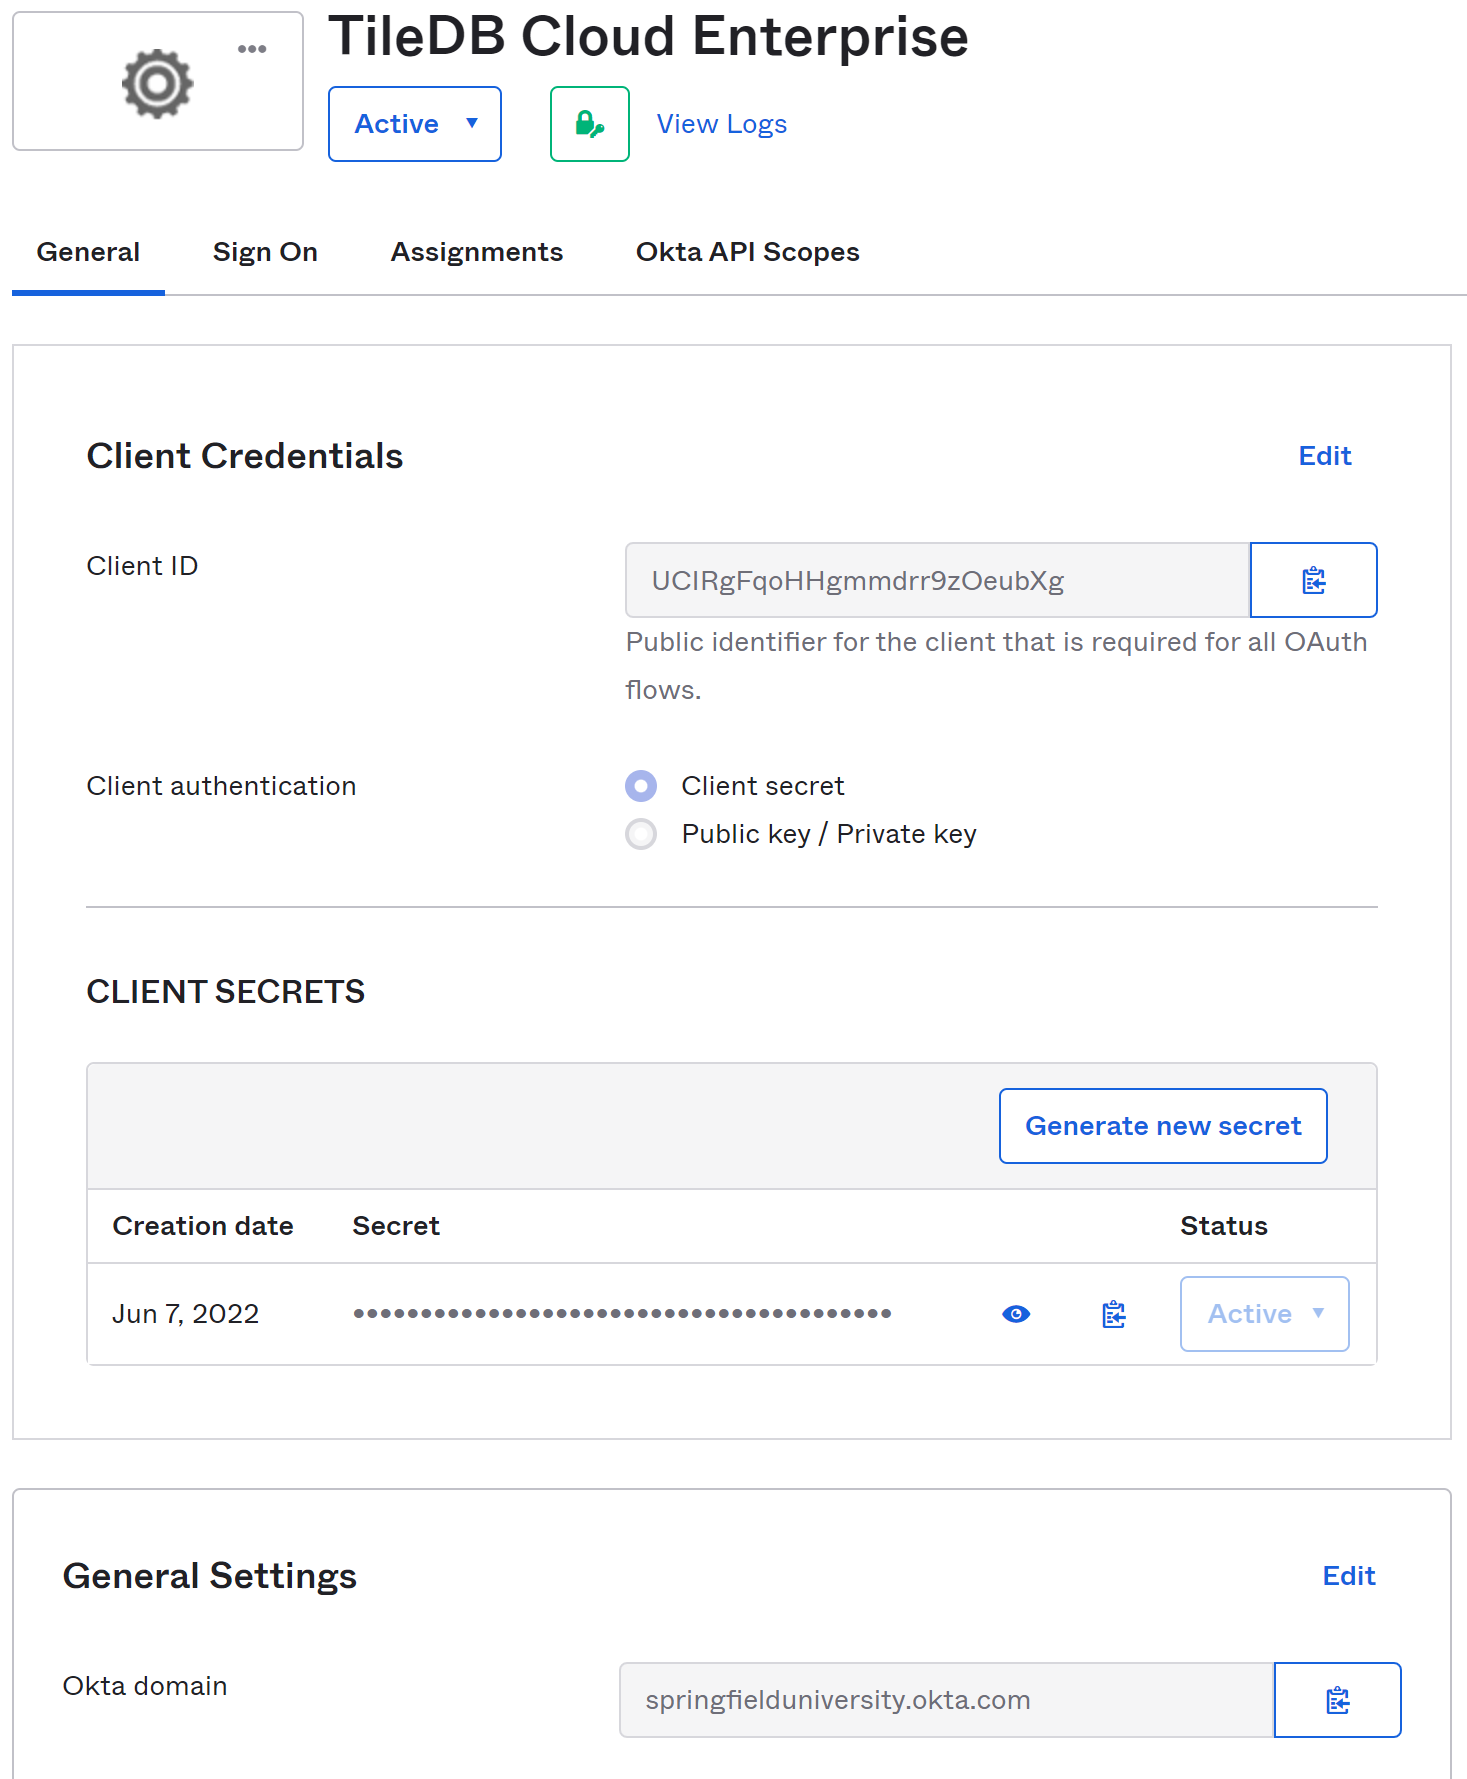
Copy the values from this page into your TileDB configuration in values.yaml. The Client ID and Client Secret go in the tiledb-cloud-ui section, and the domain goes in the tiledb-cloud-rest and tiledb-cloud-ui sections.
# Other sections and values are omitted for clarity.
tiledb-cloud-rest:
  restConfig:
    SSO:
      Okta:
        Domain: "springfielduniversity.okta.com"

tiledb-cloud-ui:
  config:
    SSOOkta:
      Domain: "springfielduniversity.okta.com"
      ClientID: "0oa5ba4rr9cO9dqVW5d7"
      ClientSecret: "4777c36d8b528e07f24cf81be8651162d0f8b278e1ed5c0850b25d6f3583"
After updating the config and redeploying, an Okta sign-in button will appear on your installation’s login page, and users will be able to authenticate to TileDB Cloud with their Okta credentials.
SCIM Provisioning
Okta uses SCIM (System for Cross-domain Identity Management) to provision users into external applications. To handle automatic creation and management of users, you can configure Okta to connect to your TileDB installation’s SCIM endpoints.
This is not available to TileDB Cloud SaaS users.
Configure TileDB Cloud
The first step in the setup is to configure TileDB Cloud’s SCIM support. TileDB Cloud uses HTTP Basic authentication to protect its SCIM endpoints, and a password needs to be configured in the values.yaml file:
# Other sections omitted.
tiledb-cloud-rest:
  restConfig:
    SSO:
      Okta:
        Domain: "springfielduniversity.okta.com"
        SCIMPasswords:
          - "a-password-for-okta-to-use"
With a SCIM password set, TileDB Cloud is now serving SCIM endpoints at the base path of .../v1/scim/2.0/. For example, if your TileDB Cloud API server is located at https://api.tiledb.example.com/, its SCIM endpoint is https://api.tiledb.example.com/v1/scim/2.0/.
Ordinarily, there will only be one password set. Multiple passwords are supported for seamless credential rotation:
- Add a new password to the
SCIMPasswordslist, so it contains['old password', 'new password']. - Update the password in Okta’s SCIM configuration to
new password. - Remove the old password from the
SCIMPasswordslist.
Configure Okta
Once you’ve set SCIMPasswords and deployed your TileDB Cloud installation, the SCIM endpoints are available to Okta. You then need to configure your Okta installation to provision users and groups in TileDB Cloud as desired.
Initial setup
In the Okta administration panel, visit the Applications page and select Browse App Catalog. Search for “SCIM 2.0” and select the SCIM 2.0 Test App (Basic Auth).
Okta offers different SCIM integrations with different authentication types. Ensure you select Basic.
Select Add Integration.
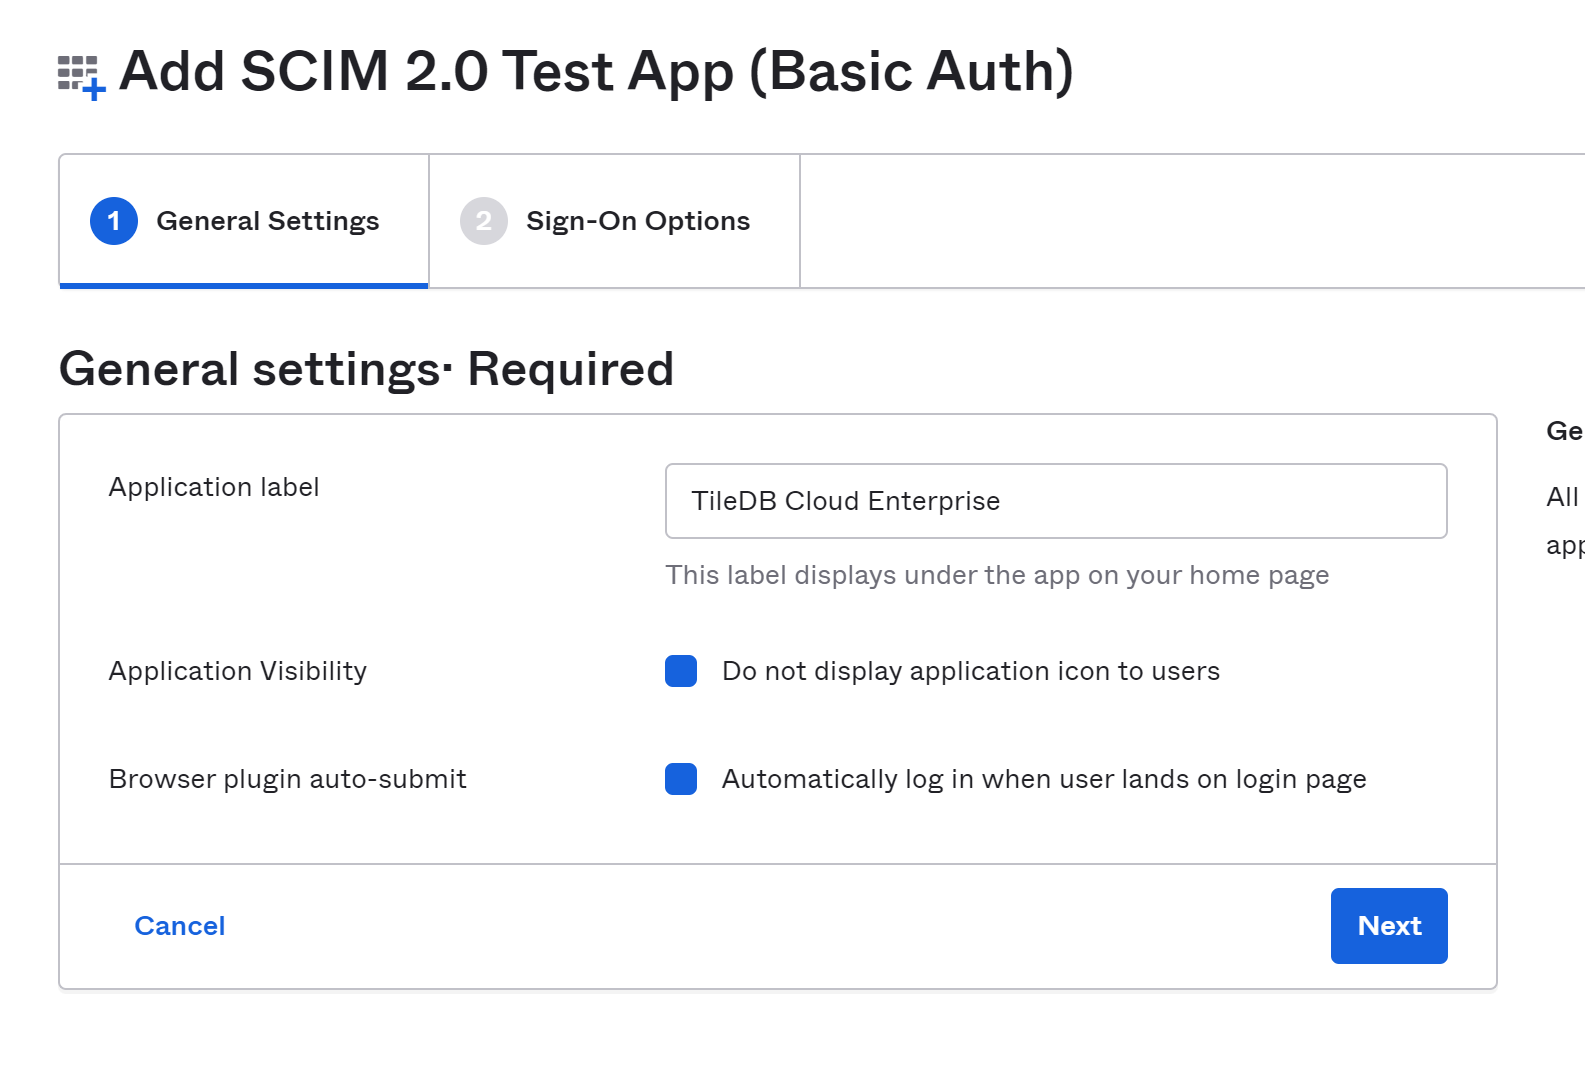
Give the application a memorable name. On the second page (Sign-On Options), leave all values at their default. Select Done. You will be taken to the newly-created integration.
At the newly-created integration, select the Provisioning tab, and select Configure API Integration (the only button in the tab). Check the Enable API integration box (once again the only visible UI element) and you will be greeted with the configuration for SCIM.
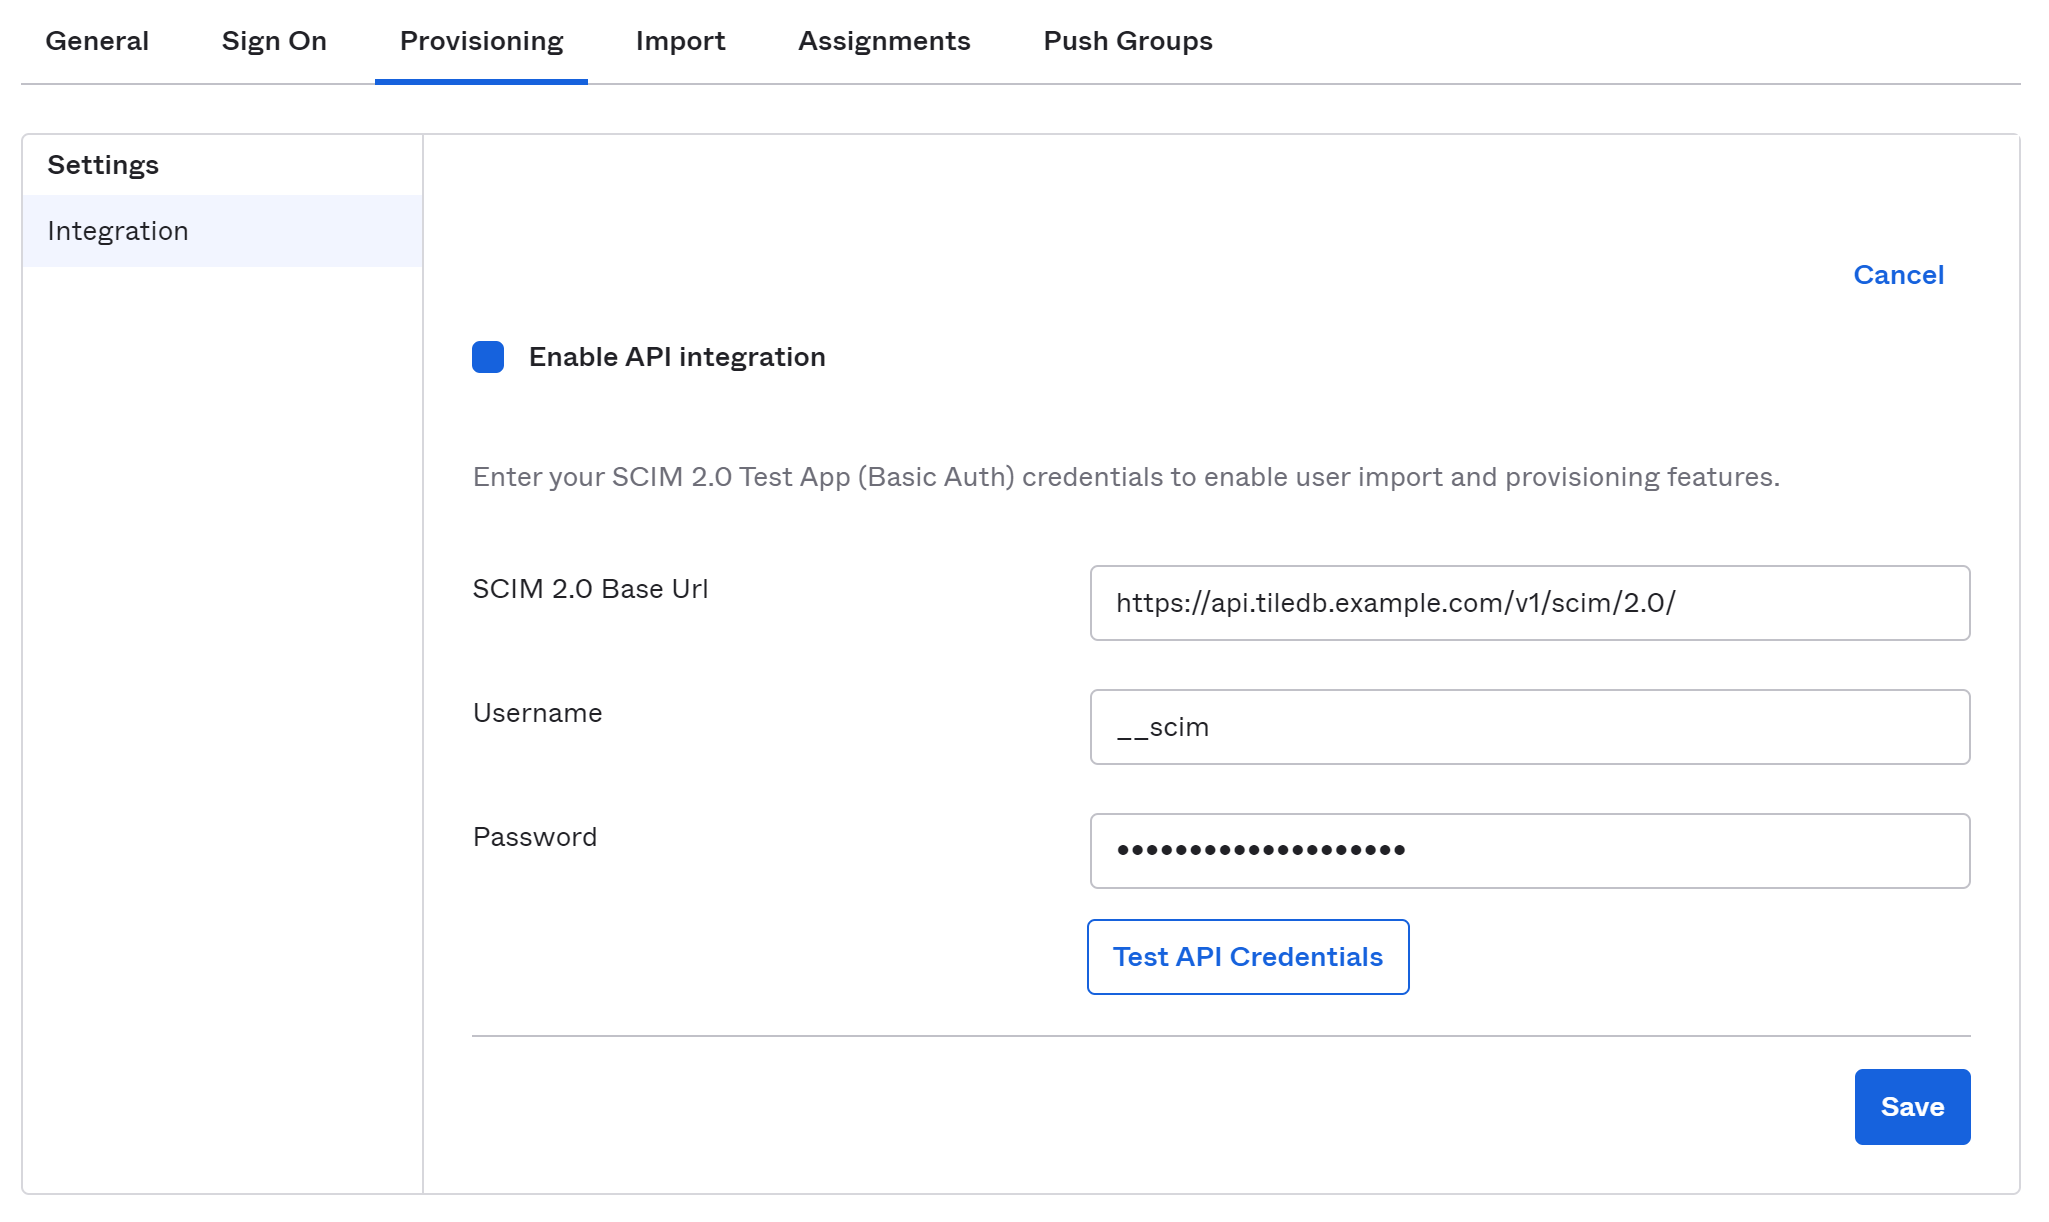
After you check that box, the SCIM configuration will appear.
- SCIM 2.0 Base Url: The URL to your TileDB installation’s SCIM endpoint. This is
/v1/scim/2.0/on your TileDB API server, as described earlier. The result should look likehttps://api.tiledb.example.com/v1/scim/2.0/. - Username: This is always
__scim. - Password: The password you configured in the
SCIMPasswordssection of your TileDB Cloud configuration.
Select Test API Credentials and, if you entered in all the right values, you should see a message of success:

On this page, select Edit and check Create Users, Update User Attributes, and Deactivate Users (Sync Password is not currently supported.) Select Save (located below Sync Password) to enable provisioning.
After these steps, provisioning is enabled, but no users or groups are currently configured to be provisioned.
Configure users and groups to be provisioned
Now that provisioning is enabled, you need to set up users and groups to be provisioned into TileDB Cloud.
Under the Assignments tab of your SCIM integration, select Assign. You can then assign users or groups to be provisioned into TileDB Cloud.
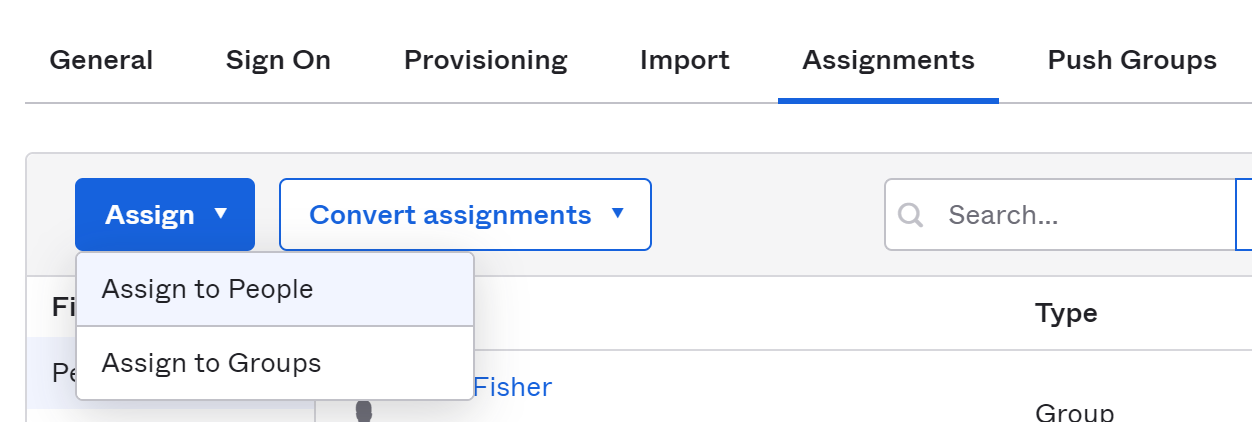
The quickest thing to do is to use Assign to Groups. When you select a group or groups, it will automatically provision all users from that group with accounts on TileDB Cloud. When new users are added to the group, they will also be provisioned with an account. Likewise, when users are removed from the group, their access to TileDB Cloud will be suspended. This works whether the group is manually or automatically managed.
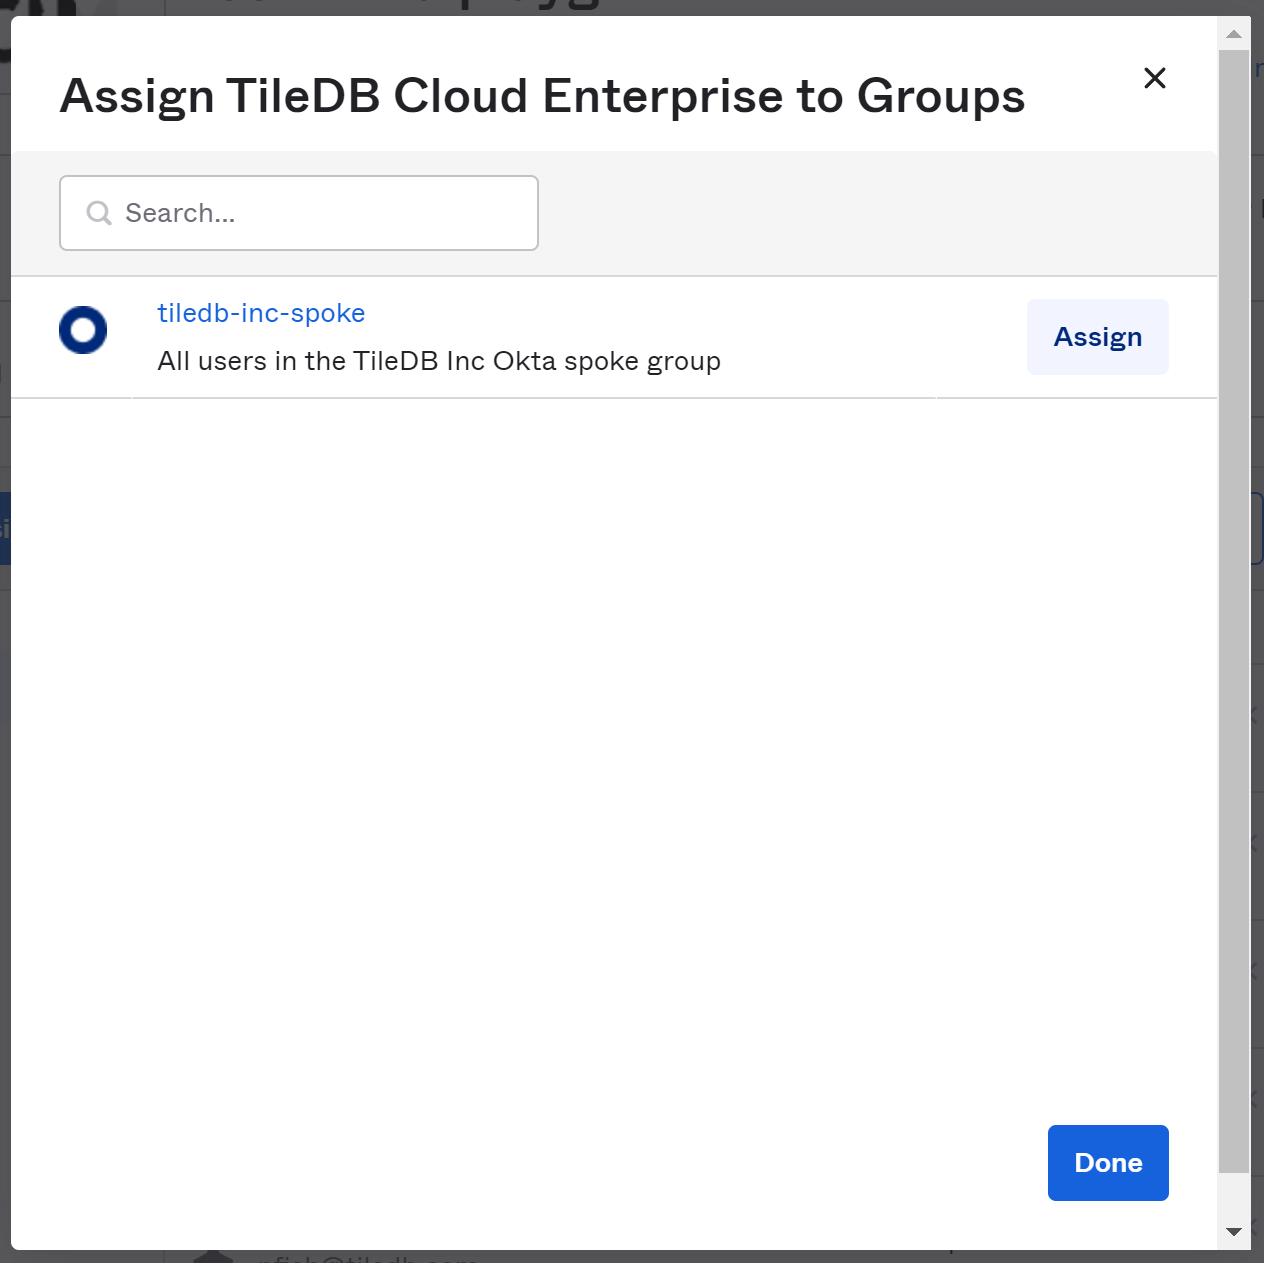
This step only pushes the members of the groups into TileDB Cloud; it does not create the groups themselves. To create groups (represented as Organizations) in TileDB Cloud, you have to enable pushing groups.
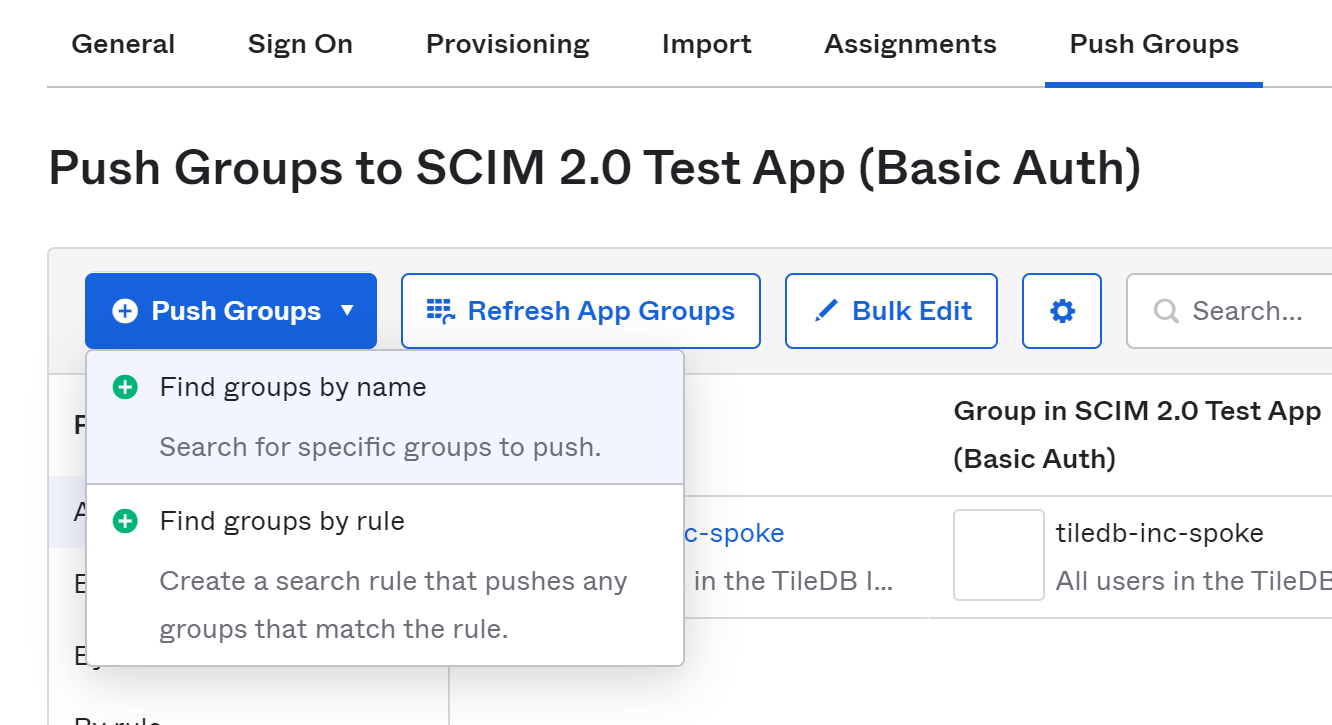
By visiting the Push Groups page and selecting the Push Groups button, you can select groups, either individually or using a search rule, to be created in TileDB Cloud.
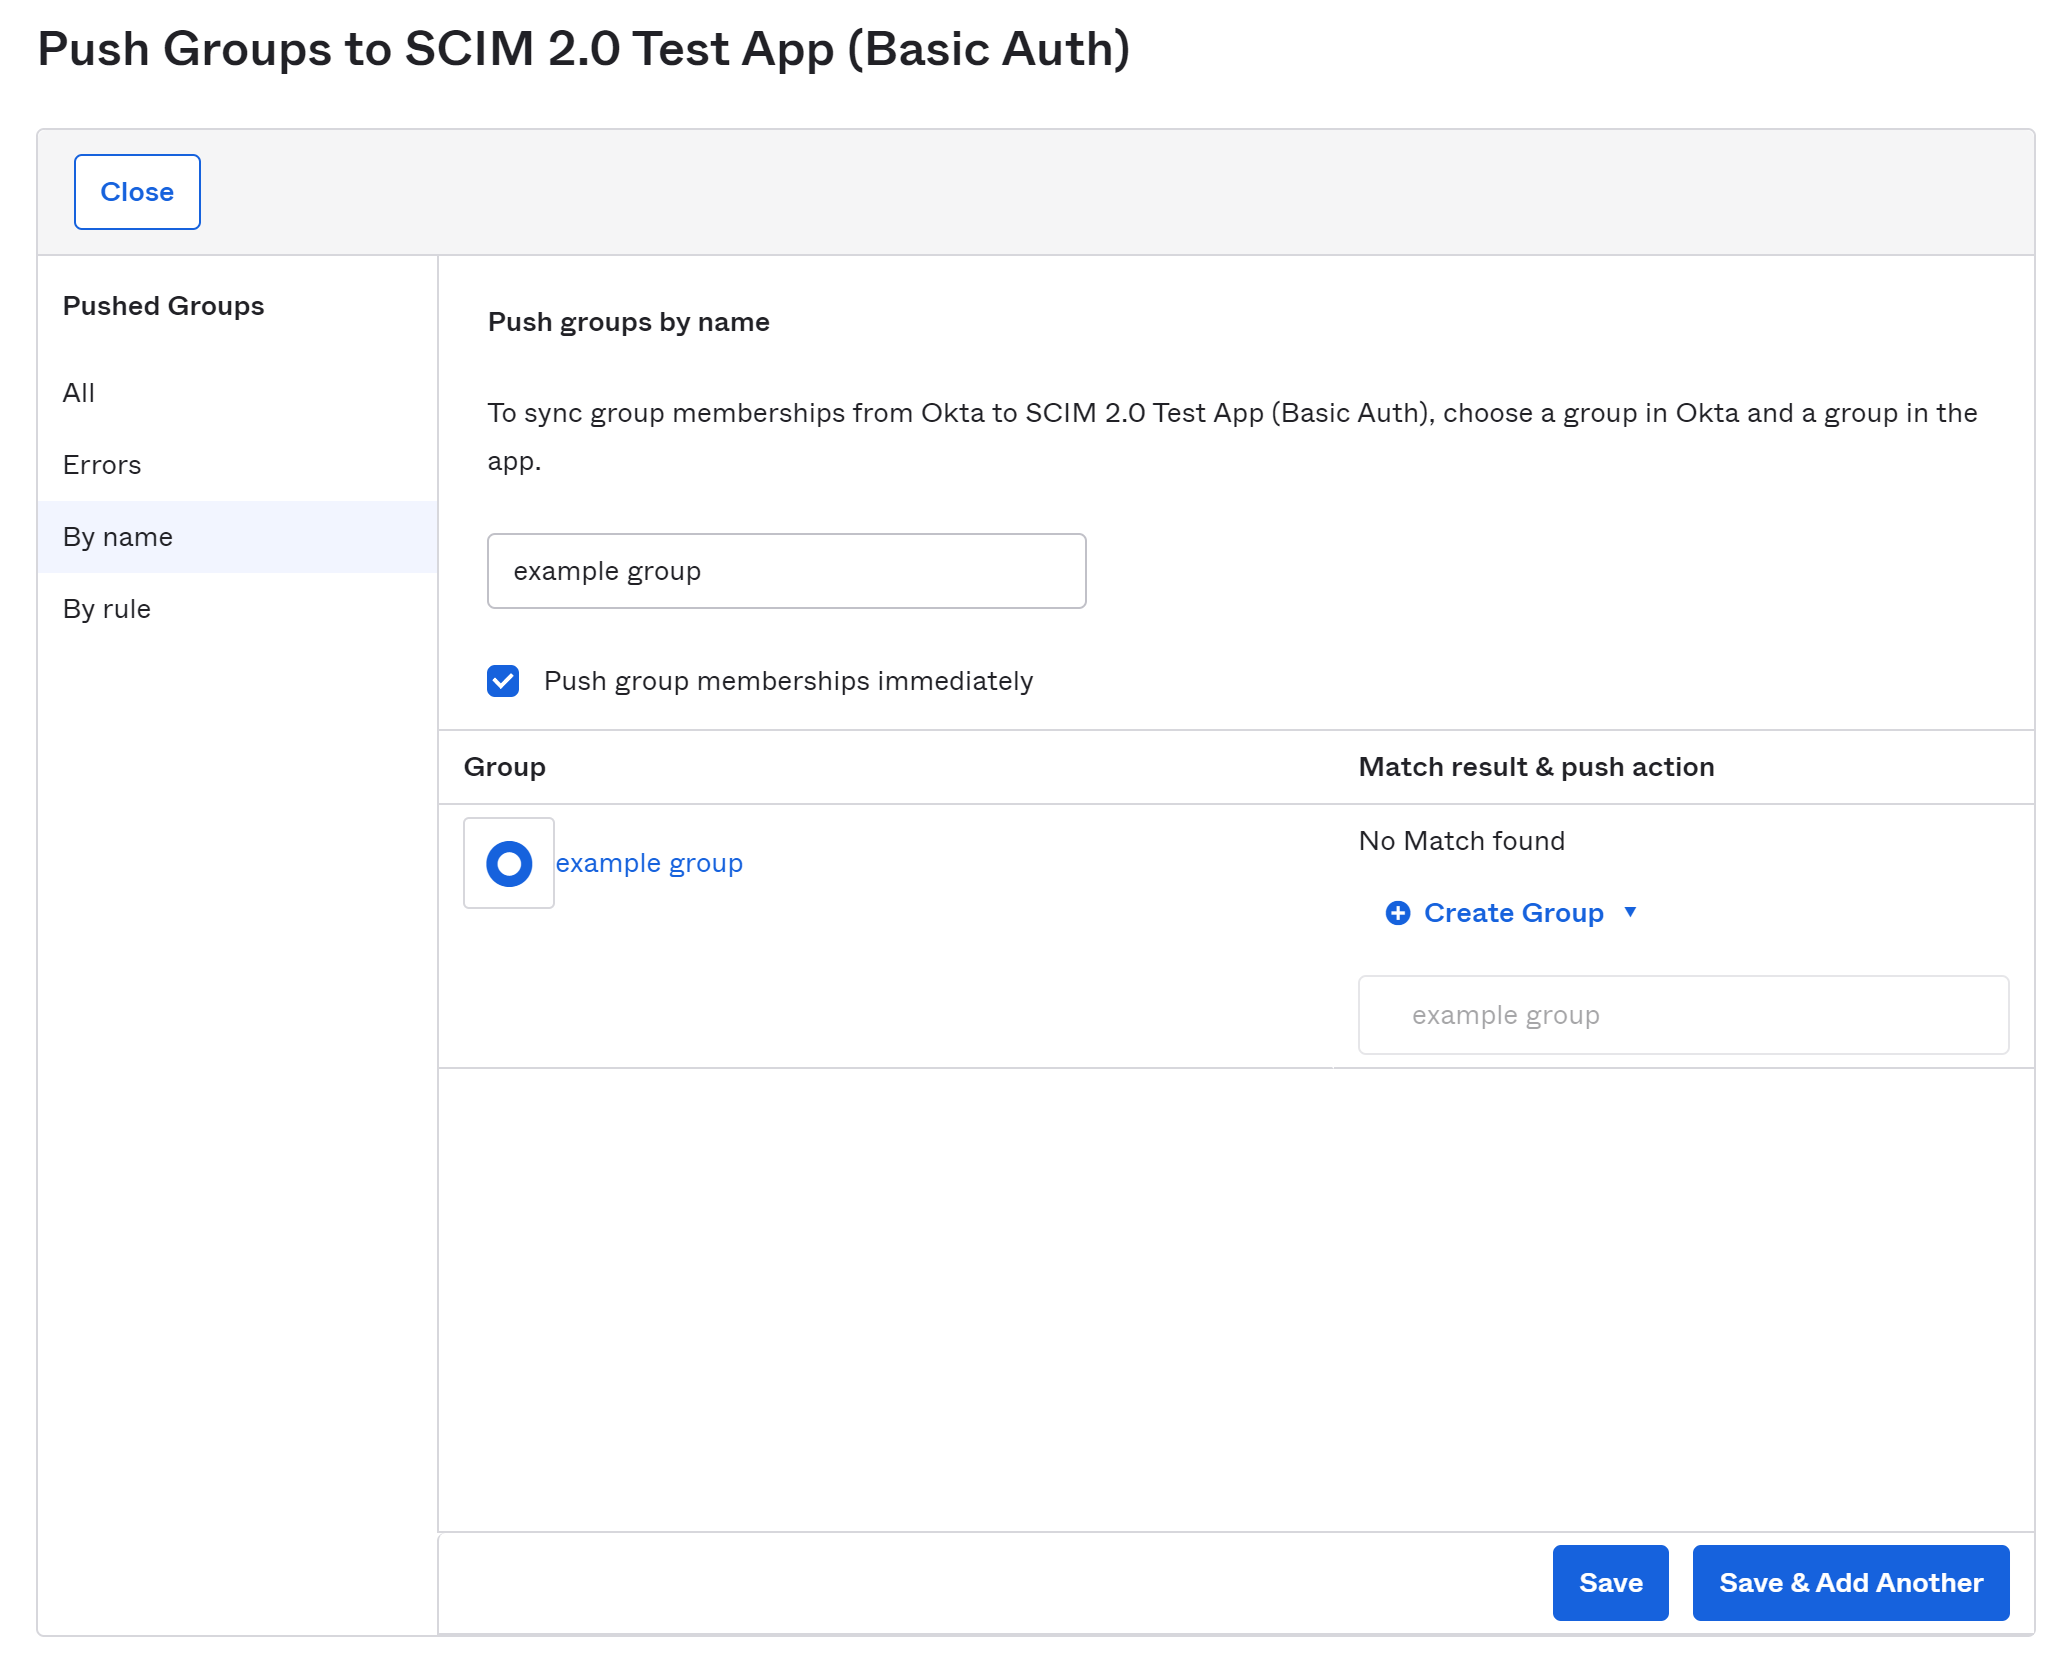
After searching for a group by name, ordinarily you want to leave all the defaults as-is: Push group memberships immediately should be checked, and the Create Group push action should be selected. Select Save, and your group will be pushed to TileDB Cloud as an organization.

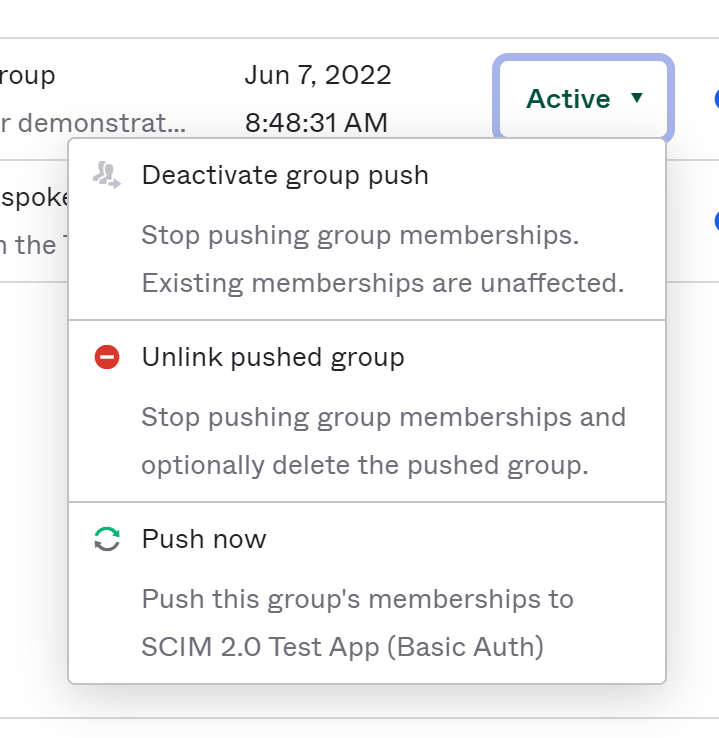
The Push Status column is a menu where you can forcibly update the group (though this happens automatically) or disconnect the group from TileDB Cloud.