Cloud Credentials
To create, register, and access arrays through the TileDB Cloud SaaS service, you need to set up access credentials. For S3-compatible object stores, TileDB Cloud SaaS supports both IAM roles and access credential key pairs. TileDB Cloud SaaS securely stores all keys in an encrypted database and never grants your keys to any other user. TileDB Cloud SaaS uses your keys in containerized stateless workers, which are under TileDB’s full control and inaccessible by any other user’s code (e.g., SQL or UDFs).
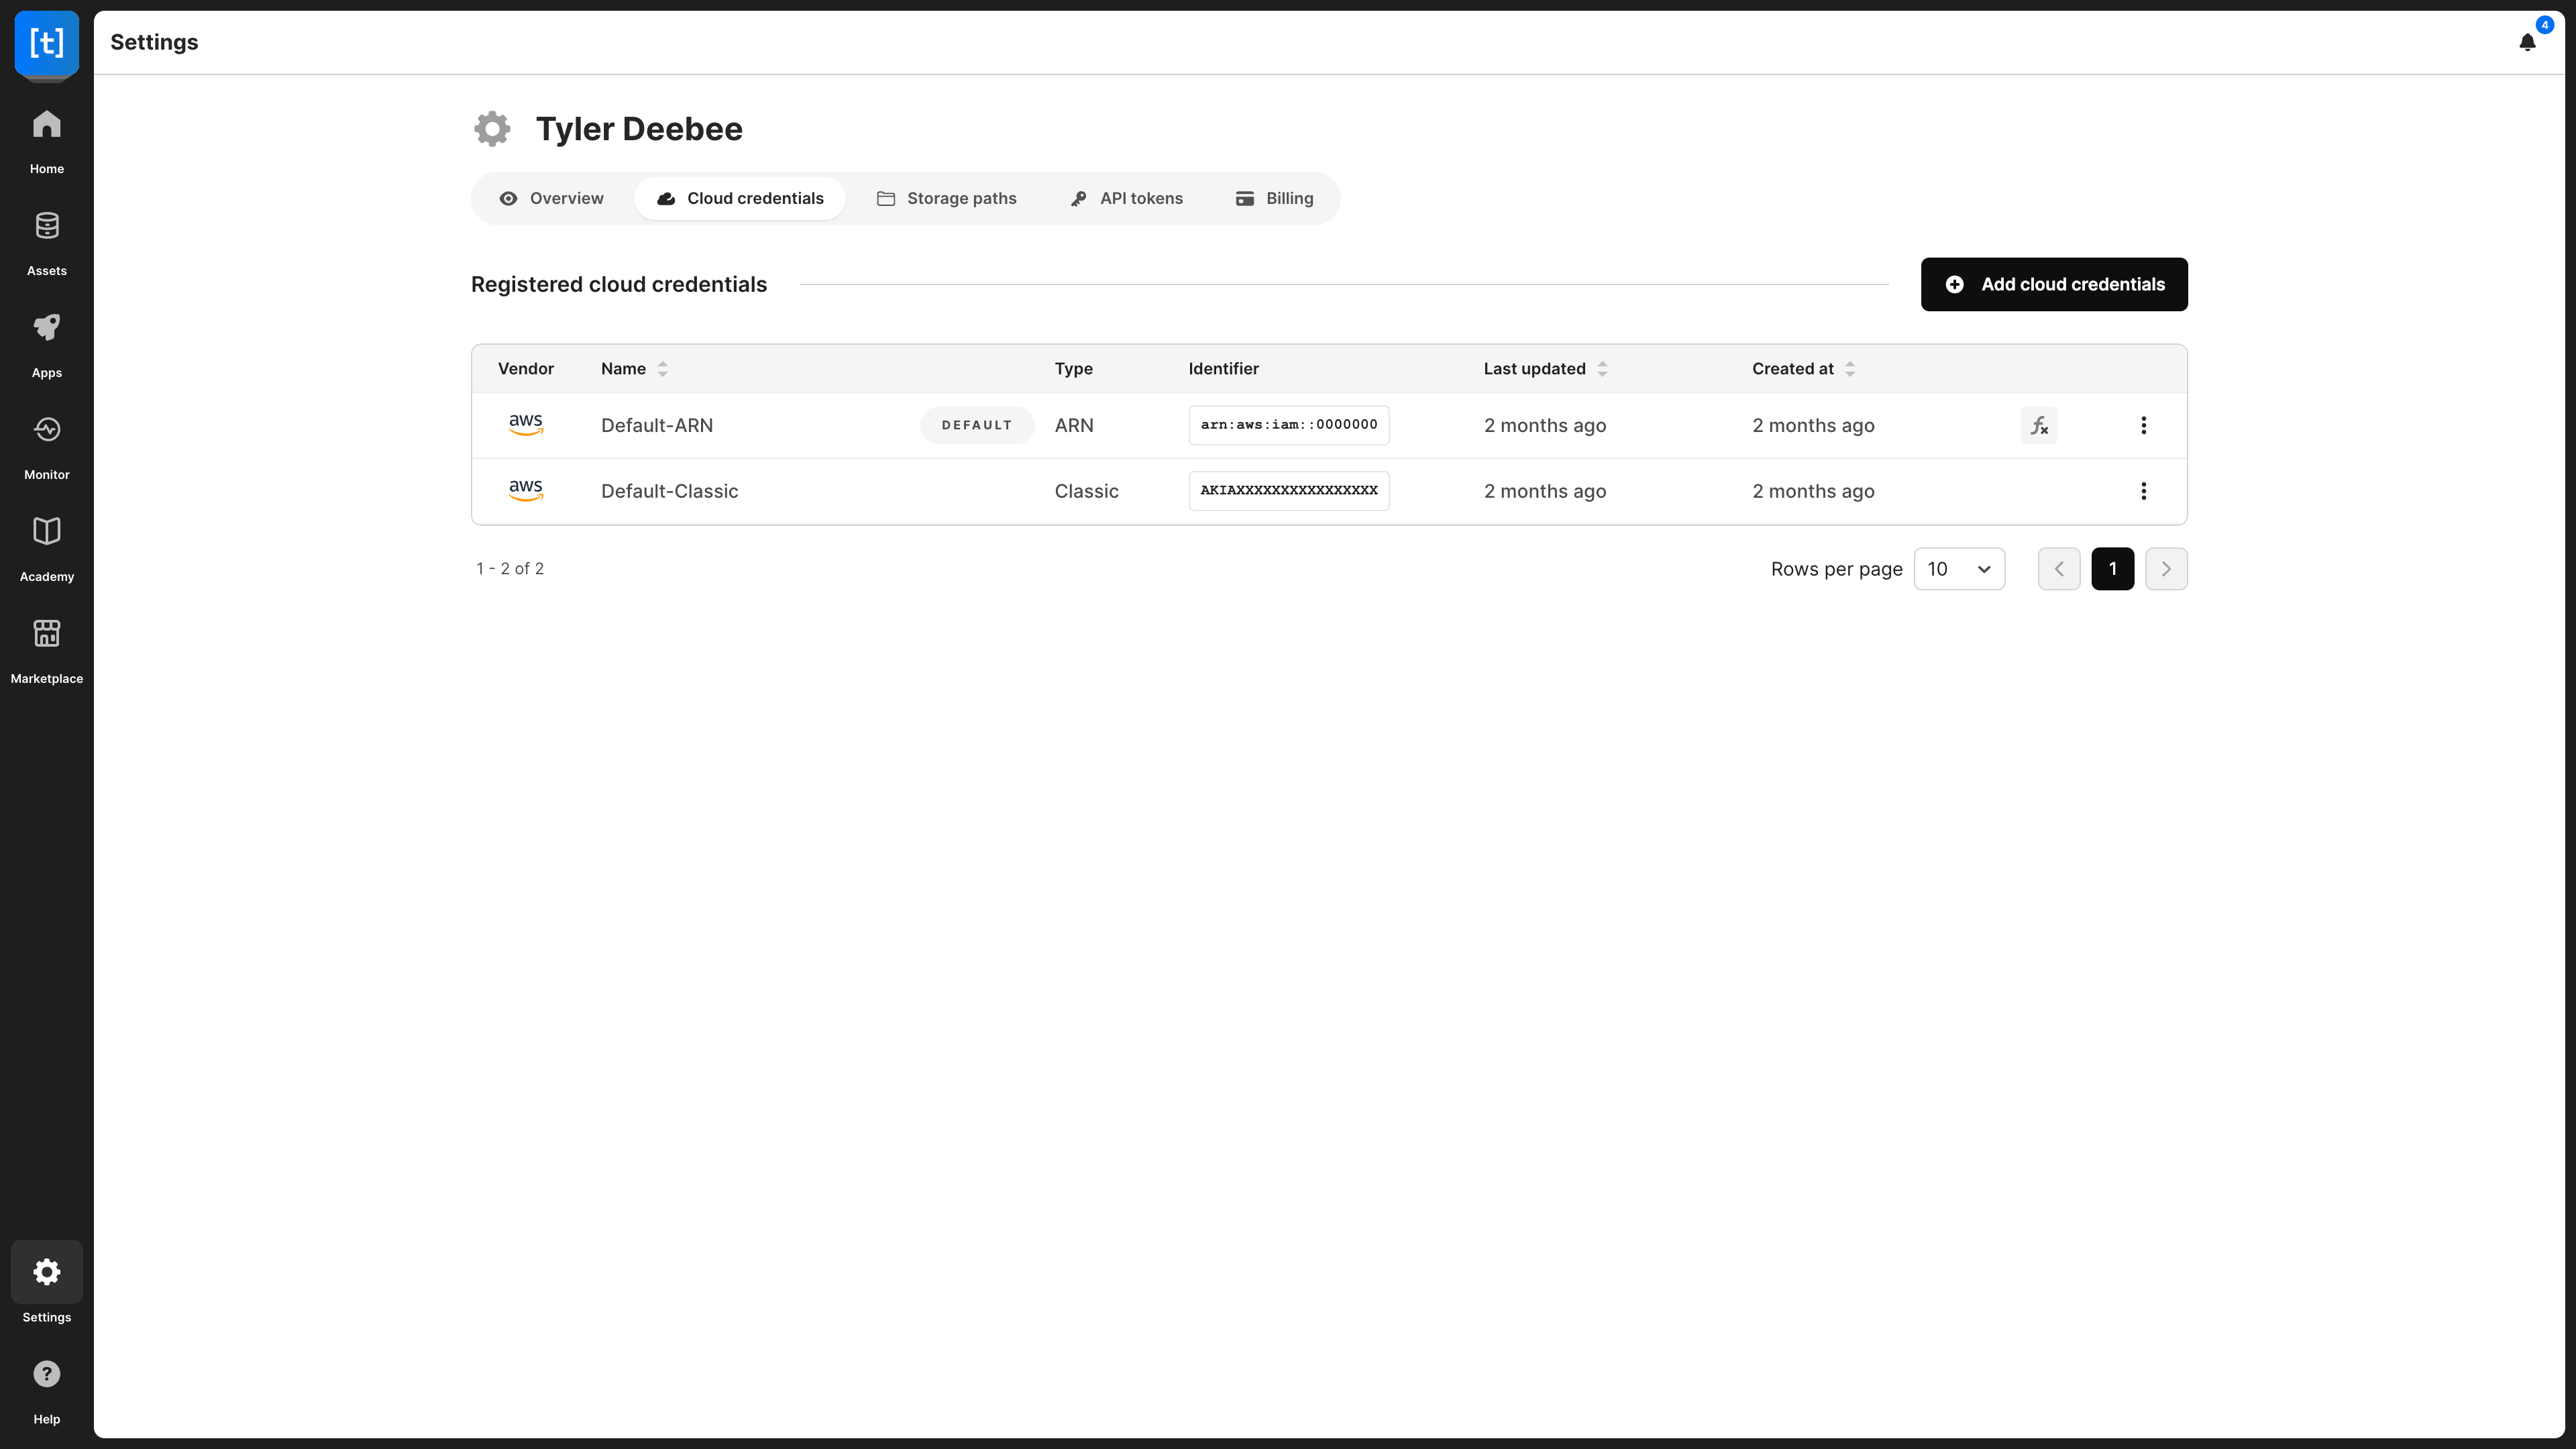
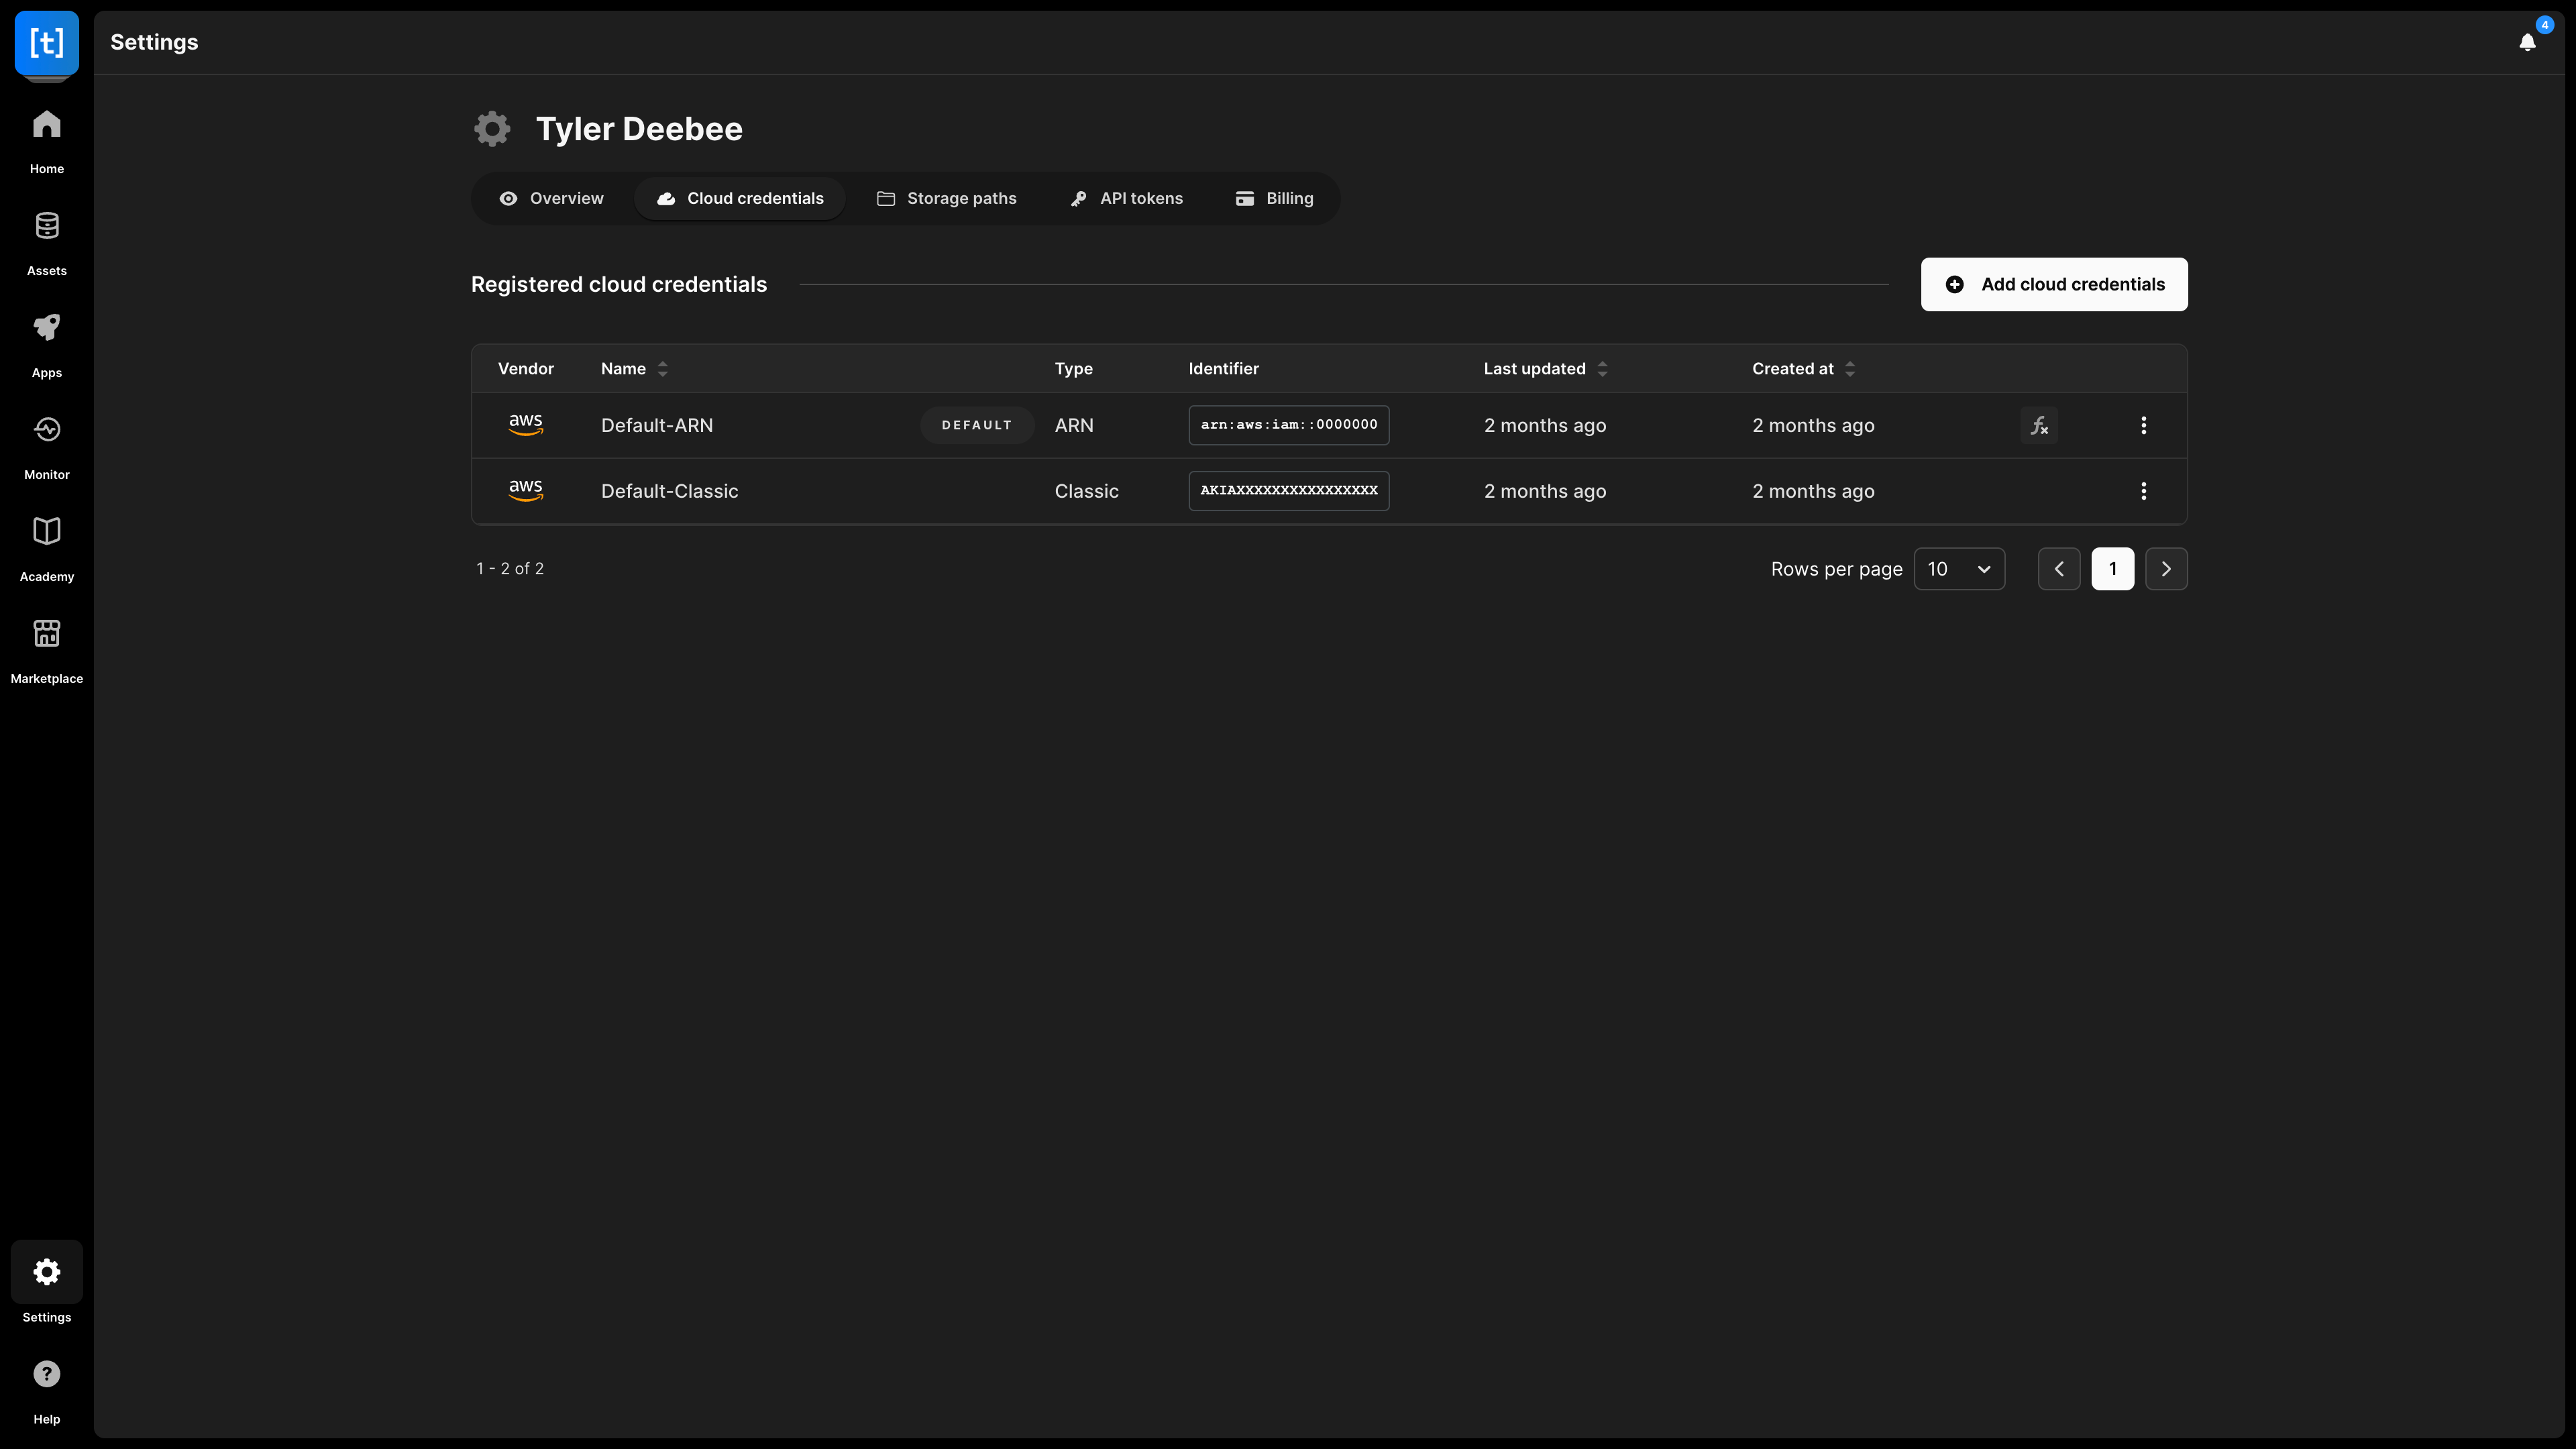
You can add multiple AWS keys to TileDB Cloud SaaS, register different arrays with different keys, select a key to be your default key, and revoke any key at any time, all from the Cloud credentials section of your profile:
Prerequisites
This page assumes you have done the following:
- Sign up for a TileDB account.
- Work with your IT team to set up your AWS account with S3 and IAM access. You need to be able to create S3 buckets. You also need to create IAM policies and IAM roles if you are using AWS AssumeRole.
Access keys
To add an access key, perform the following:
Navigate to the Cloud credentials section of your profile. Select Add credentials or Add cloud credentials, depending on if a credential already exists.
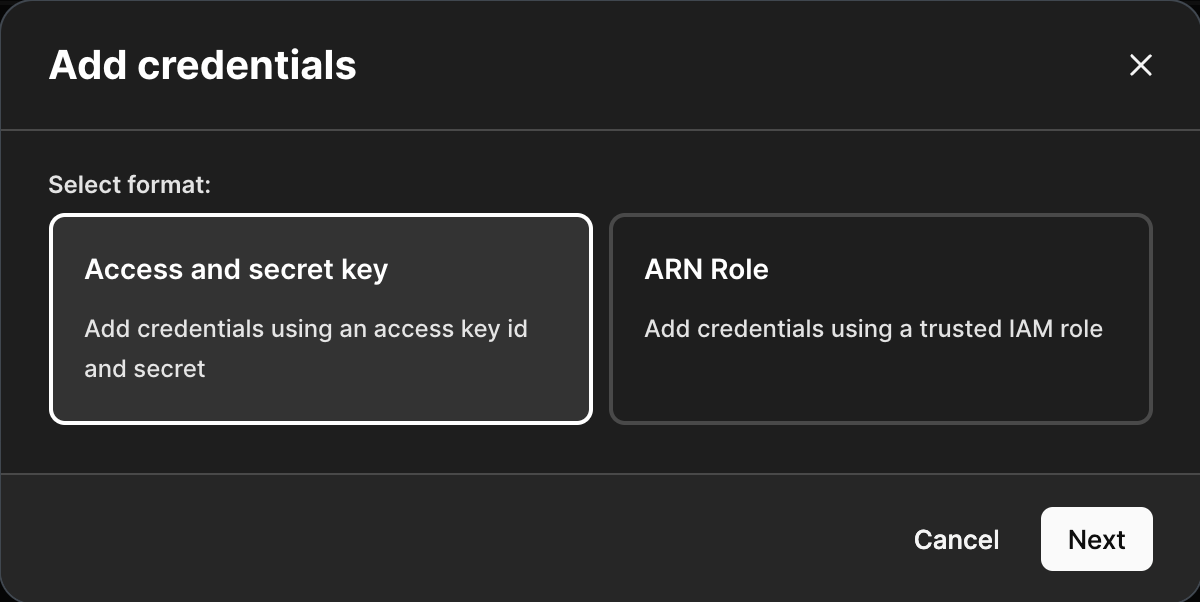
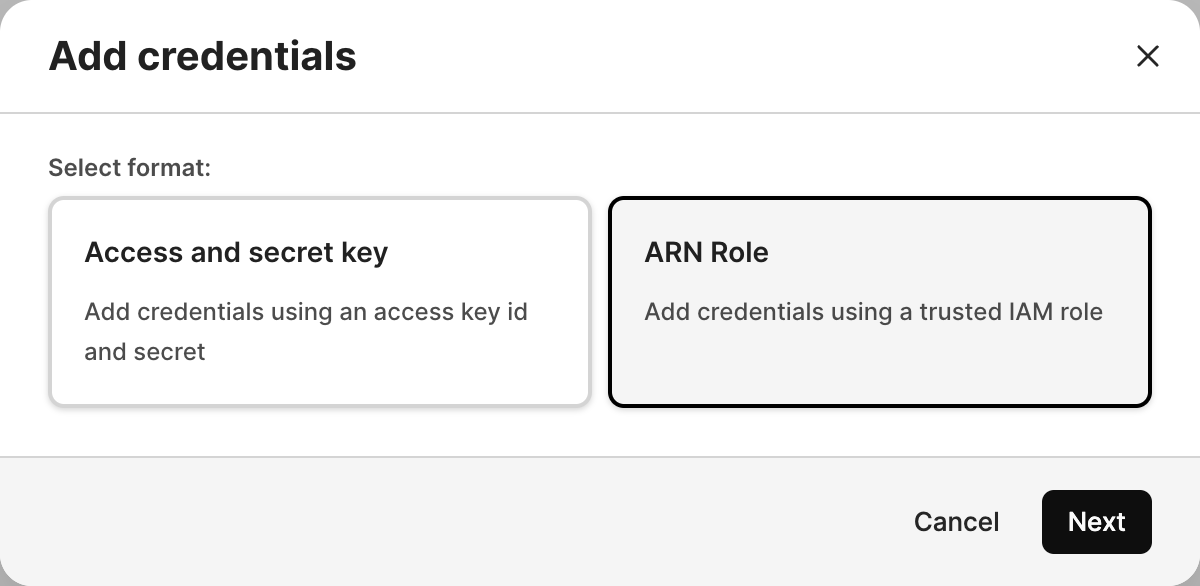
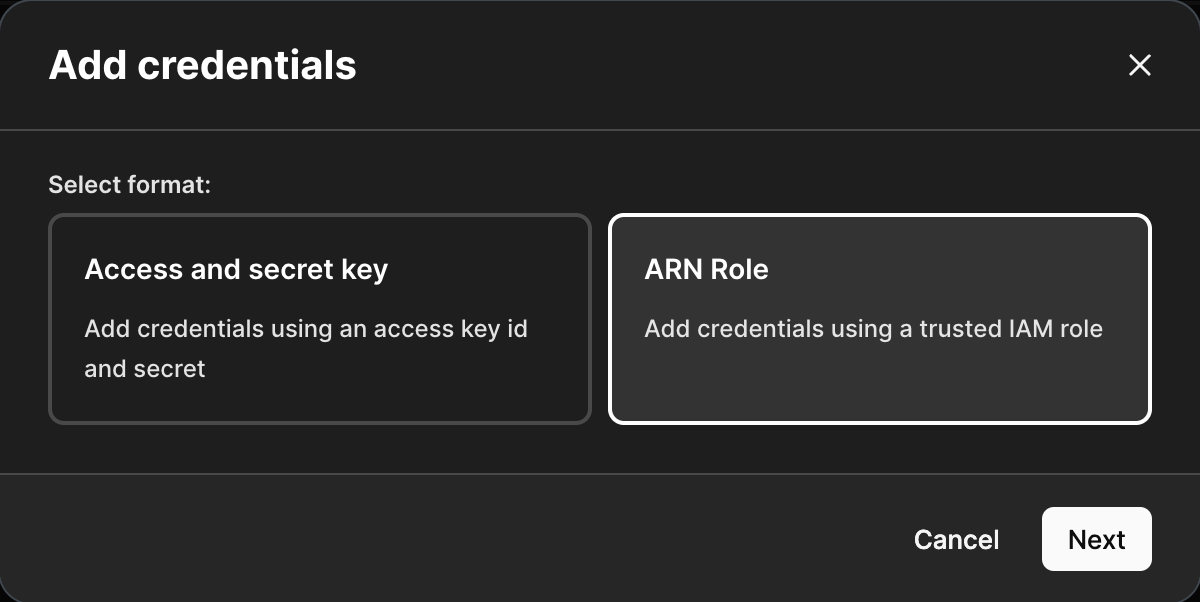
Select Access and secret key as the format. Select Next.

Add a Friendly Name of your choice.
Add the AWS Access Key Id and AWS Secret Access Key.
Optional: Specify a Custom endpoint URL if using a cloud storage provider other than AWS.
Optional: Toggle Set as default on to set the current key as your default key.
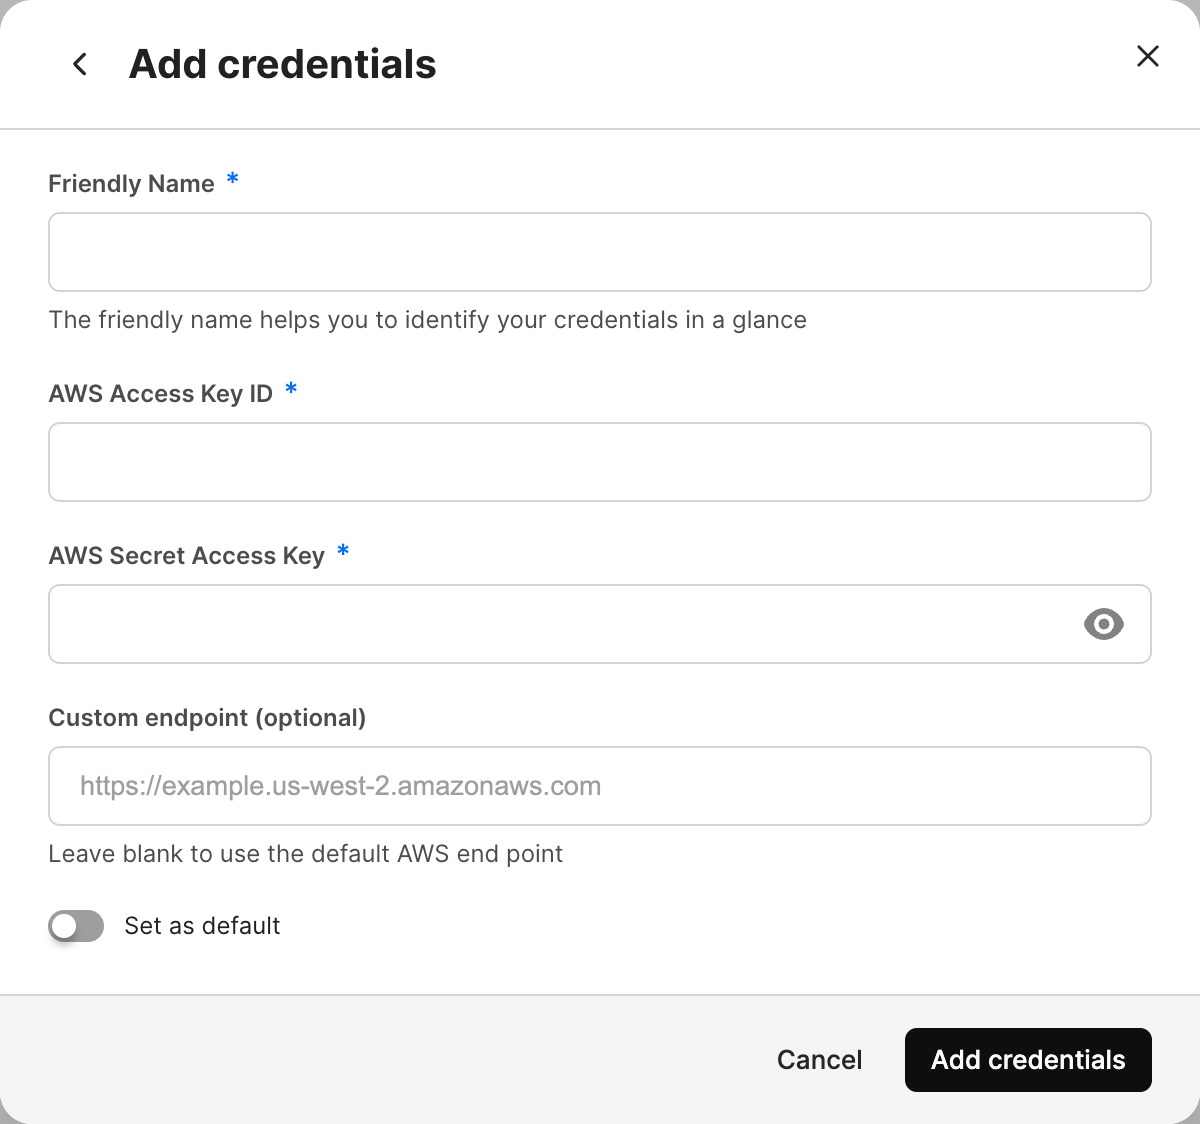
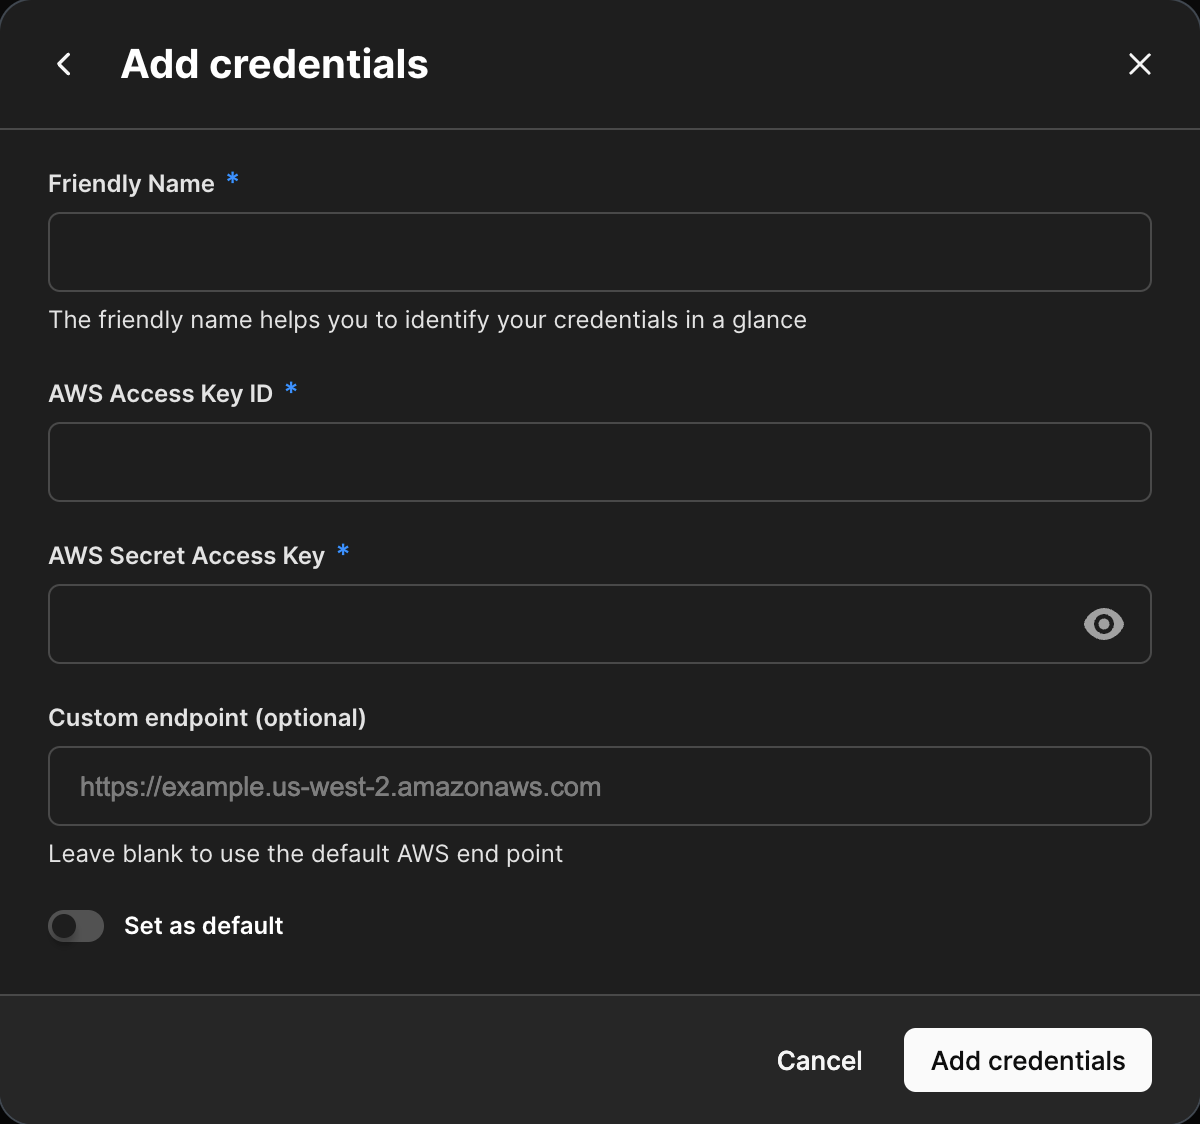
Select Add credentials to save the credentials to your profile.
AWS AssumeRole
With an AWS AssumeRole policy, you can enable AWS cross-account access, so that a role in one account can access a bucket in a separate account.
When using AWS AssumeRole, the Service Token Service (STS) creates temporary keys that the deployment party (in this case, the TileDB Cloud SaaS Console) can use to access the bucket. This means you don’t need to create an AWS IAM user for every user logging in to the TileDB Cloud SaaS Console and generate key pairs. Instead, after a user authenticates to TileDB, the AssumeRole functionality grants the TileDB Cloud SaaS Console access to the bucket on behalf of a user. This allows many users in the same organization who need access to the same cloud storage bucket to reuse those credentials.
For example, consider two accounts: account A and account B. Account A signs up with access to TileDB Cloud SaaS to access one or more bucket’s in account B’s AWS account. The most common setup is to create an IAM role for TileDB Cloud SaaS to use and then allow it to access a specific bucket within an Amazon S3 bucket policy. This is done by linking an Amazon Resource Name (ARN) generated for account B to account A. Requests for access to the bucket will only be granted coming from our AWS account with our external ID.
Creating credentials that use a trusted IAM role involves the following high-level steps:
- Generate an AWS Principal and External ID in TileDB for use in AWS.
- Create a bucket, if one doesn’t exist, or use an existing bucket.
- Add a bucket policy to the bucket.
- Create a new IAM policy to match the bucket policy.
- Create an IAM role using the AWS Principal and External ID from TileDB and attach the IAM policy to the IAM role.
- Collect the ARN from the IAM role.
- Attach the ARN to the cloud credential in TileDB.
- Optionally set up KMS for the target bucket.
Generate an AWS Principal and External ID
Navigate to the Cloud credentials section of your profile.
Select Add cloud credentials.
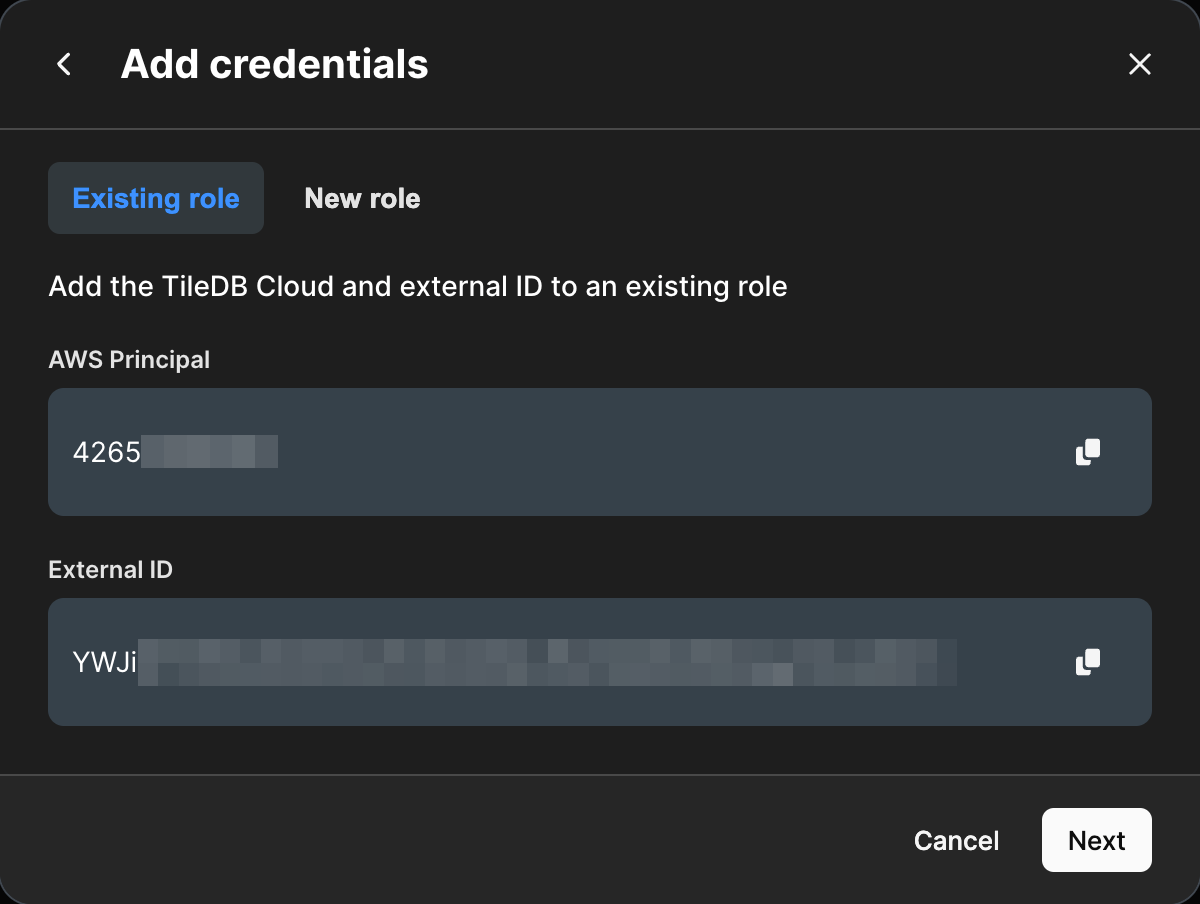
Select ARN role as the format. Select Next.
A brief description about ARN IAM roles as they relate to TileDB Cloud SaaS will appear. Select Next.
The Existing role tab contains the AWS Principal and External ID needed for your bucket policy. Make note of these.
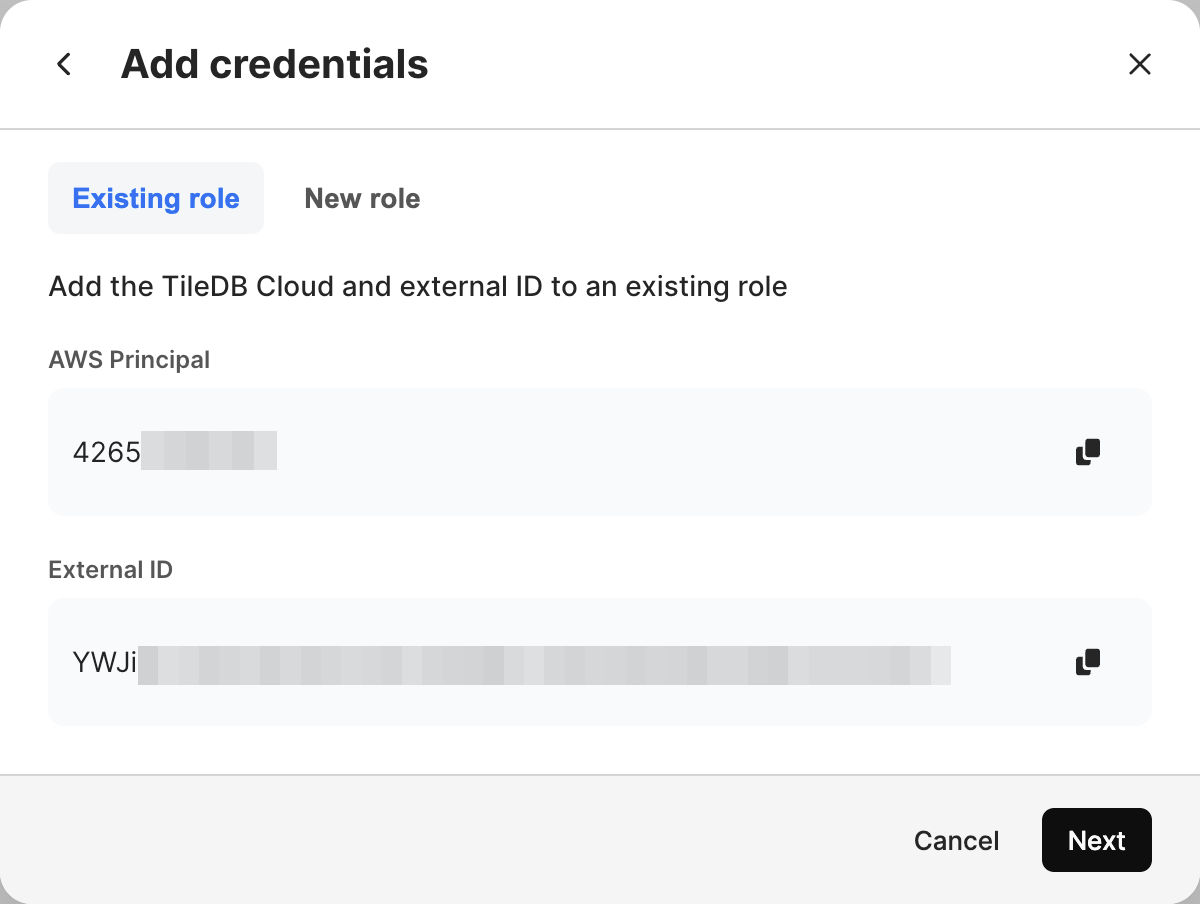
Select the New role tab of the modal. This JSON string will be the trust policy for the IAM role you will be assuming. Included within the object are the AWS Principal and External ID from the Existing role tab. Copy the trust policy, and save it somewhere.

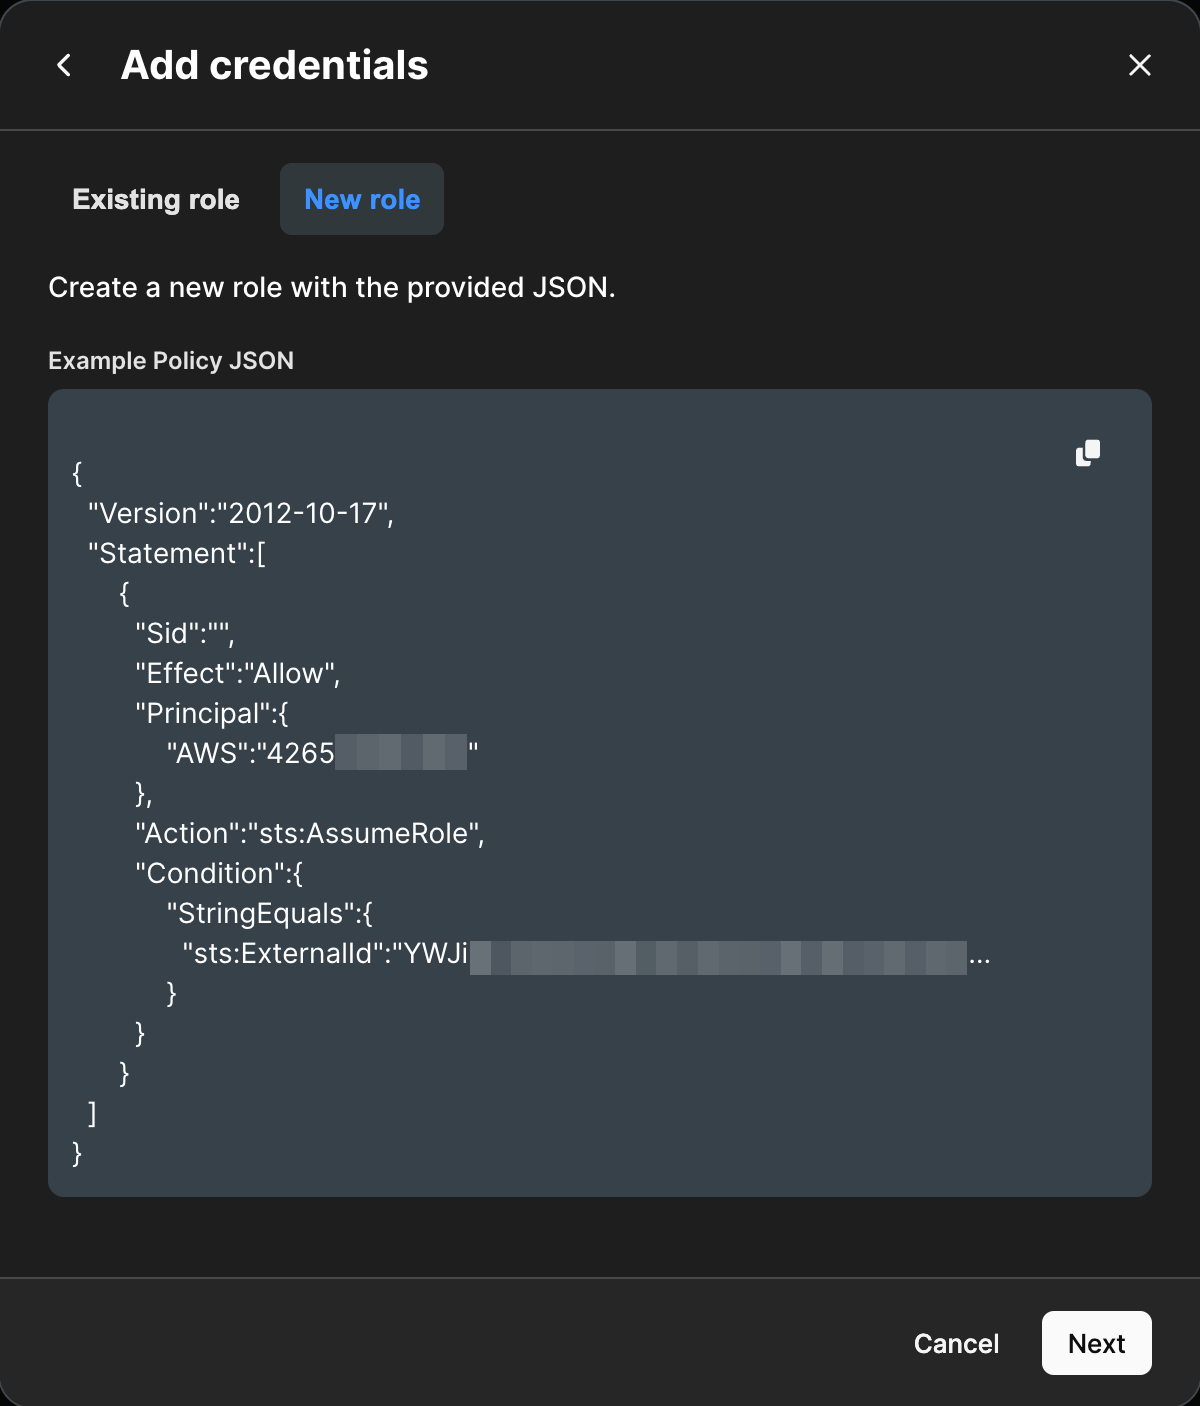
An example JSON trust policy is below:
{
  "Version": "2012-10-17",
  "Statement": [
    {
      "Effect": "Allow",
      "Principal": {
        "AWS": "arn:aws:iam::{PROVIDED IN UI}:root"
      },
      "Action": "sts:AssumeRole",
      "Condition": {
        "StringEquals": {
          "sts:ExternalId": "{PROVIDED IN UI}"
        }
      }
    }
  ]
}
Create or use an existing Amazon S3 bucket
Log in to the AWS Console as account B or an administrator.
In the Services menu, open S3. You can also search for
S3in the search bar.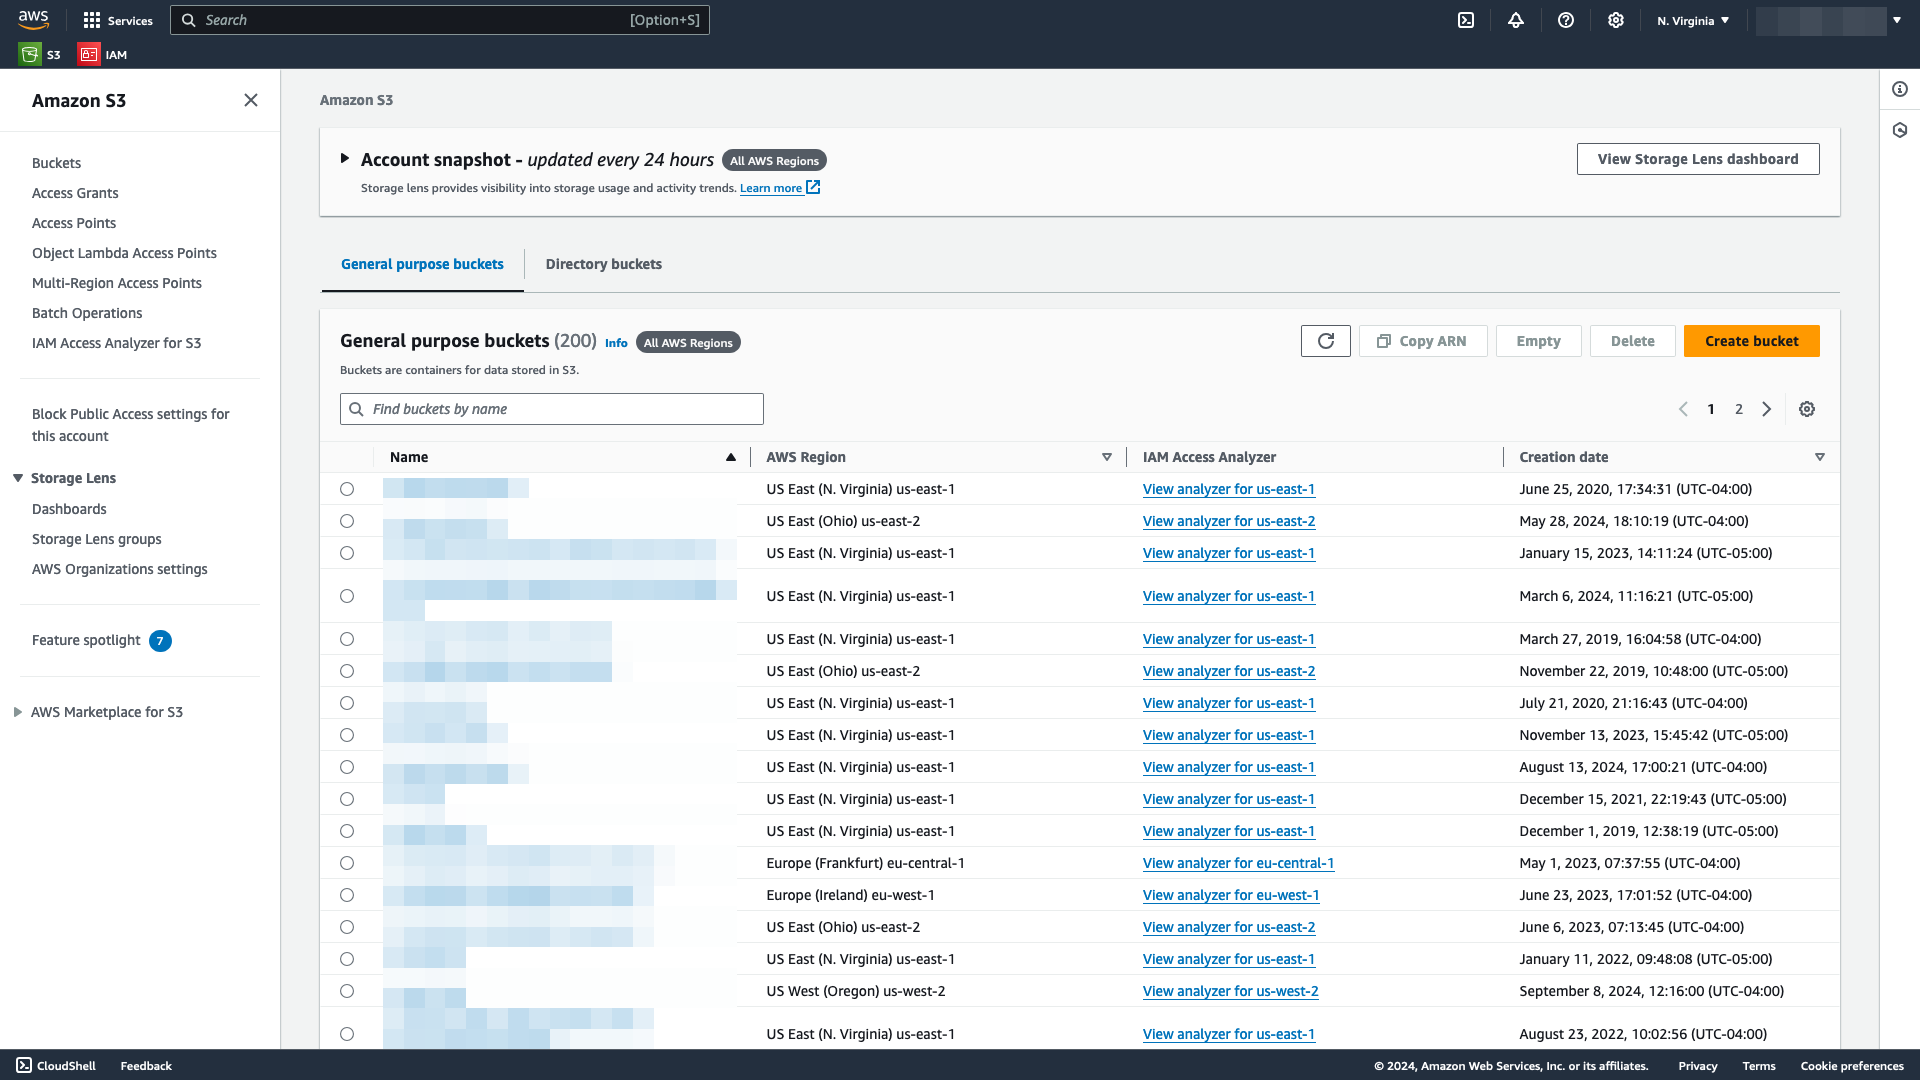
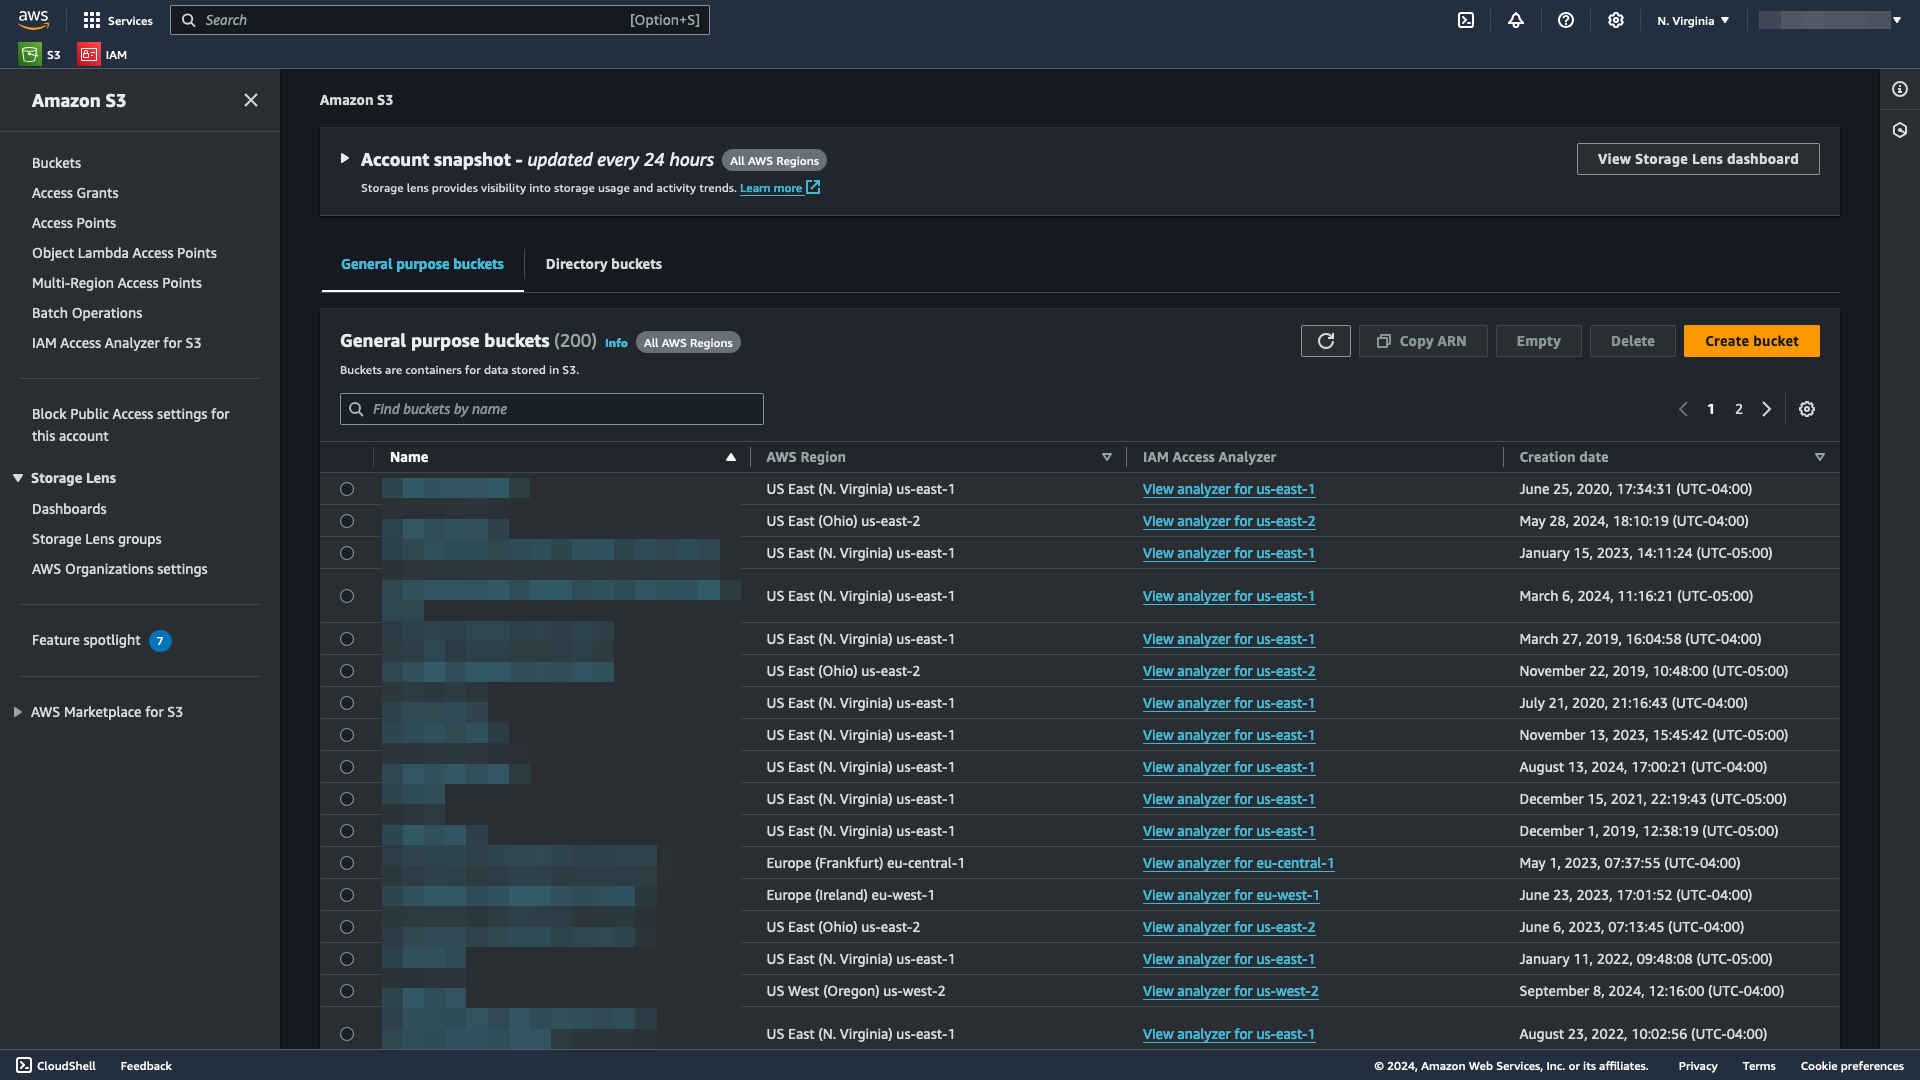
Select Buckets.
Identify the bucket you will use for your TileDB resources:
If using an existing bucket, search for the bucket name under General purpose buckets.
If creating a new bucket, follow these instructions (you can also refer to Amazon’s guide on creating an S3 bucket):
In S3, select Create bucket. This will open the Create bucket window.
Give the bucket a meaningful Bucket name. Under Bucket type, leave the General purpose bucket type selected.
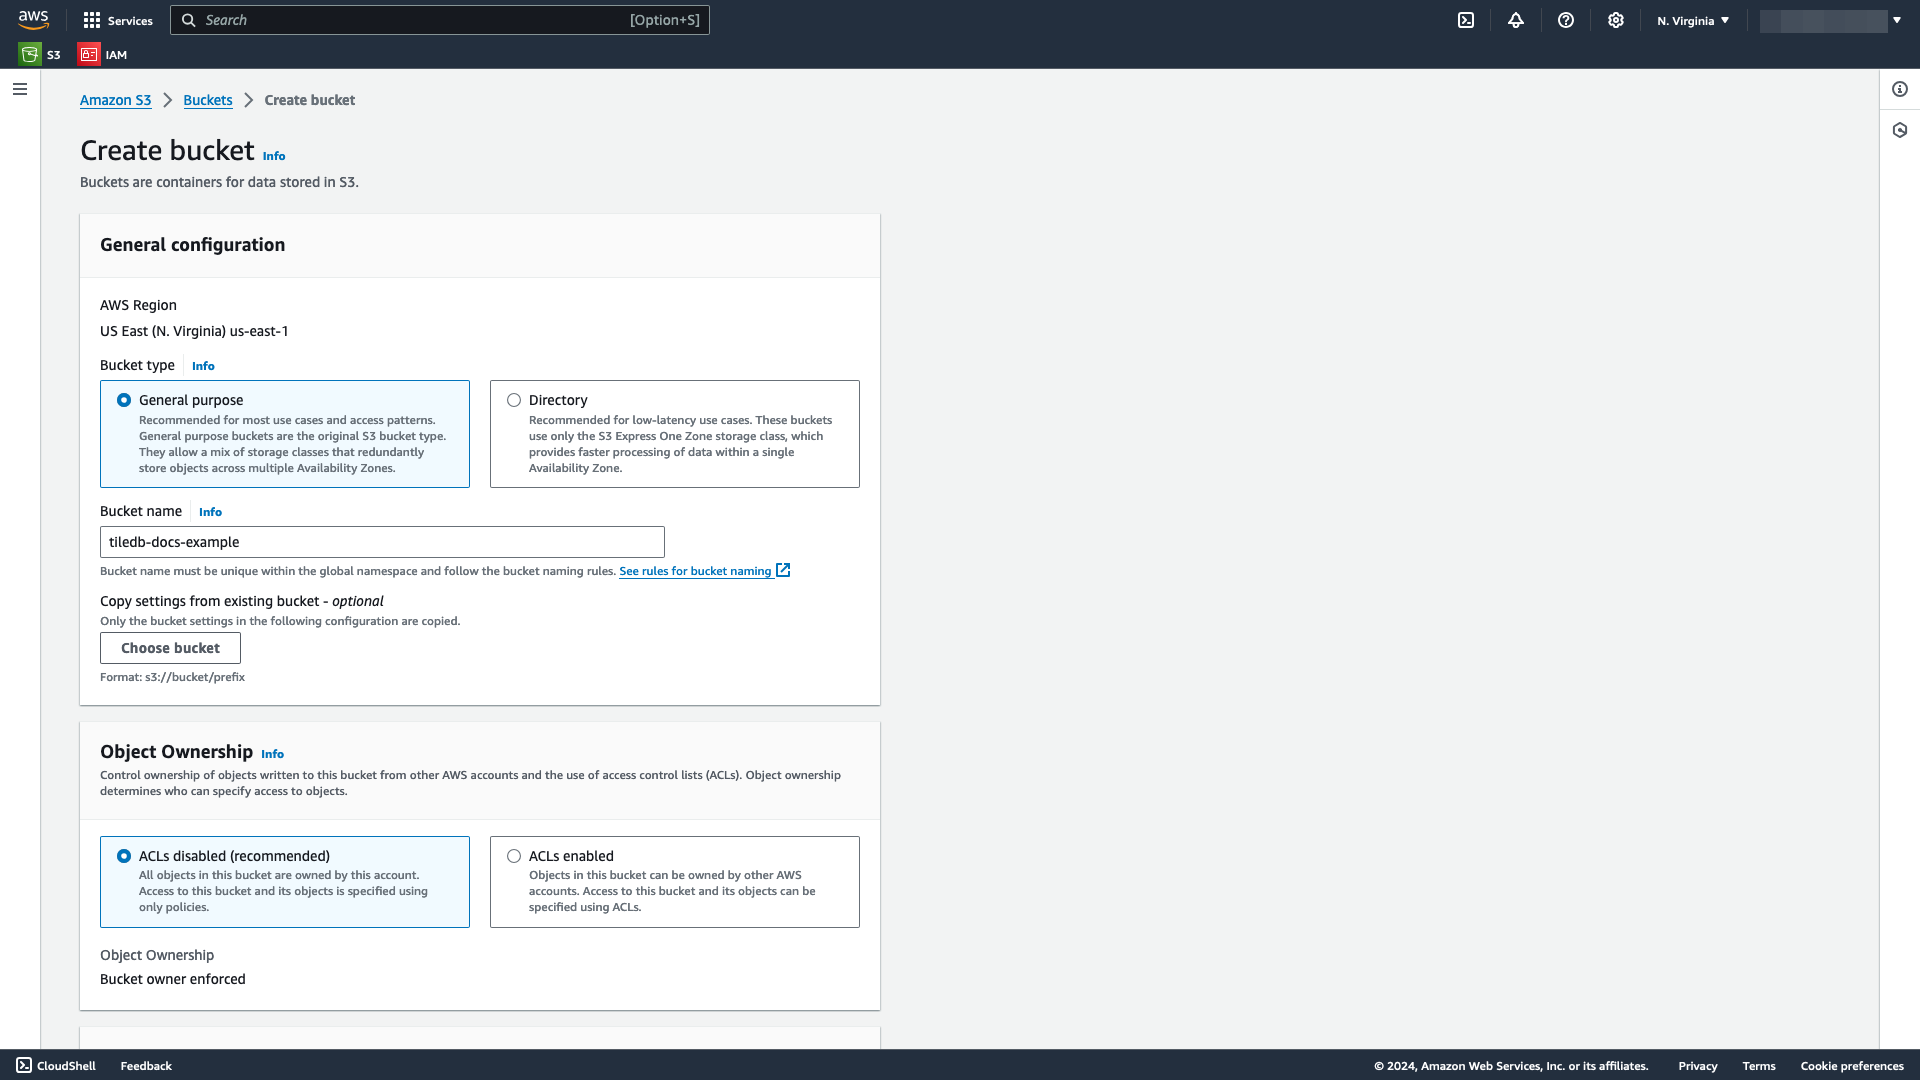
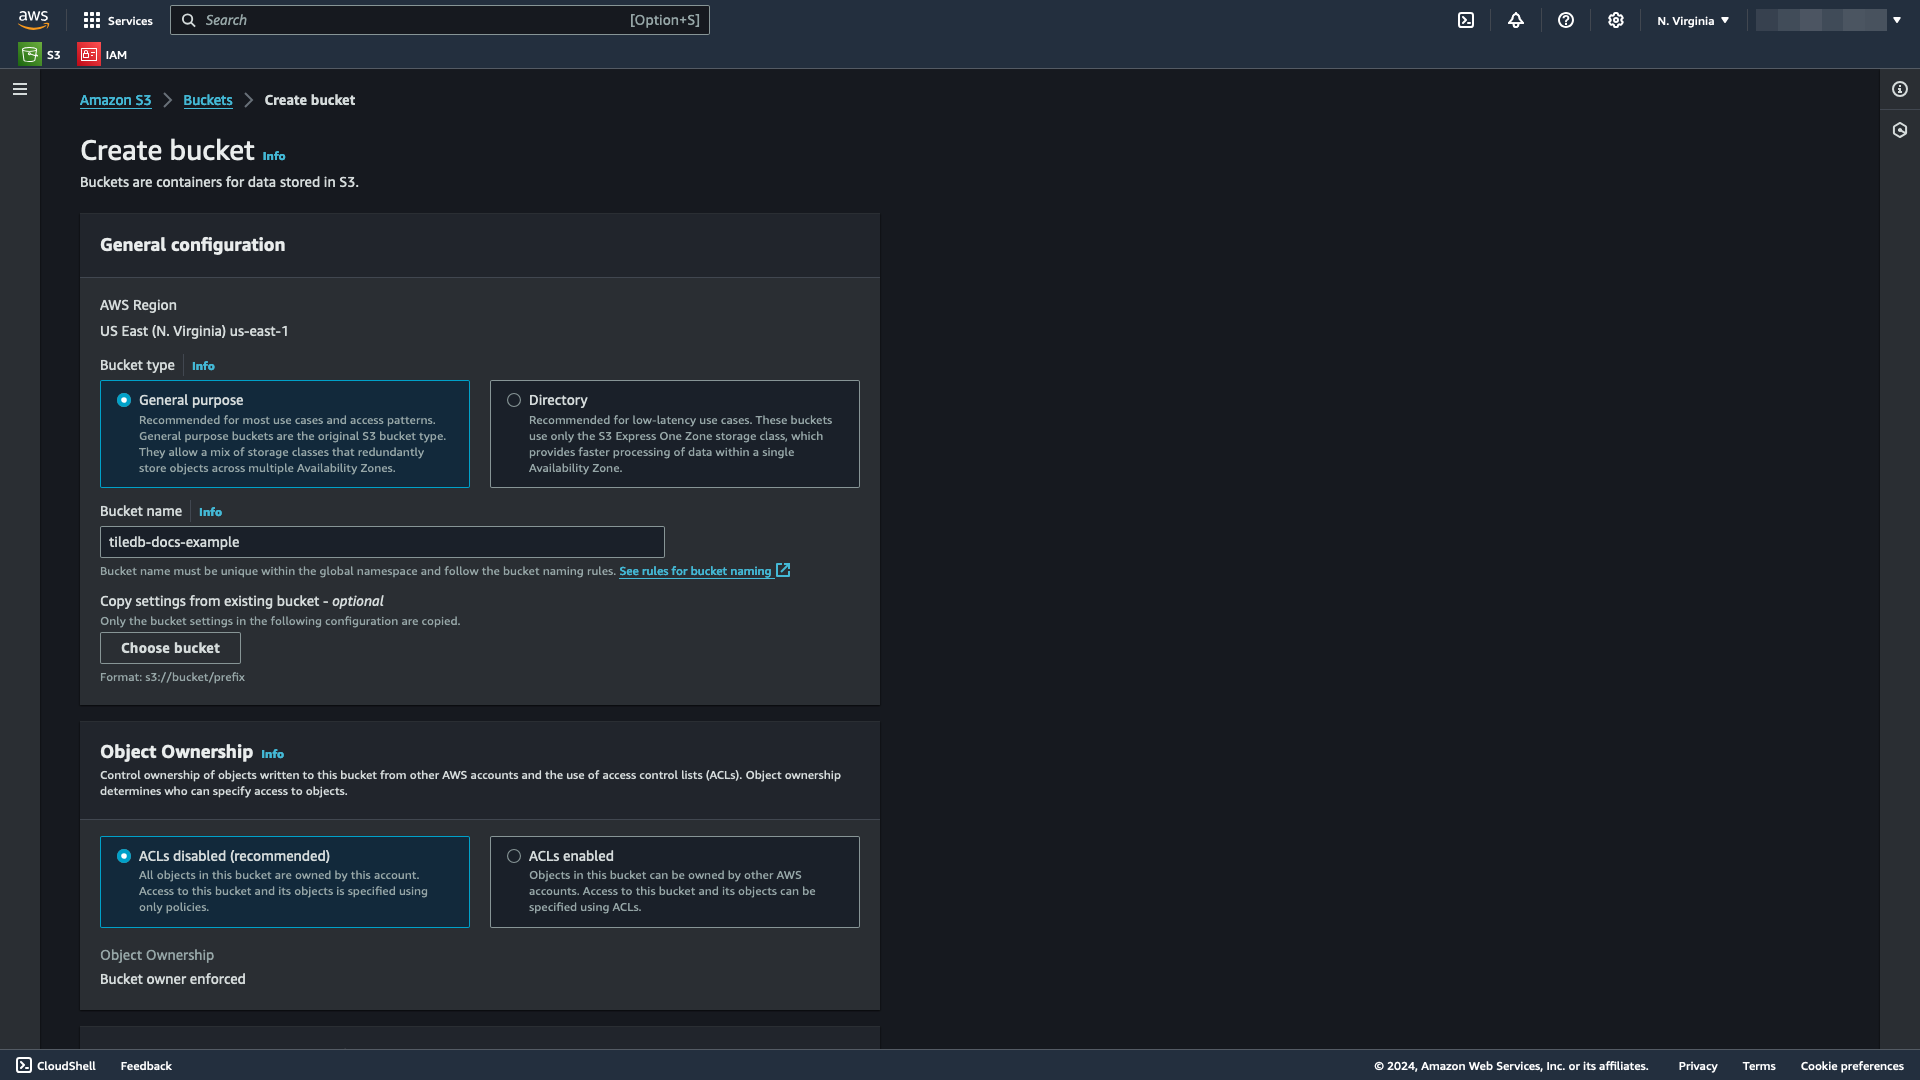
If you’re new to S3, you can leave all other settings as default. Many of these settings can be changed after the bucket is created.
Select Create bucket.
Add a bucket policy to the bucket
Open the S3 bucket you wish to use for the ARN.
Select the Permissions tab.
Locate the Bucket policy section, and select Edit.
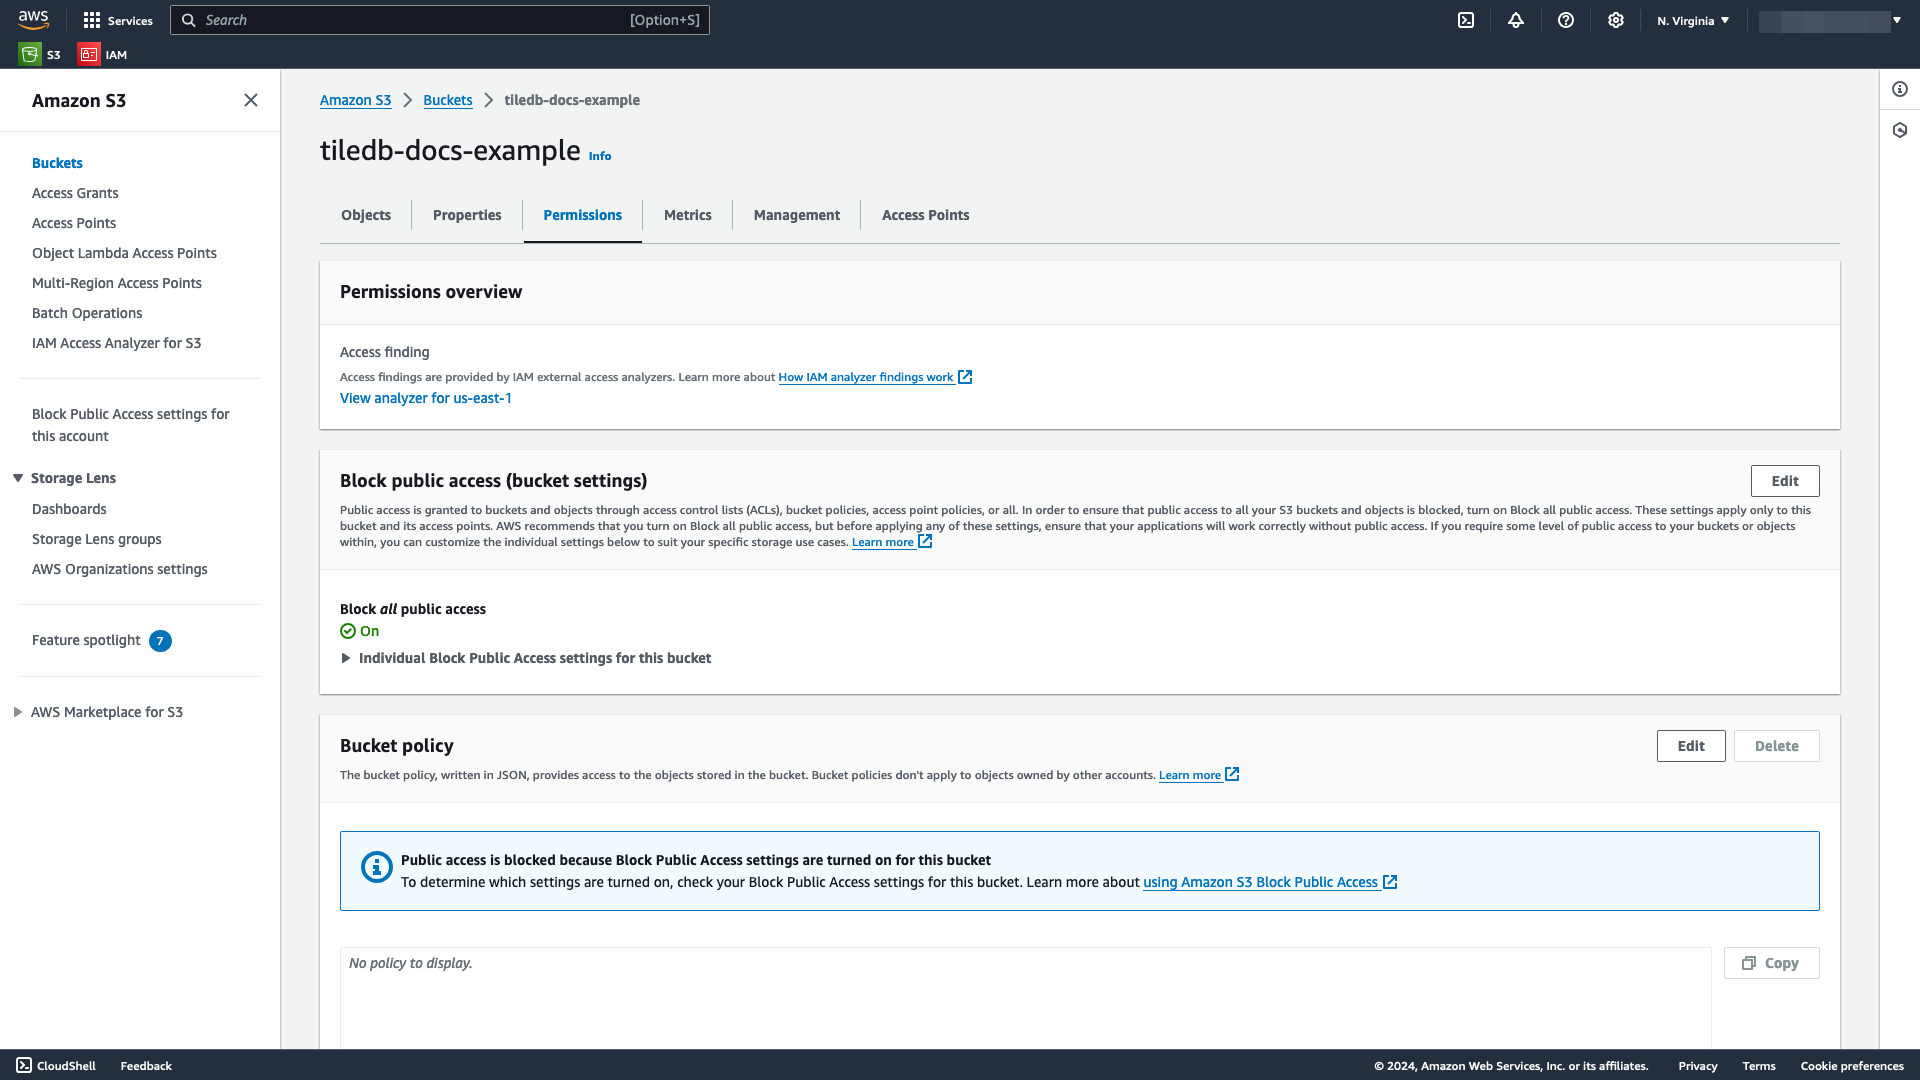
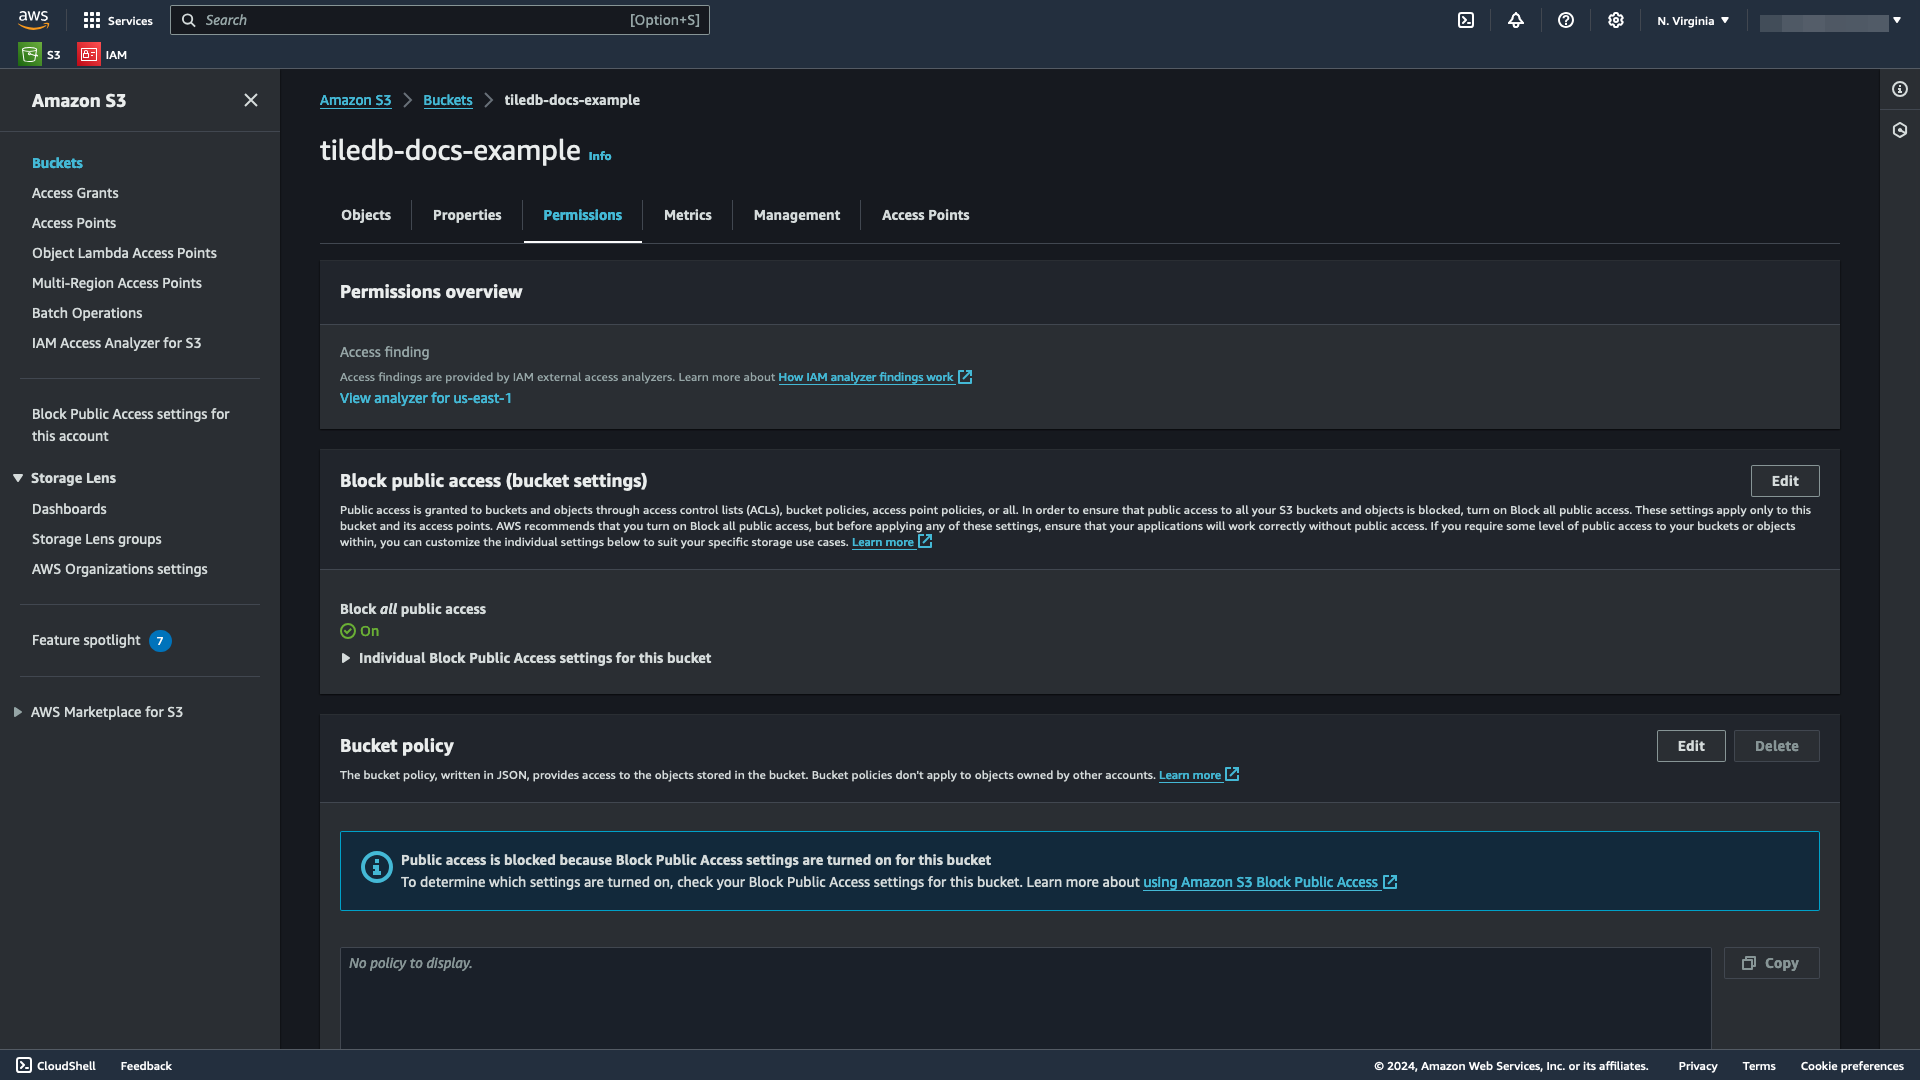
Within the Edit bucket policy window, provide a list of
Statements in JSON format containing the necessary permissions you wish your TileDB account to have on your bucket: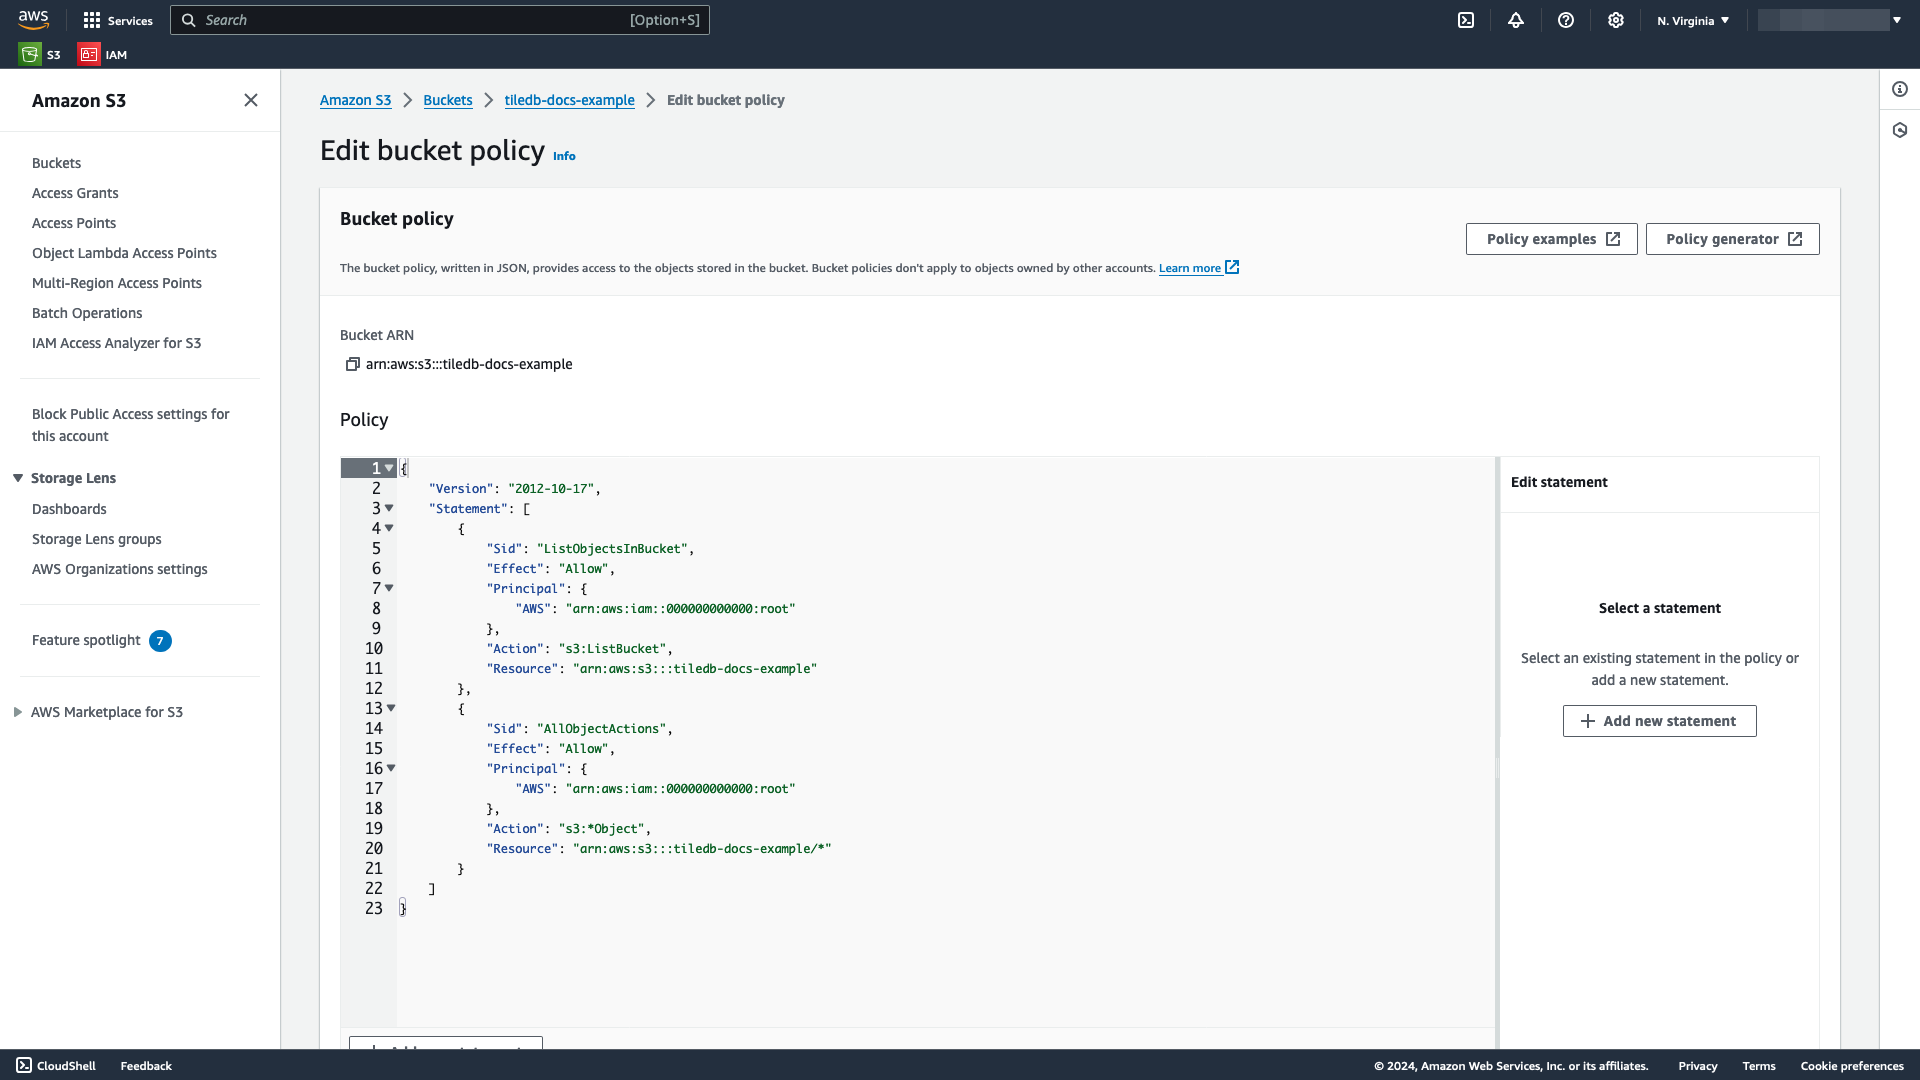
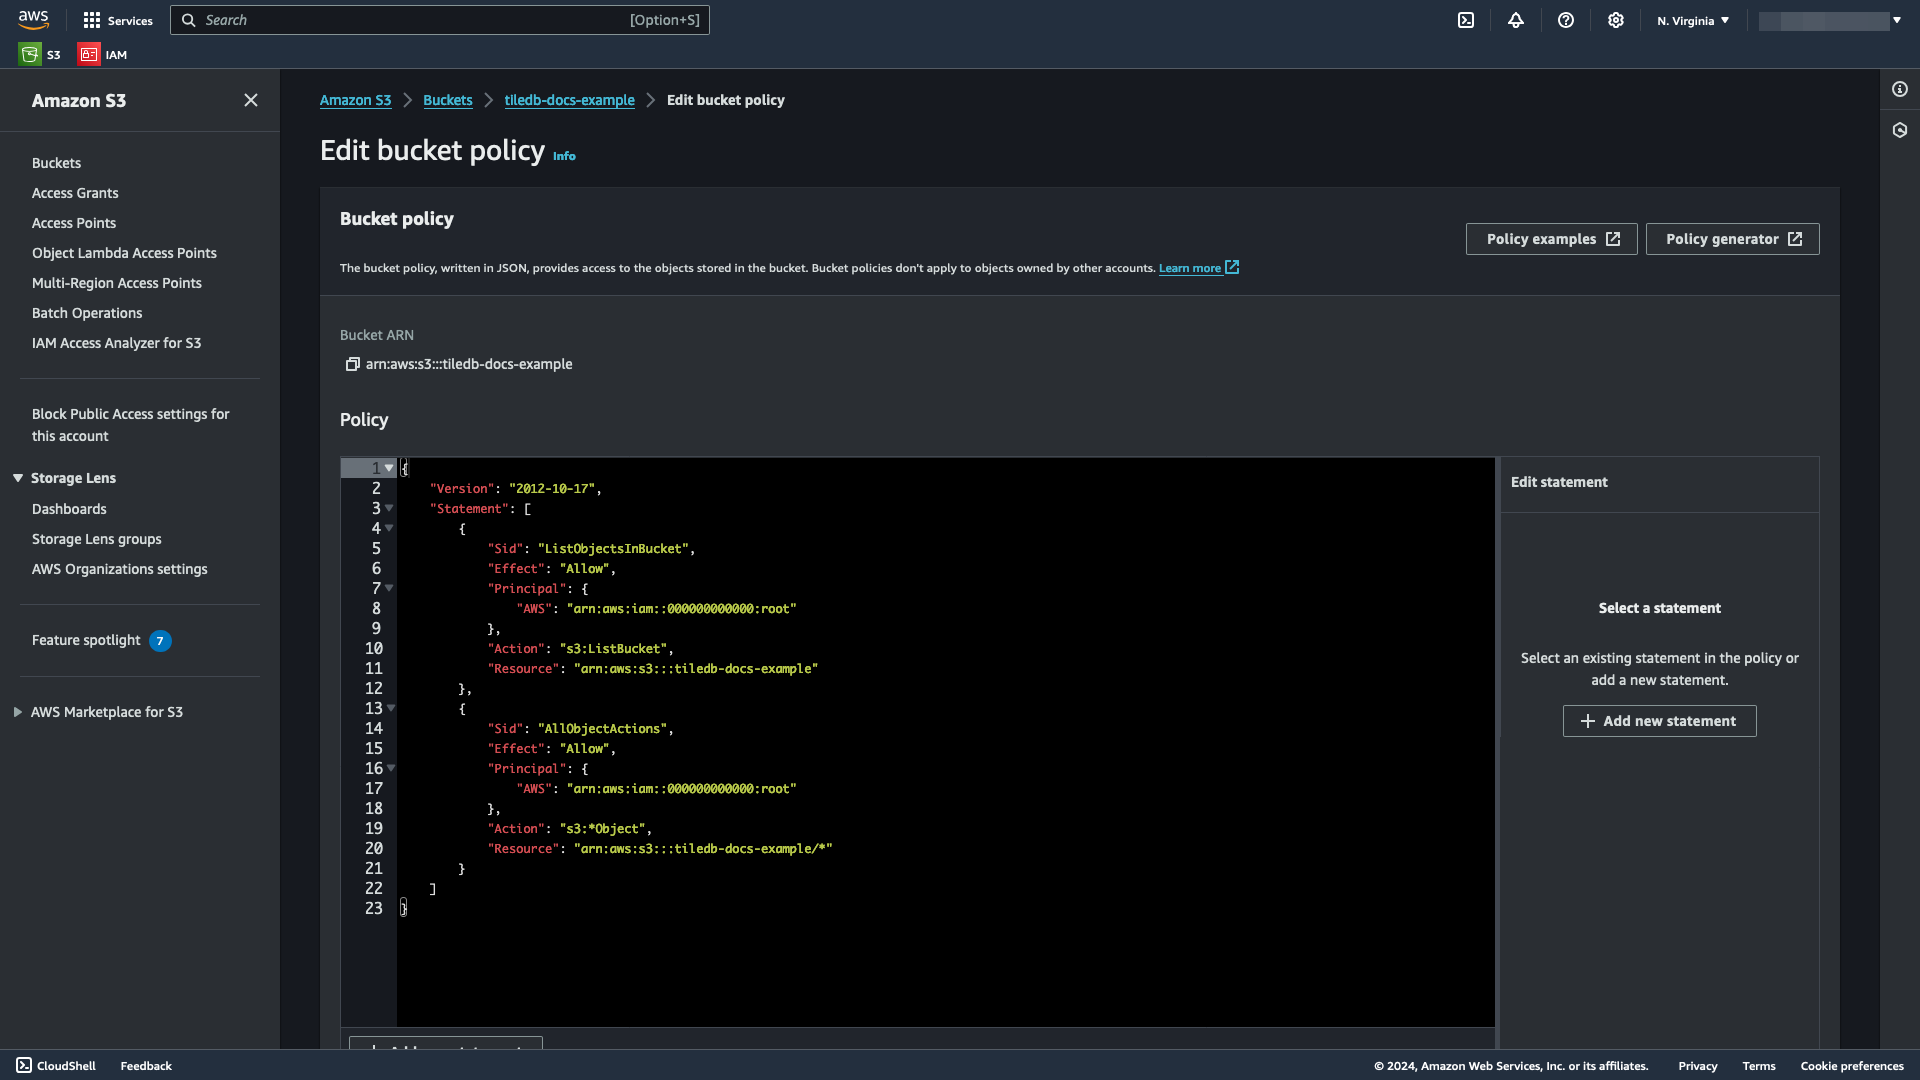
An example JSON bucket policy is below, which lets you list objects in your bucket and have full control over all objects in your bucket:
{
  "Version": "2012-10-17",
  "Statement": [
    {
      "Sid": "ListObjectsInBucket",
      "Effect": "Allow",
      "Principal": {
        "AWS": "arn:aws:iam::<aws-principal>:root"
      },
      "Action": ["s3:ListBucket", "s3:ListBucketMultipartUploads"],
      "Resource": "arn:aws:s3:::<bucket-name>"
    },
    {
      "Sid": "AllObjectActions",
      "Effect": "Allow",
      "Principal": {
        "AWS": "arn:aws:iam::<aws-principal>:root"
      },
      "Action": [
        "s3:GetObject",
        "s3:PutObject",
        "s3:AbortMultipartUpload",
        "s3:ListMultipartUploadParts",
        "s3:DeleteObject"
      ],
      "Resource": "arn:aws:s3:::<bucket-name>/*"
    }
  ]
}
Replace
<aws-principal>with the value of the AWS Principal you generated from Generate an AWS Principal and External ID, and replace<bucket-name>with the name of your bucket. This example usestiledb-docs-example.Select Save changes to save your changes.
Create a new IAM policy to match the bucket policy
From the AWS Console, open IAM. You can also search for
IAMin the search bar.Under Access management, select Policies.
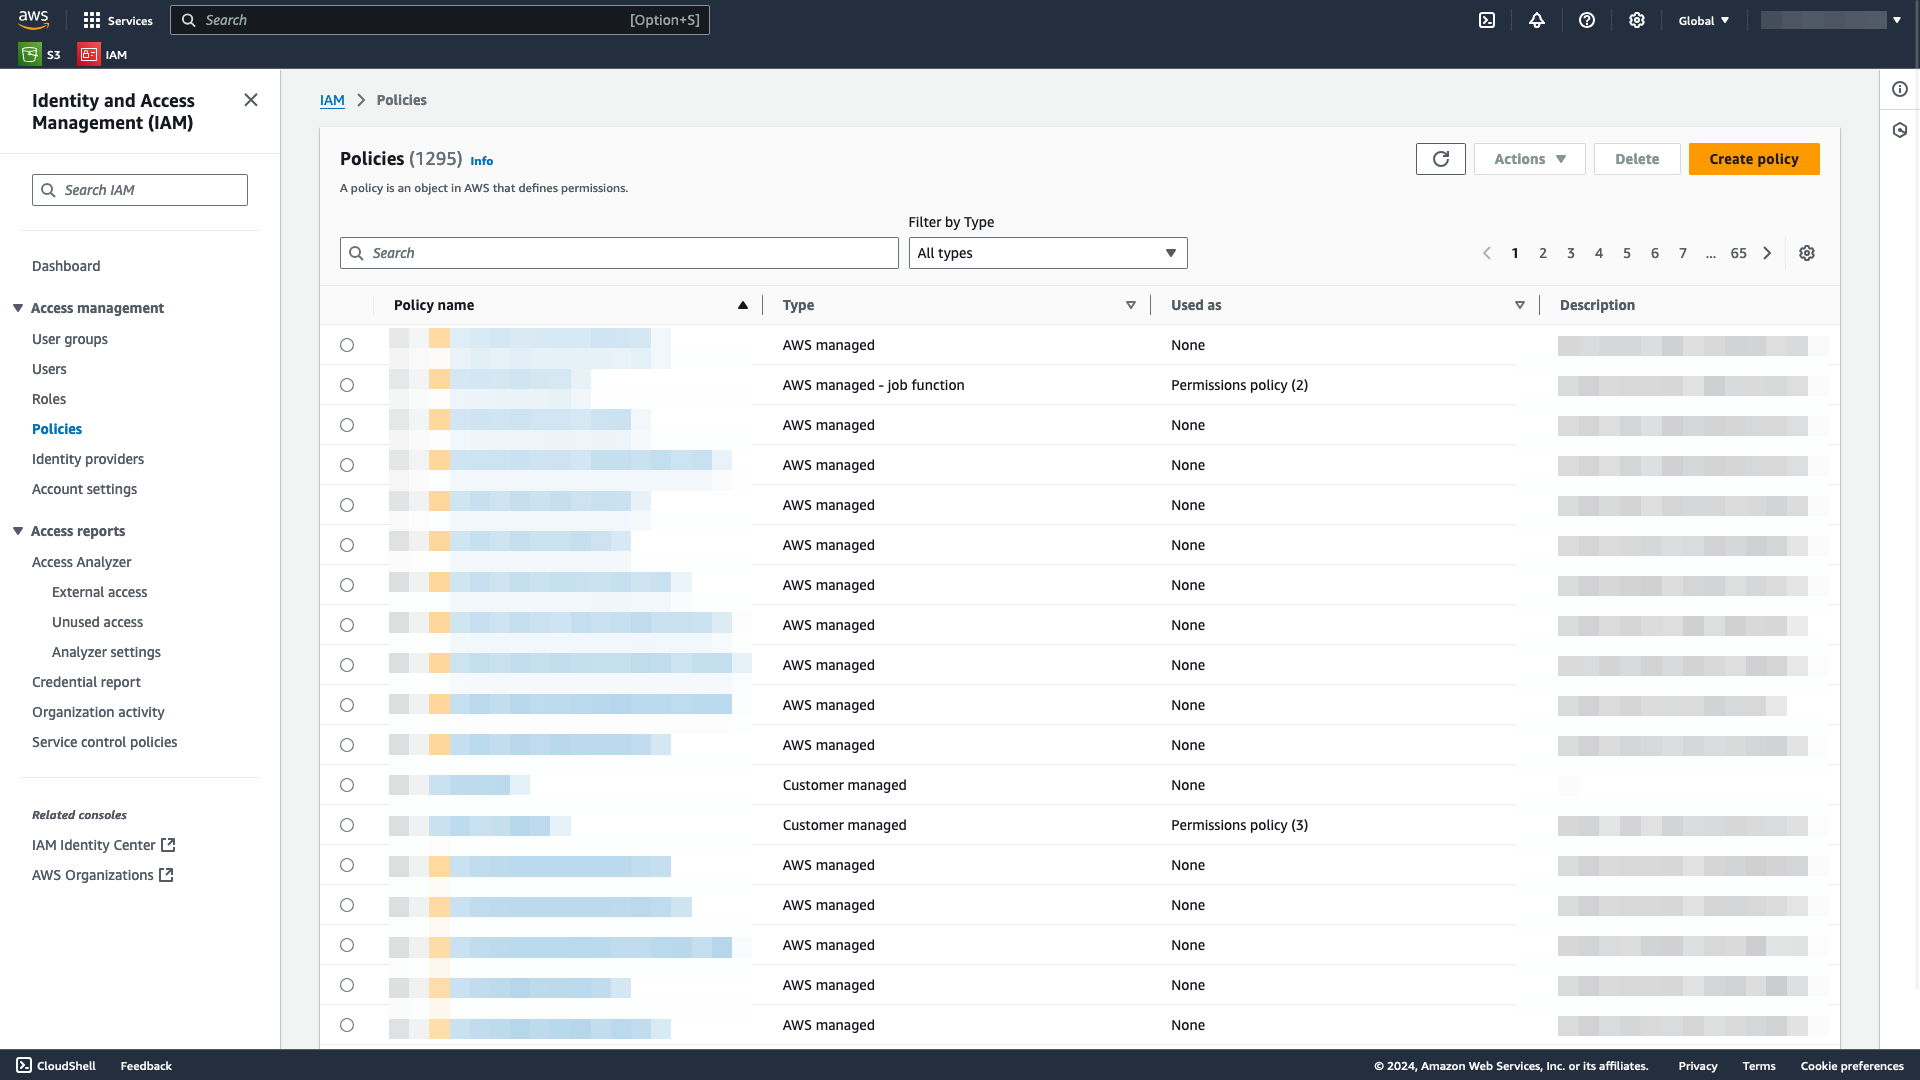
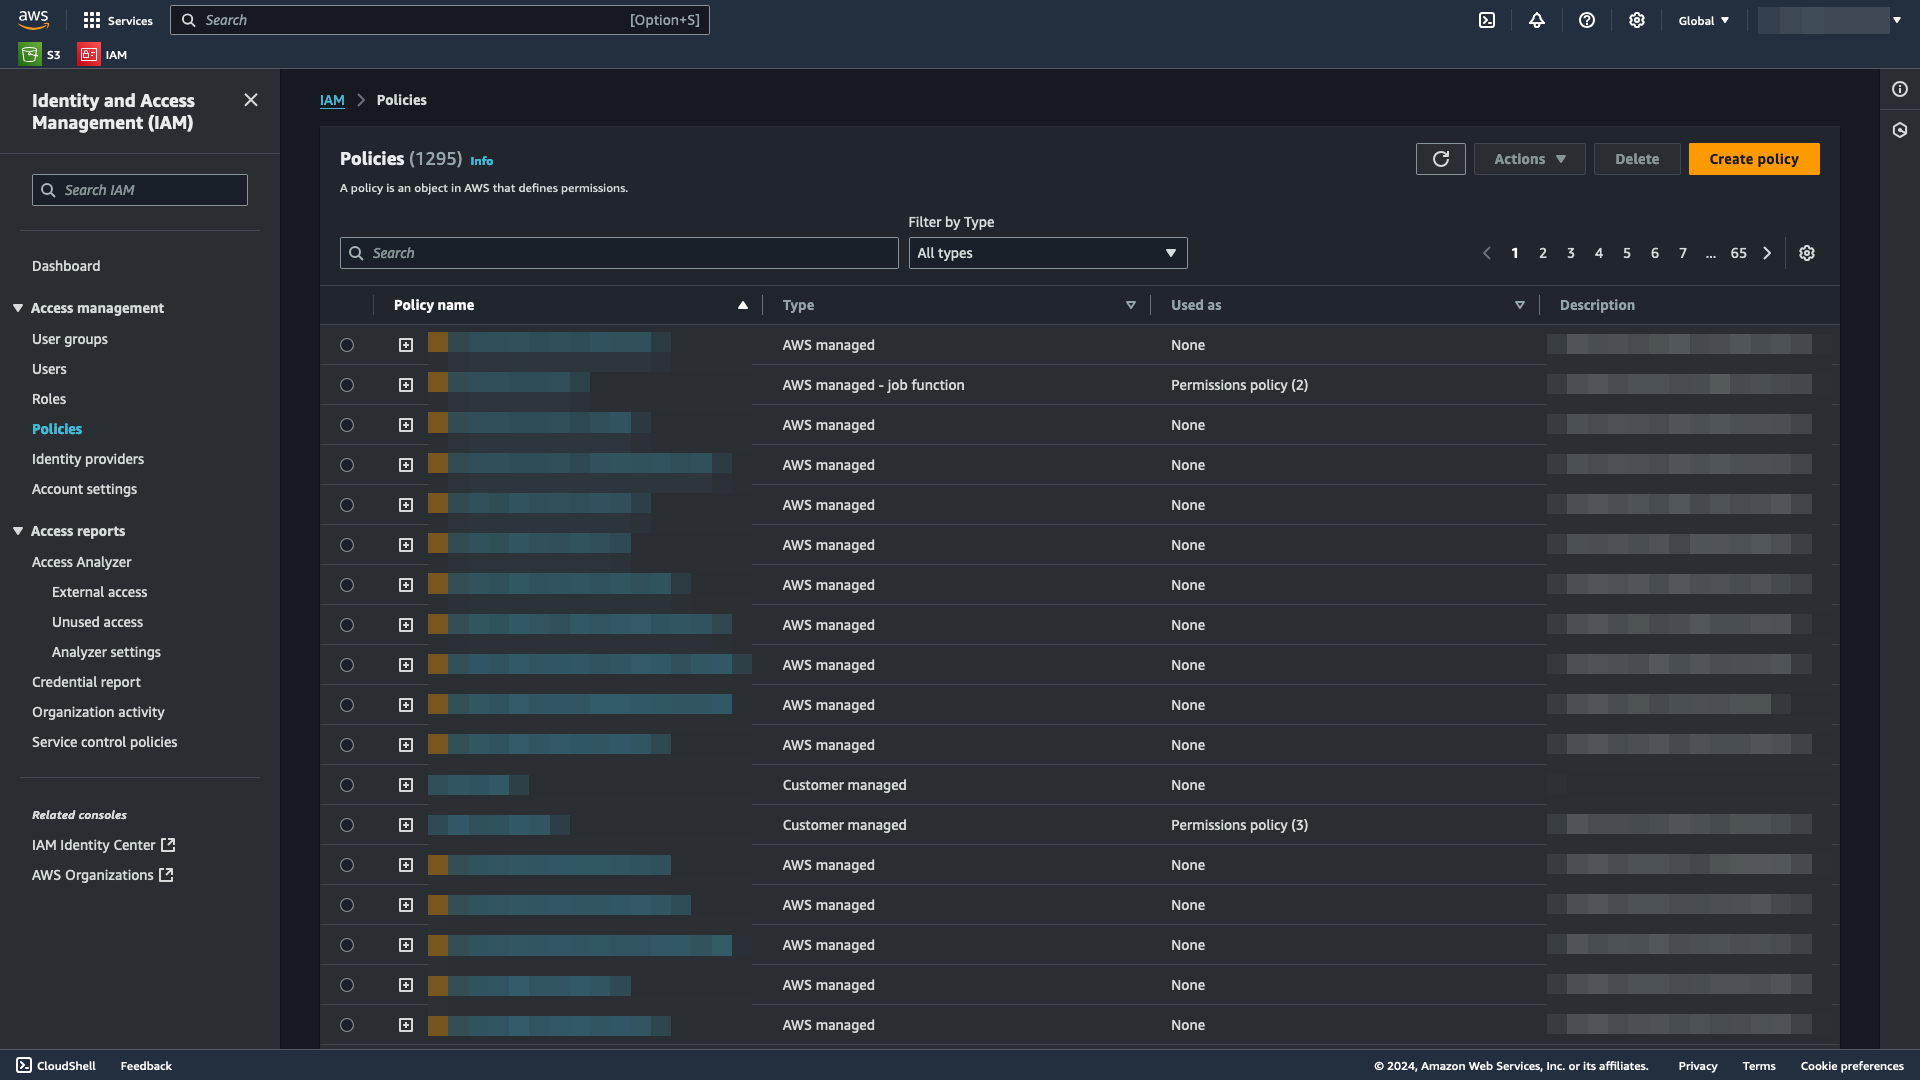
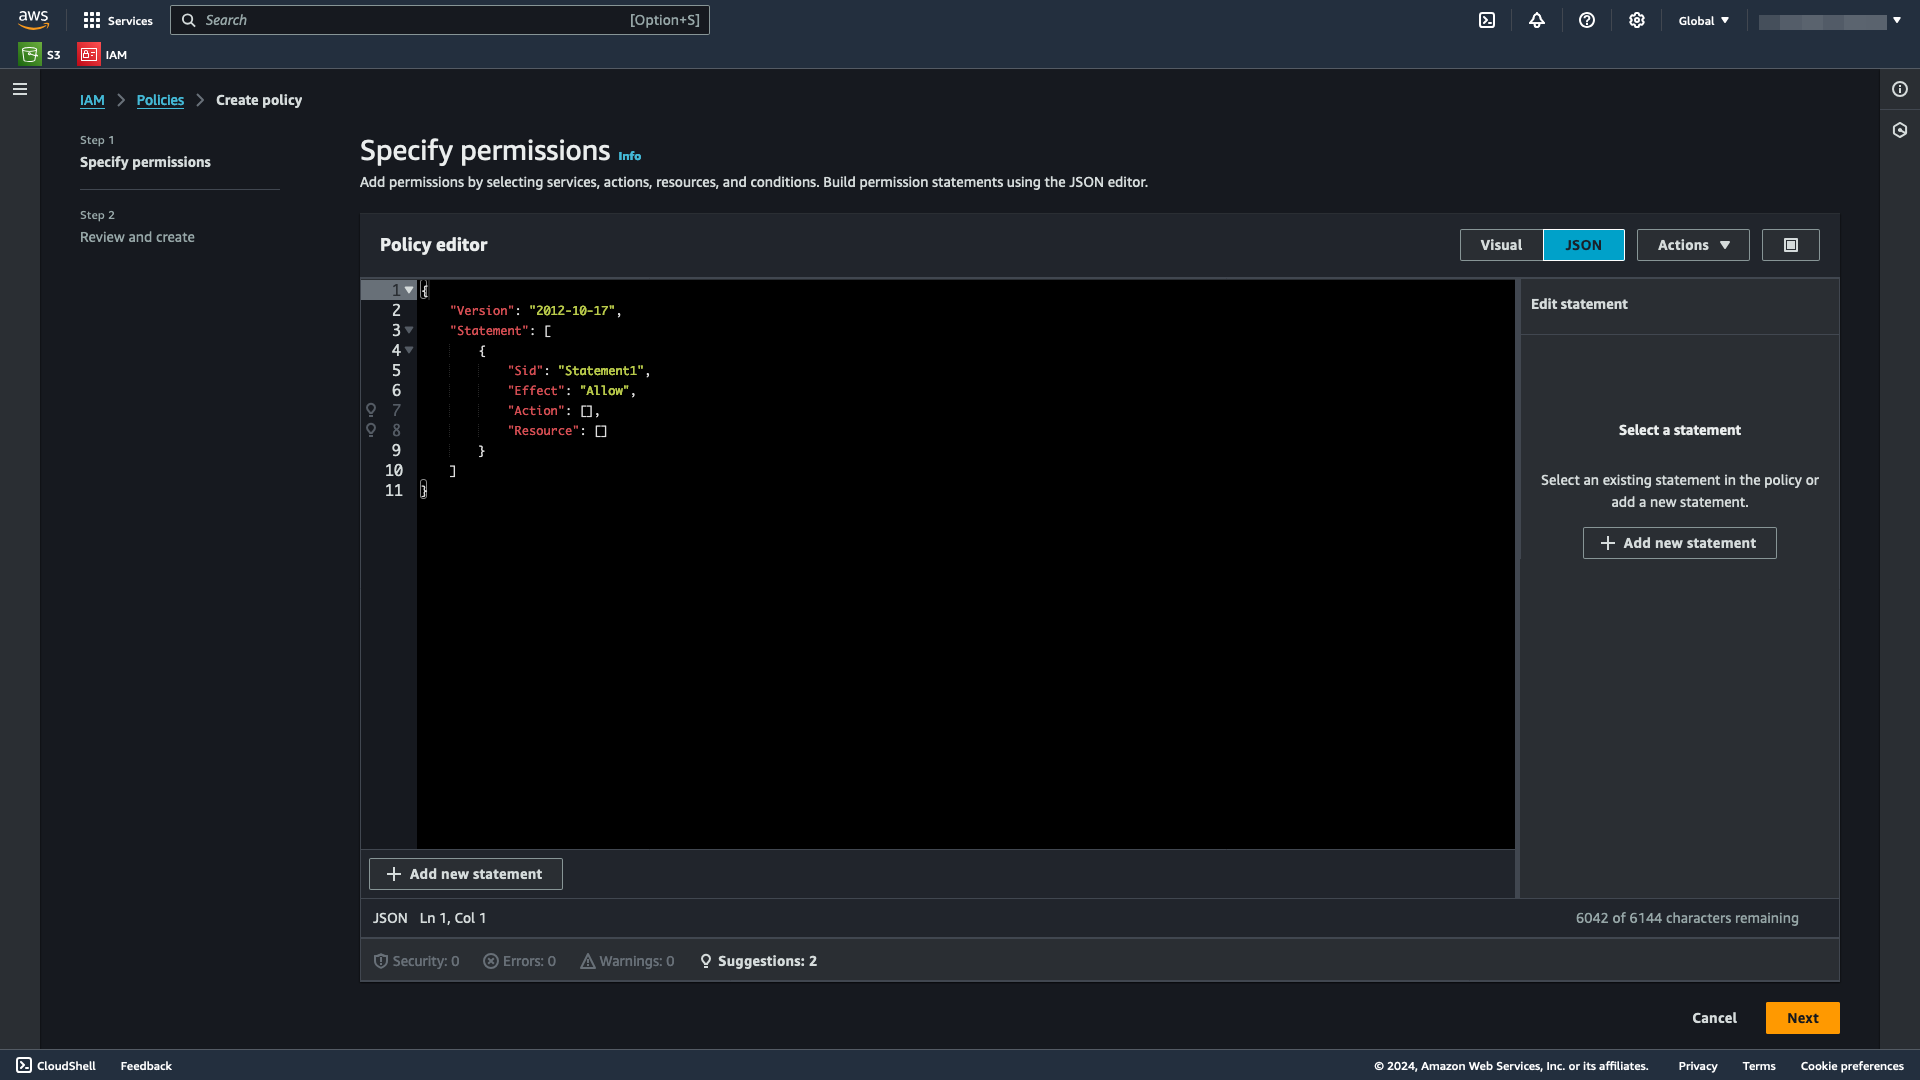
Create a policy by selecting Create policy.
Use either the Visual editor to manually define policies, or use the JSON editor to paste a JSON policy. You can use the same policy you defined on your bucket if it fits your use case. Just make sure you remove the
Principalkey.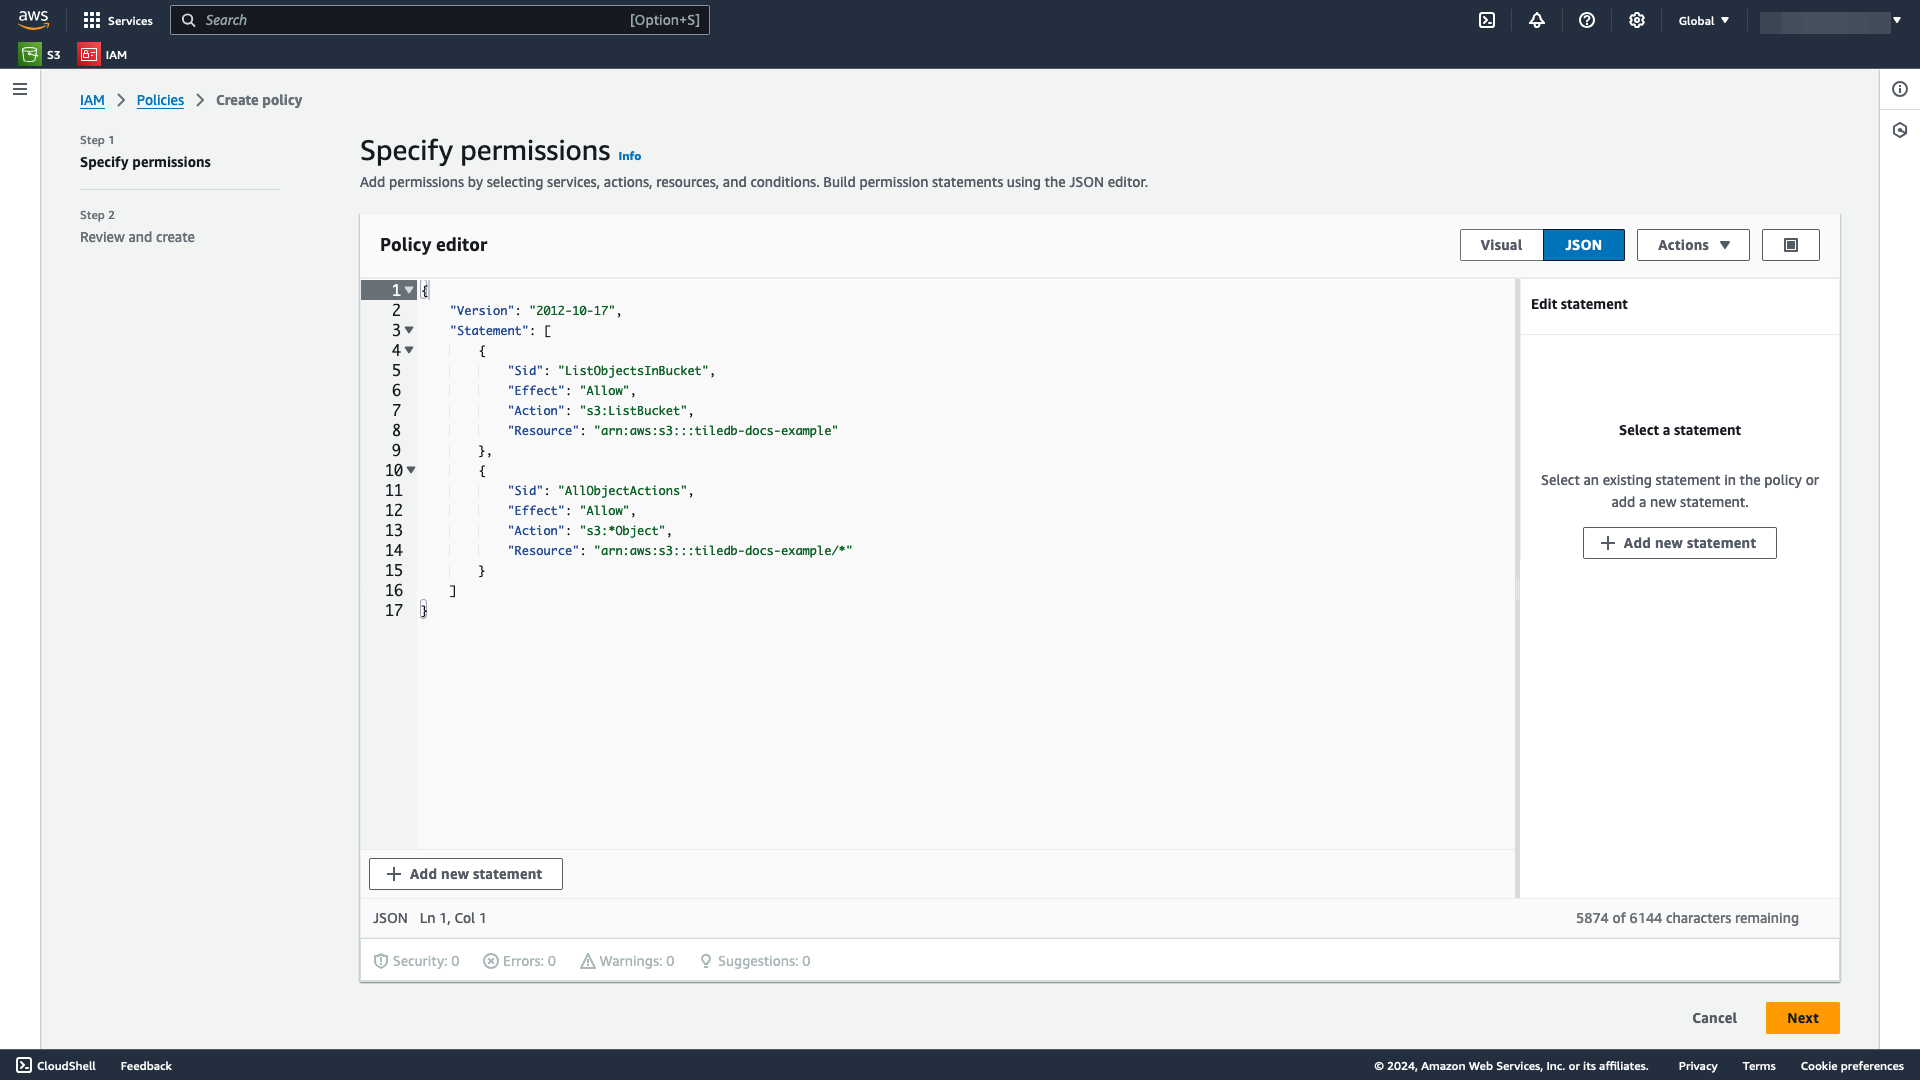
Supply a meaningful Policy name. Optionally add a Description and Tags**.
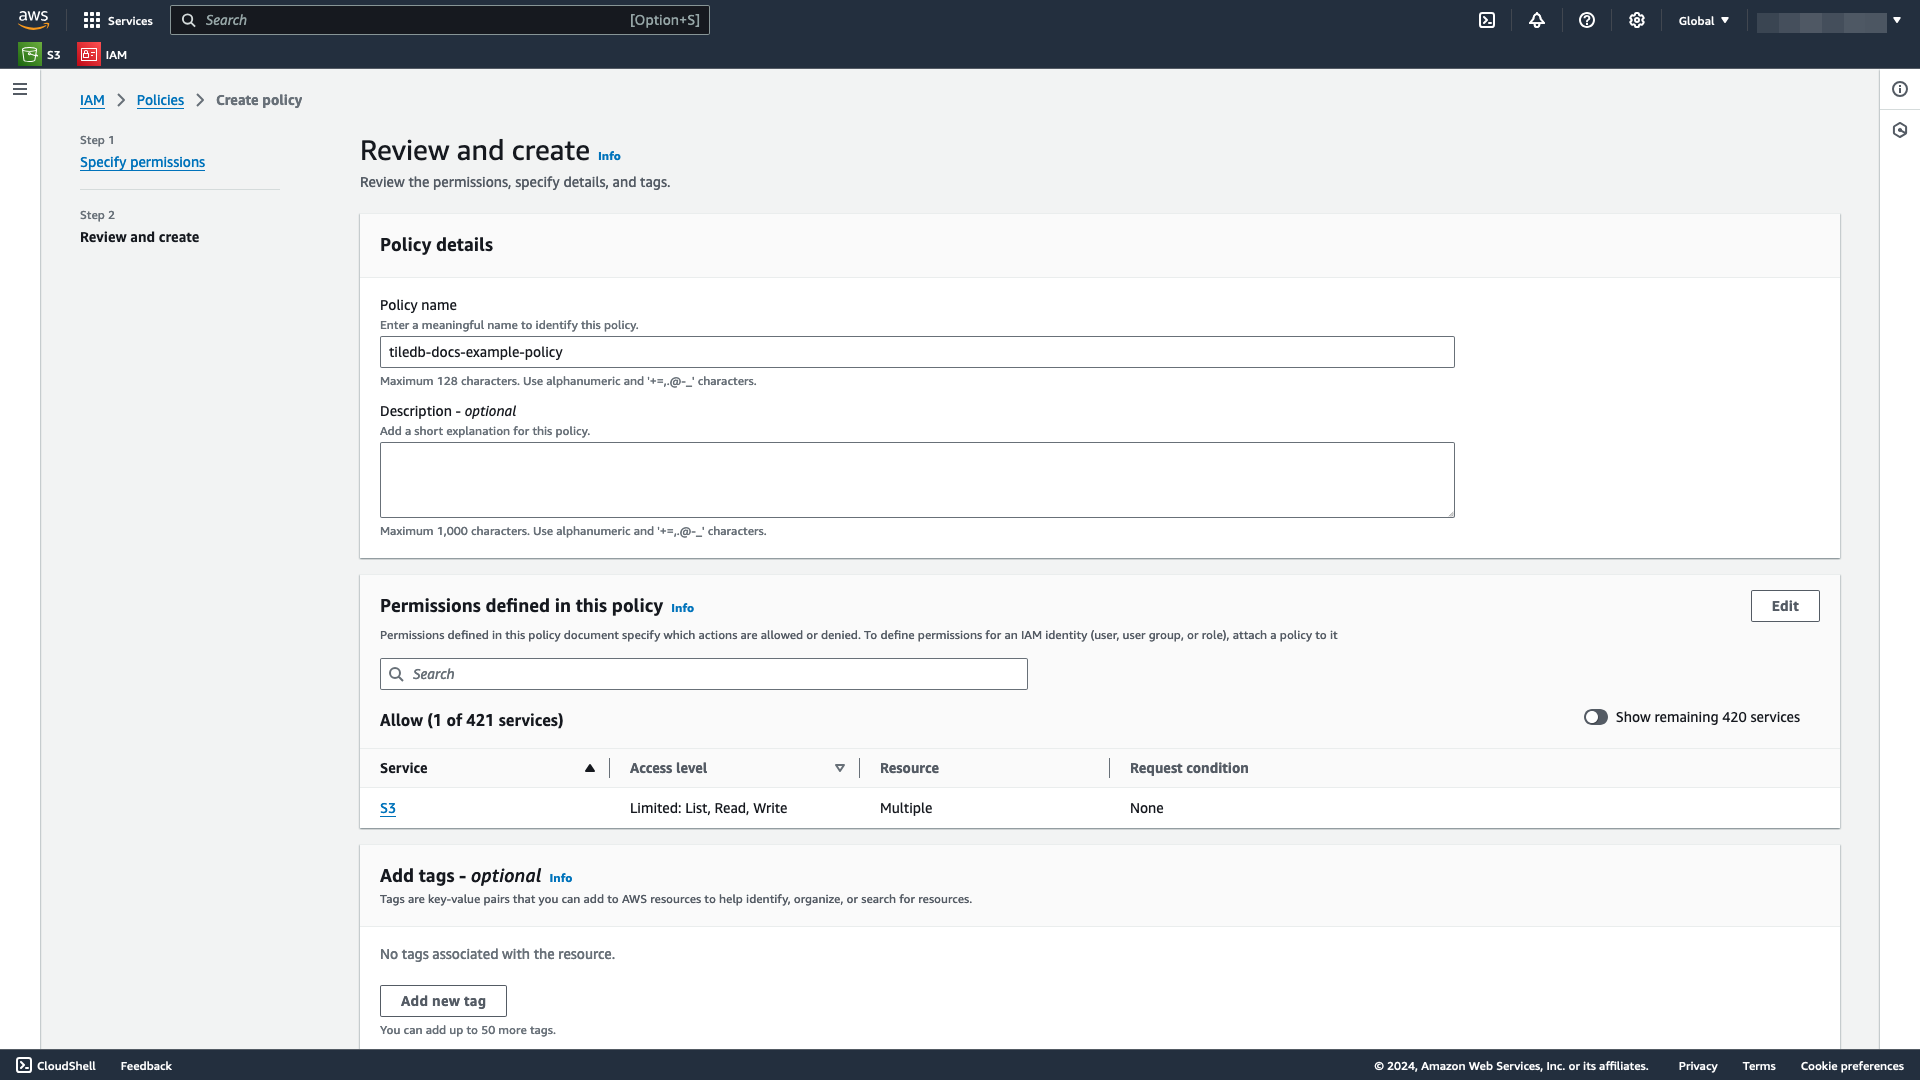

Select Create policy.
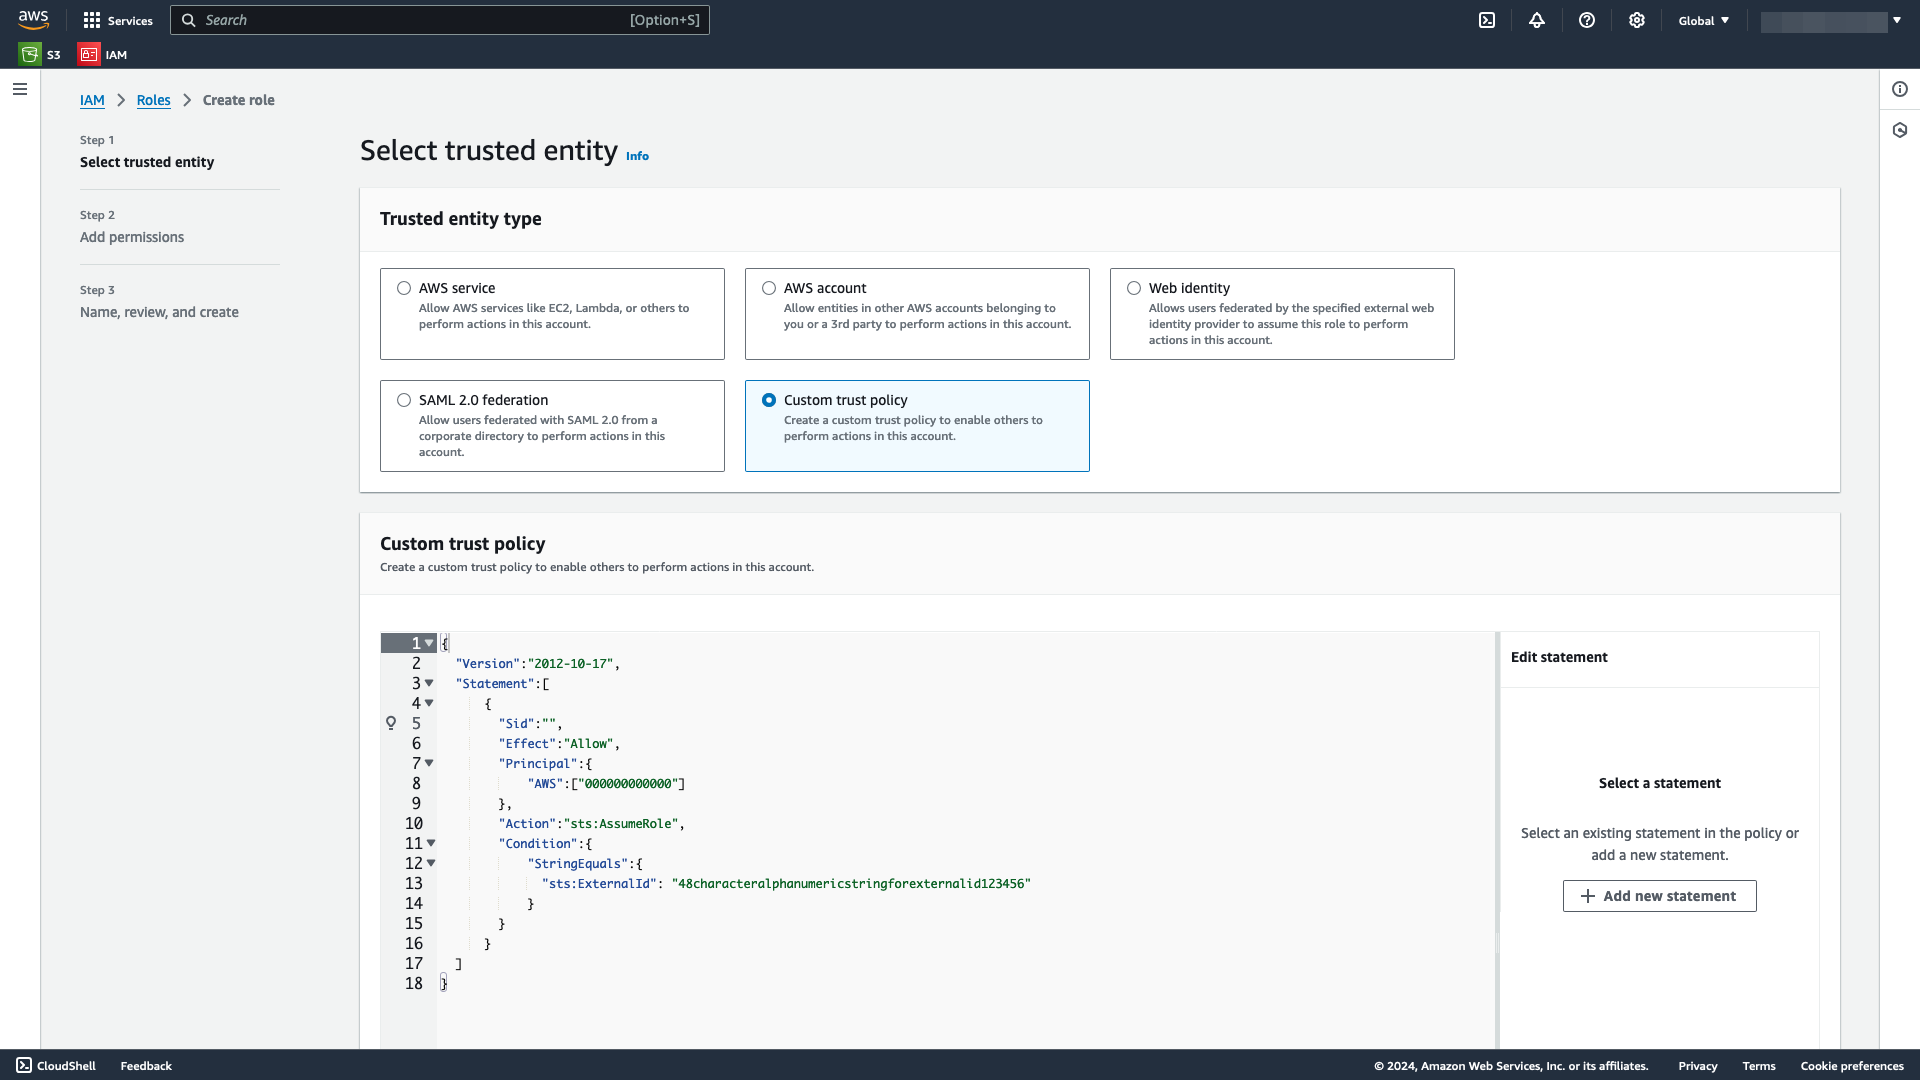
Create a new IAM role
Under Access management, select Roles.
Select Create role.
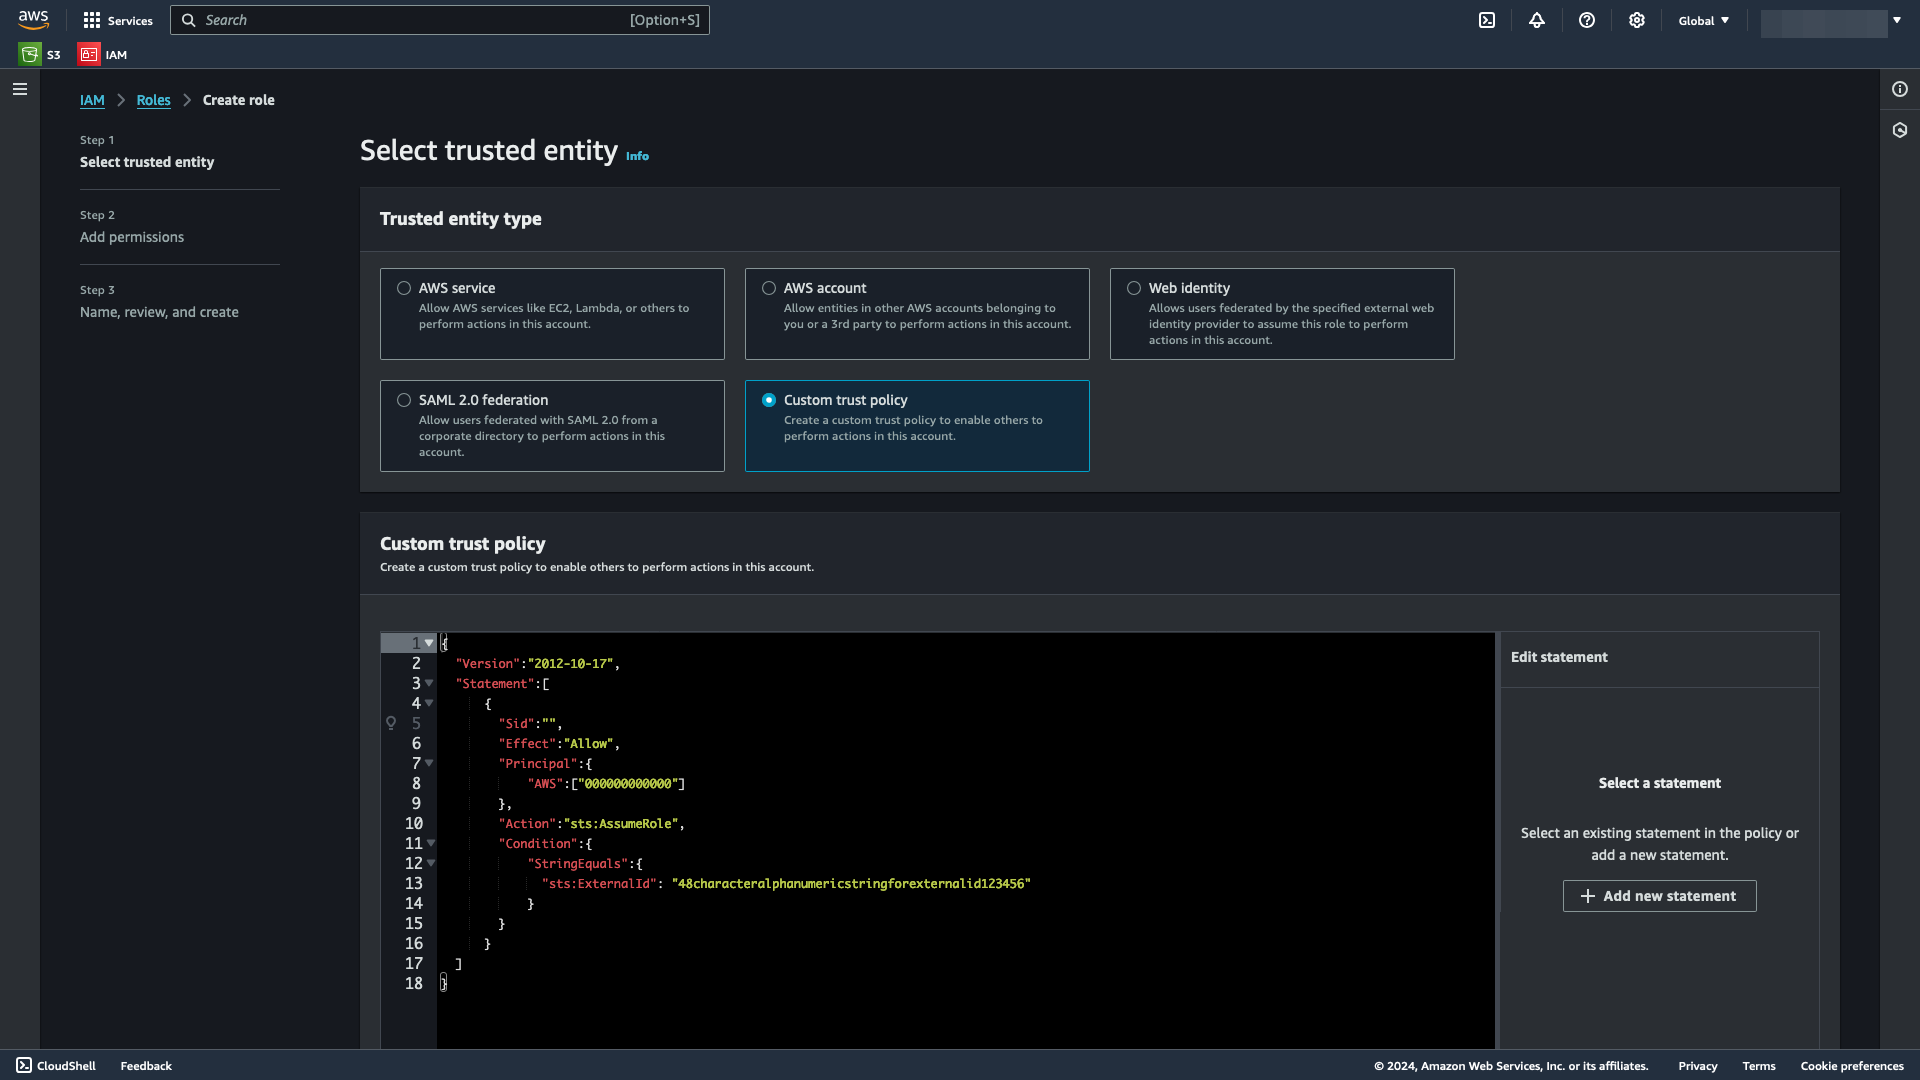
Under Trusted entity type, select Custom trust policy.
In the Custom trust policy section, paste the trust policy JSON generated from Generate an AWS Principal and External ID. Select Next.
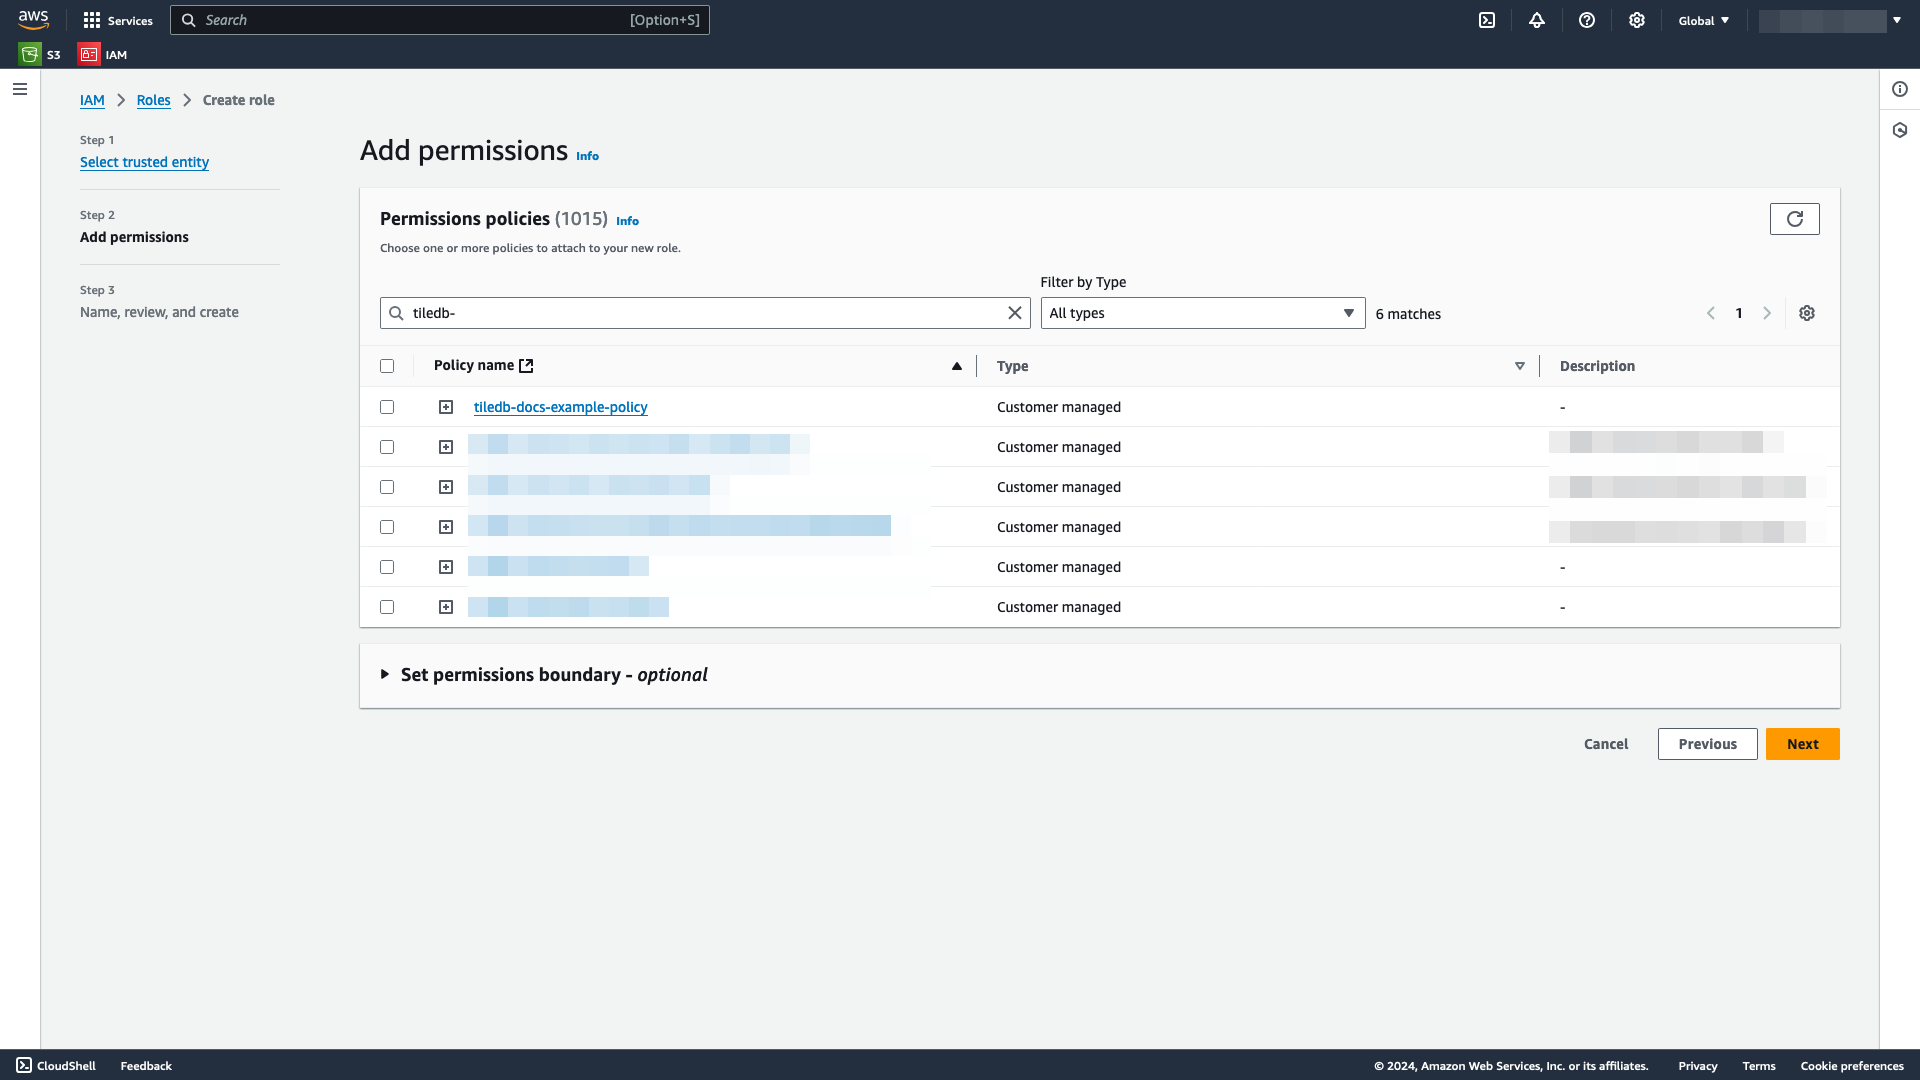
In the Add permissions window, search for and attach the IAM policy you created in the previous section.
In the Name, review, and create window, add a meaningful Role name and an optional Description.
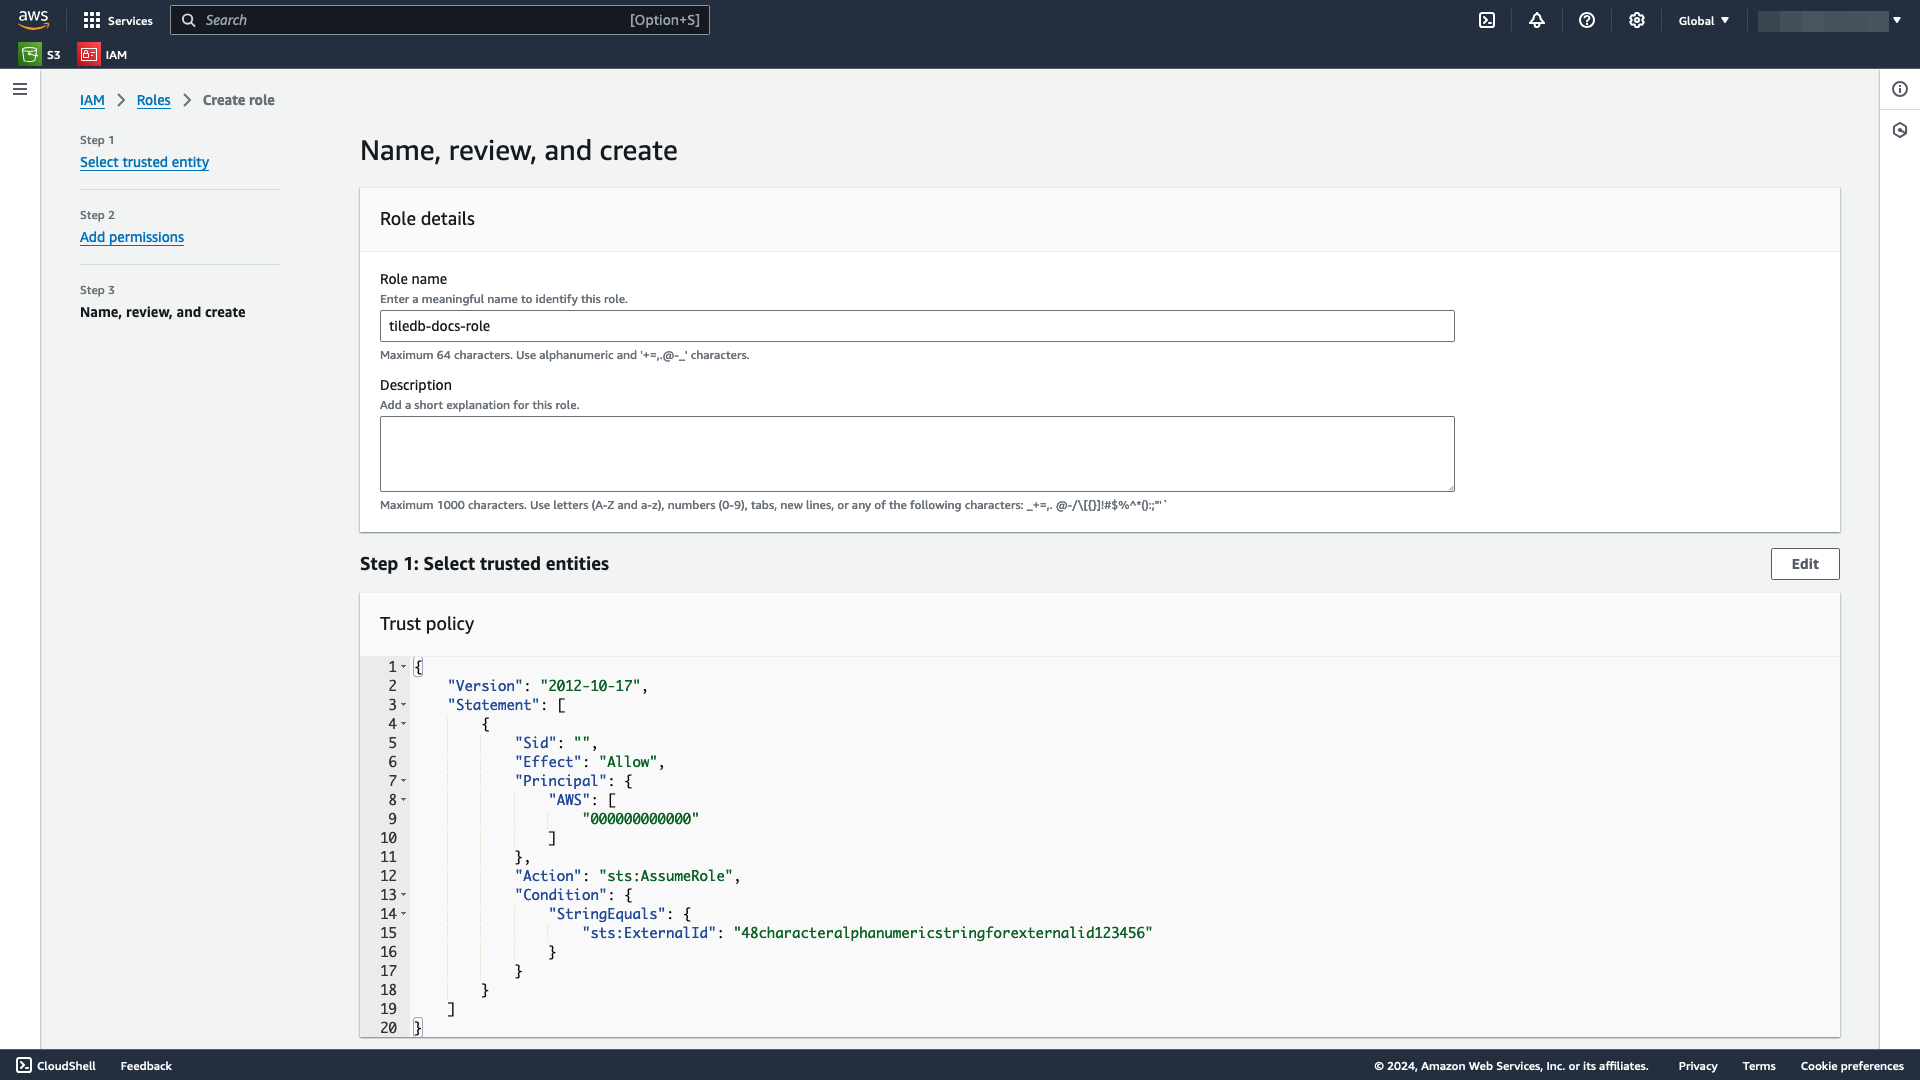
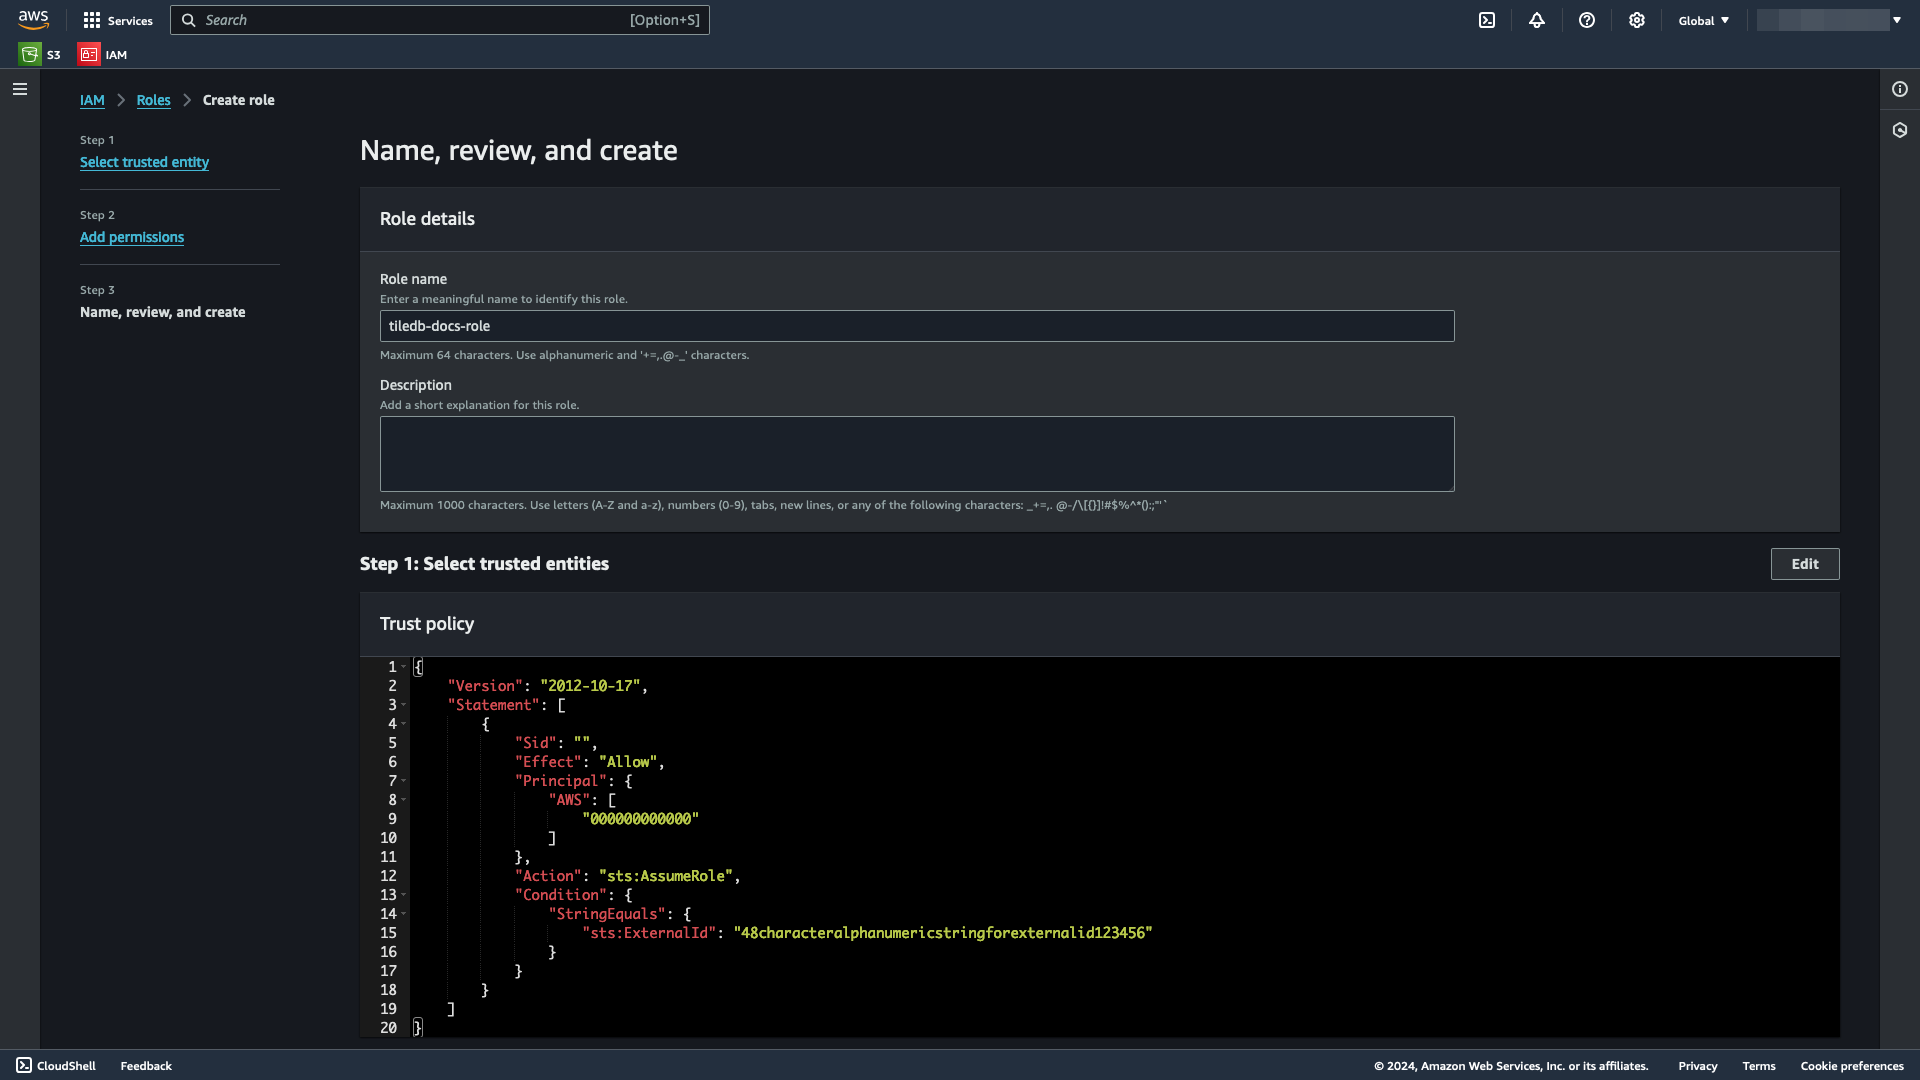
Select Create role.
Reopen the role you created and copy the ARN.
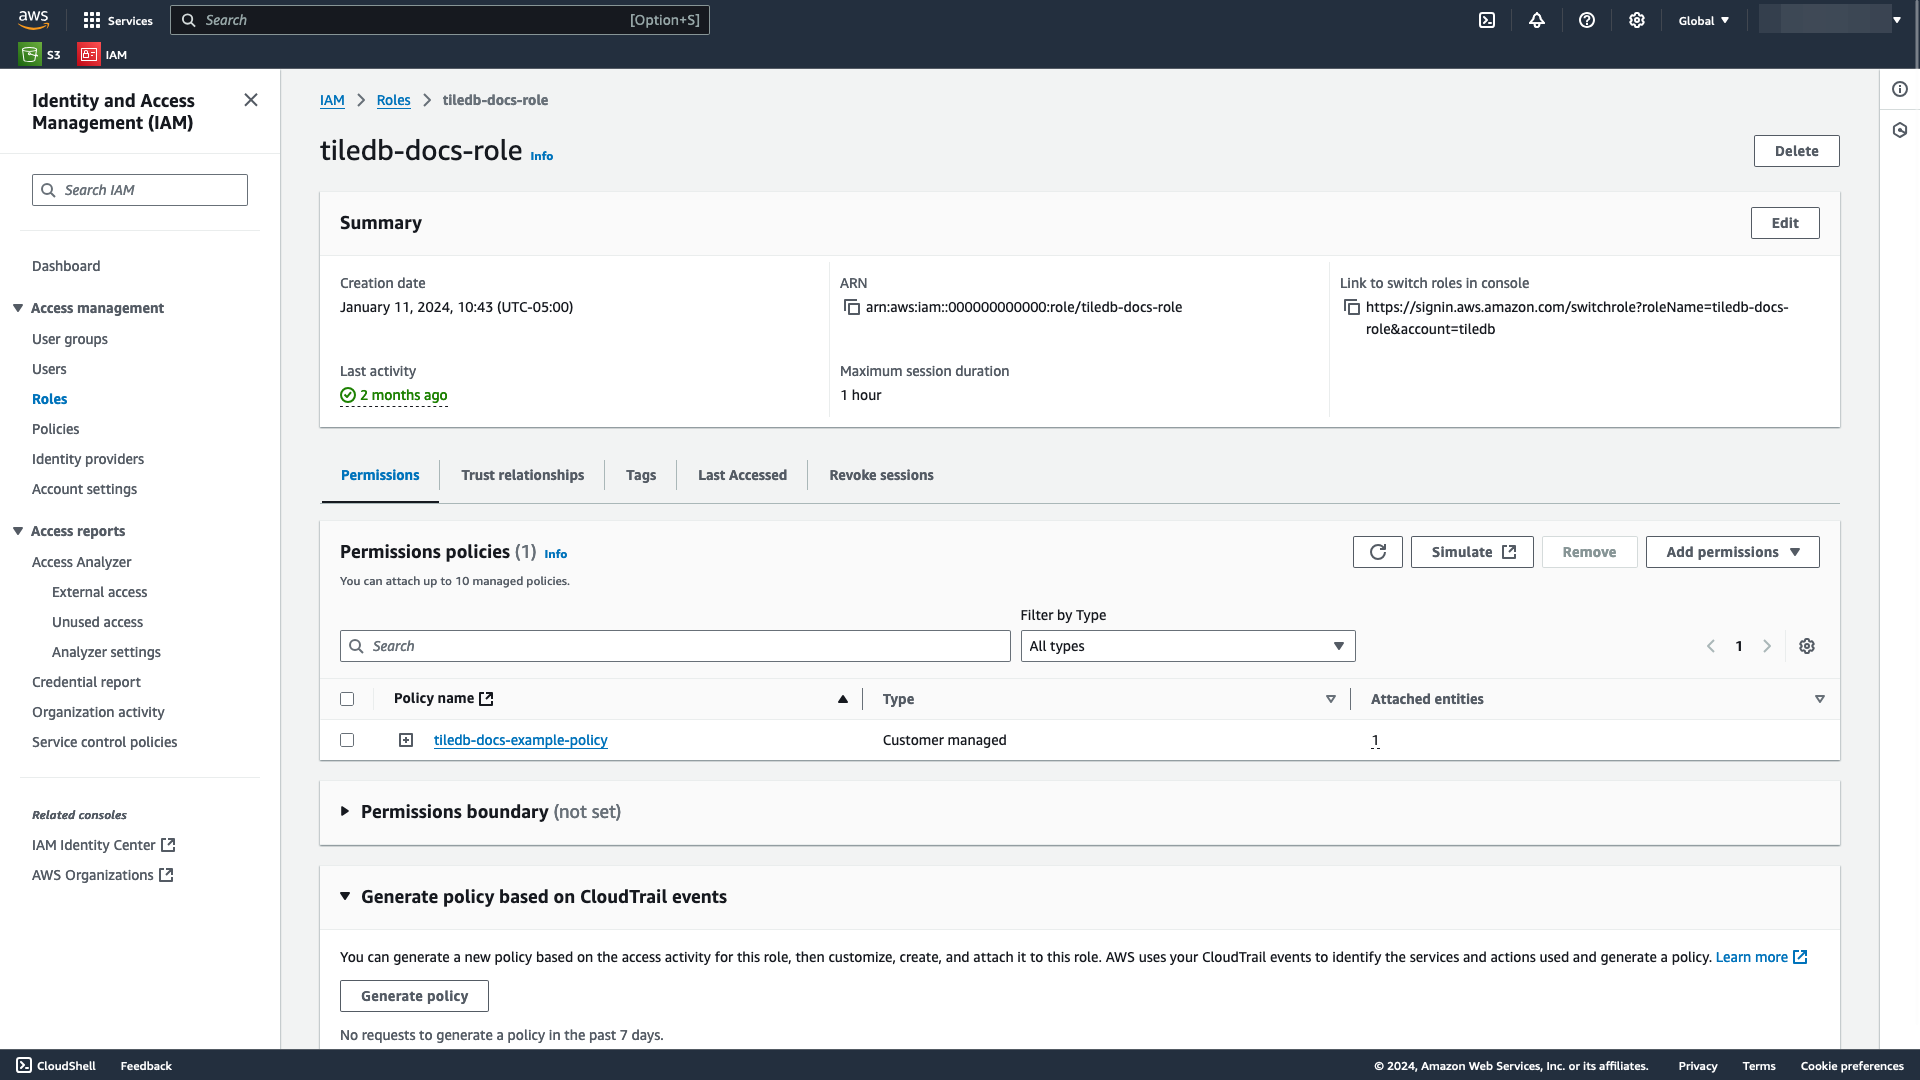
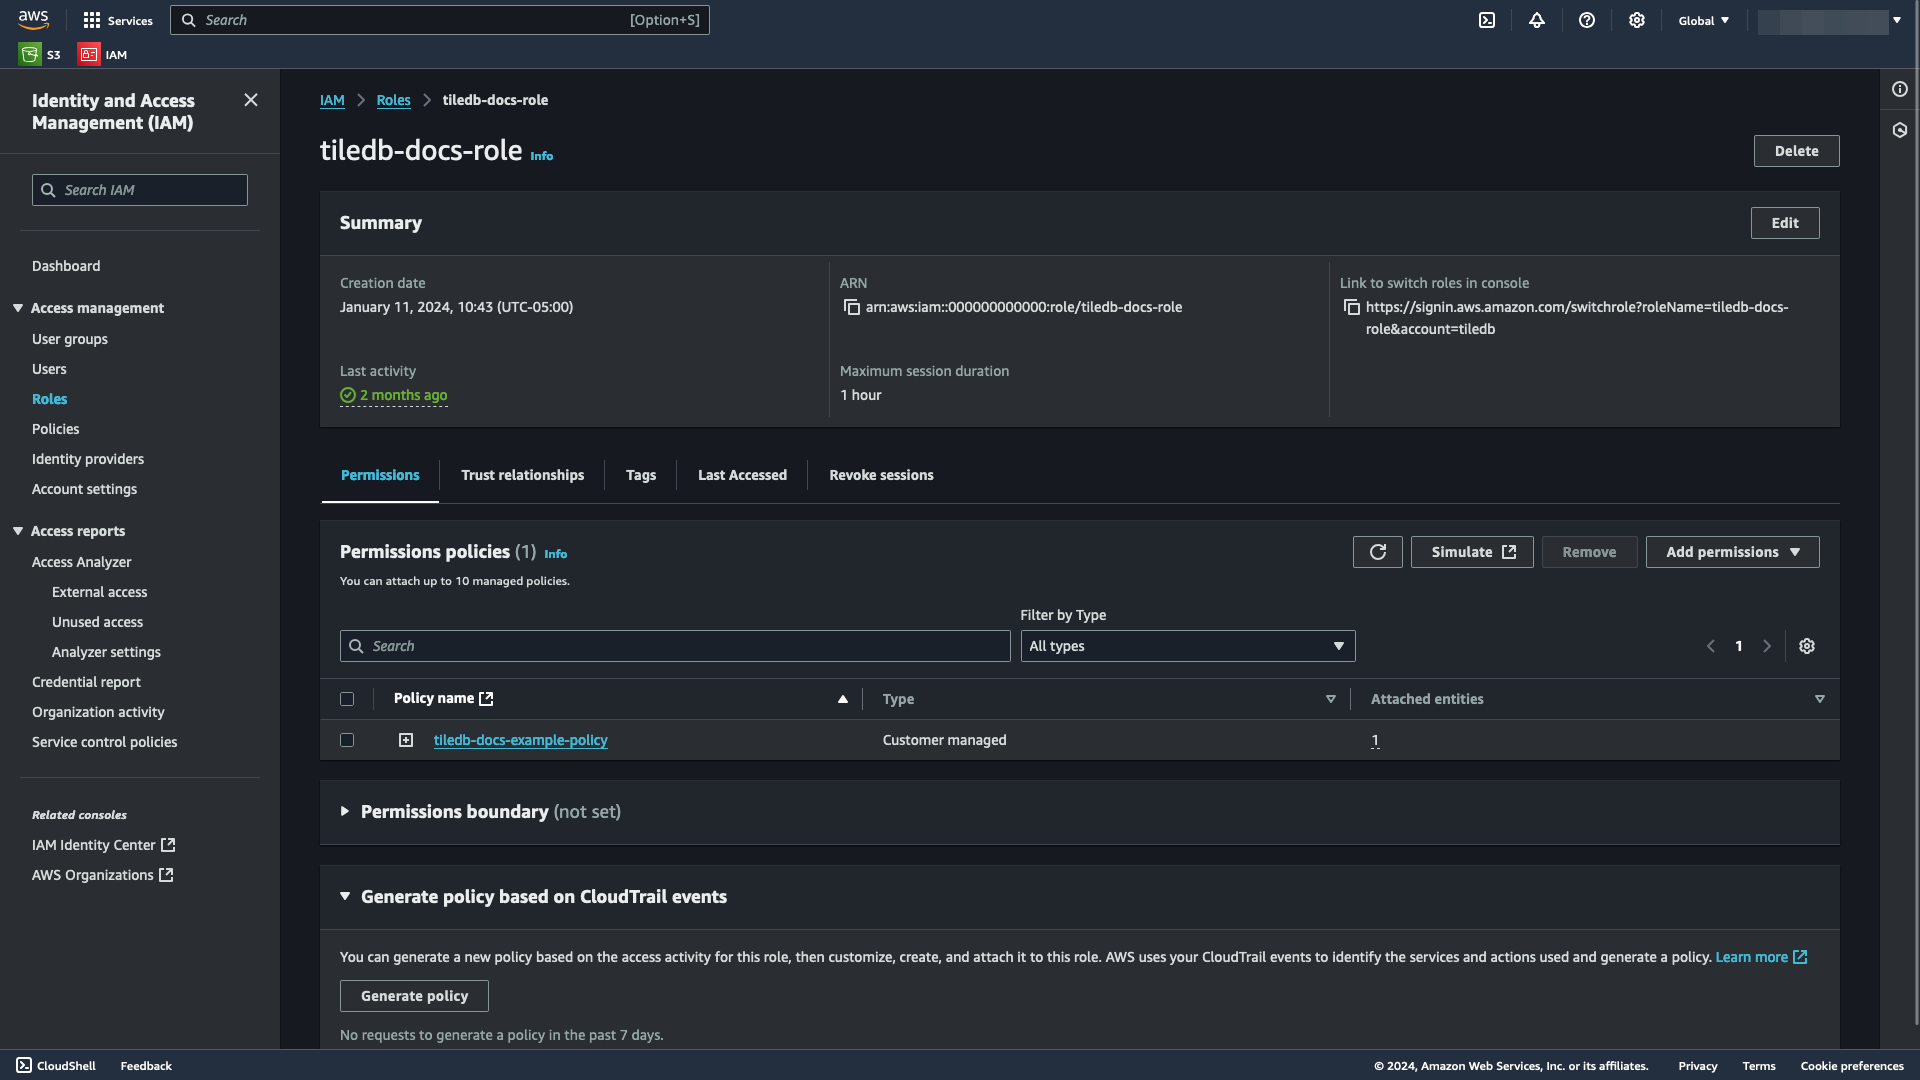
Attach the ARN to the cloud credential
Return to Cloud credentials in the TileDB Cloud Console.
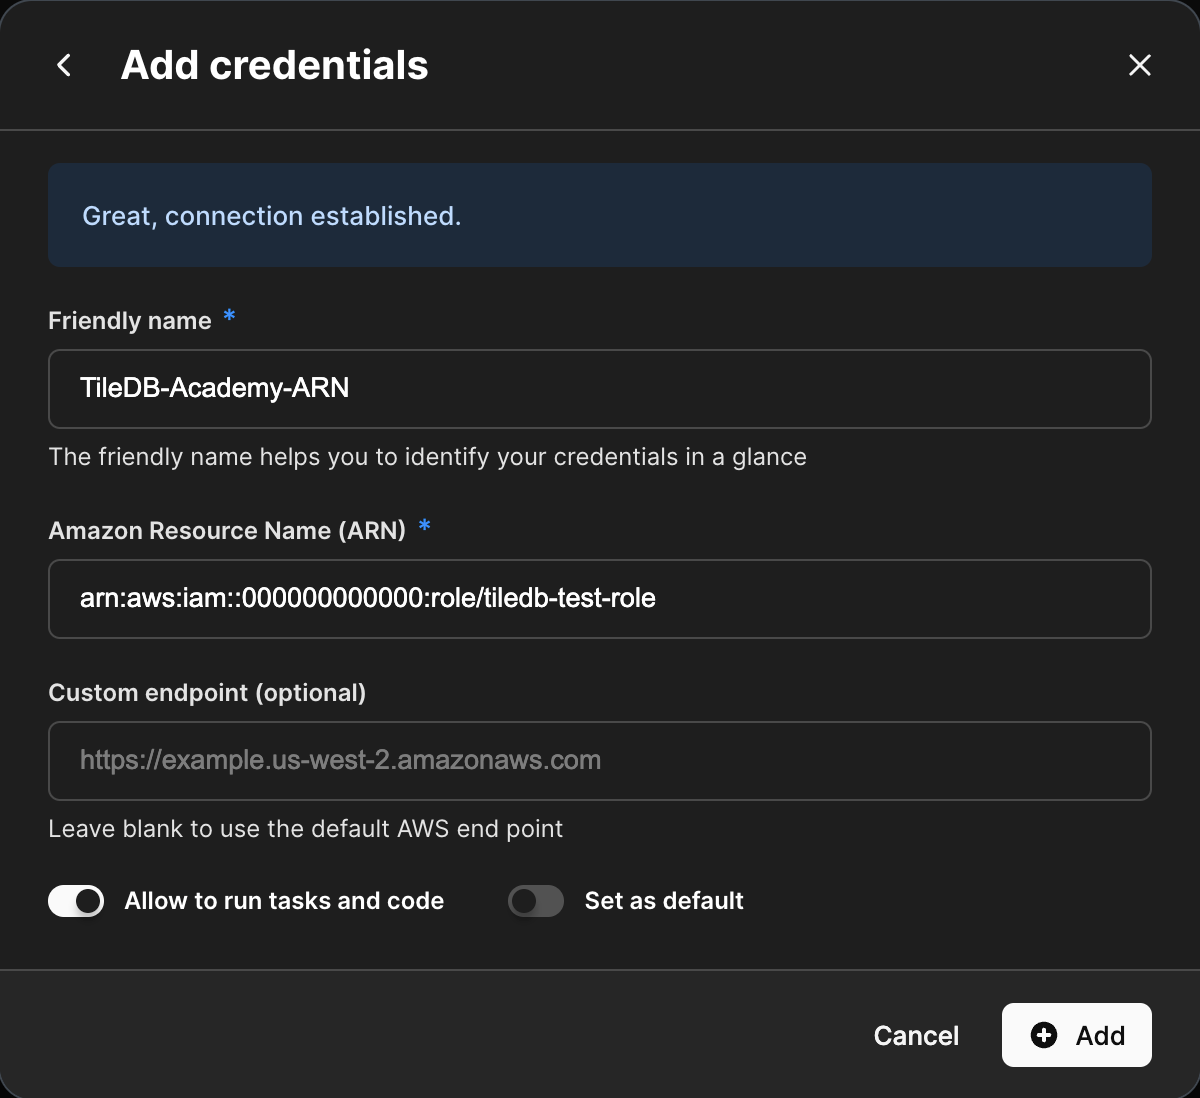
Add a Friendly Name of your choice.
Add the ARN from earlier to the Amazon Resource Name (ARN) section of the modal.
Optionally specify a Custom endpoint
Optionally specify this credential to Allow to run tasks and code or Set as default.
Allow to run tasks and code will allow TileDB to inject the credential into a task graph environment. This is only applicable to ARN-type roles. Set as default just makes this credential the default credential used for the given namespace.

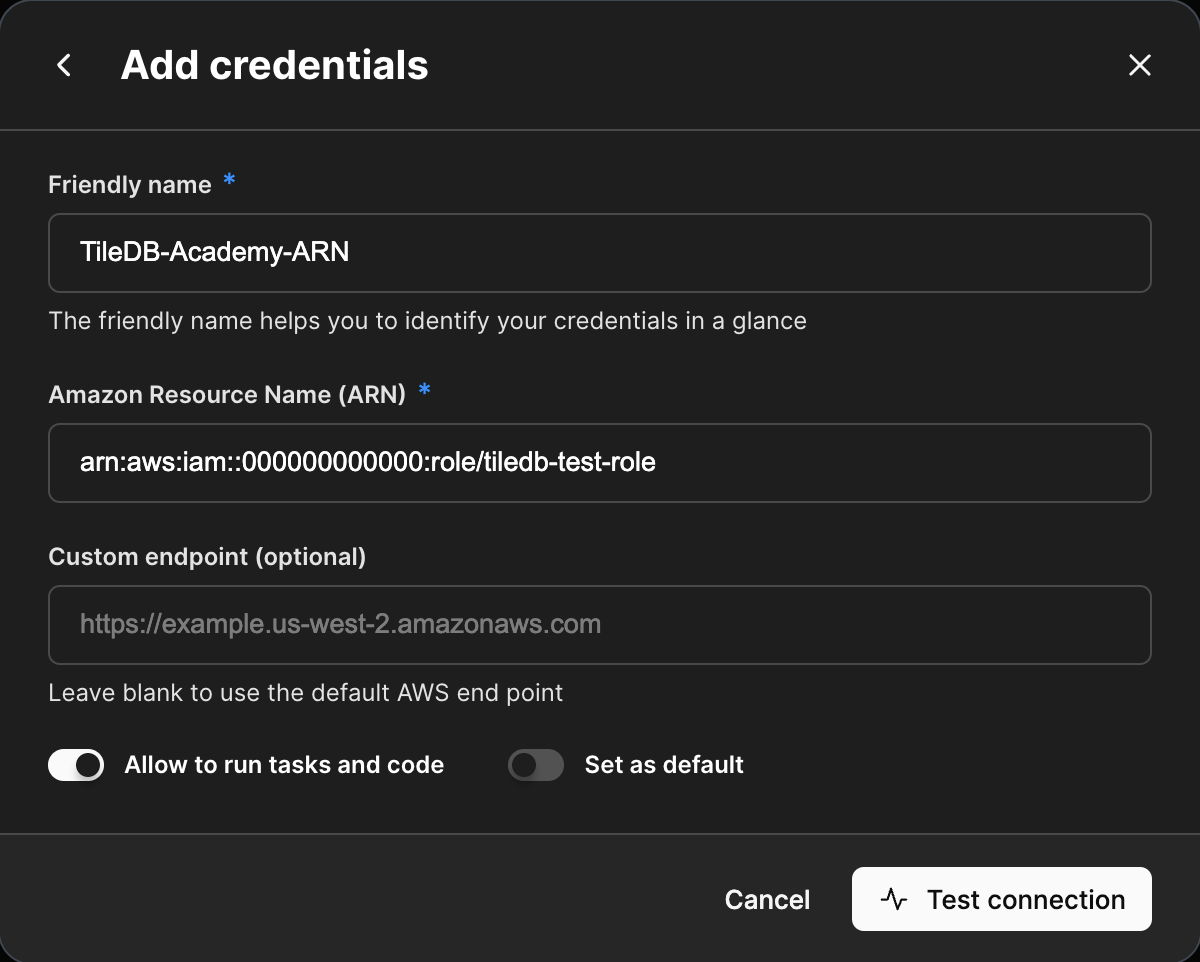
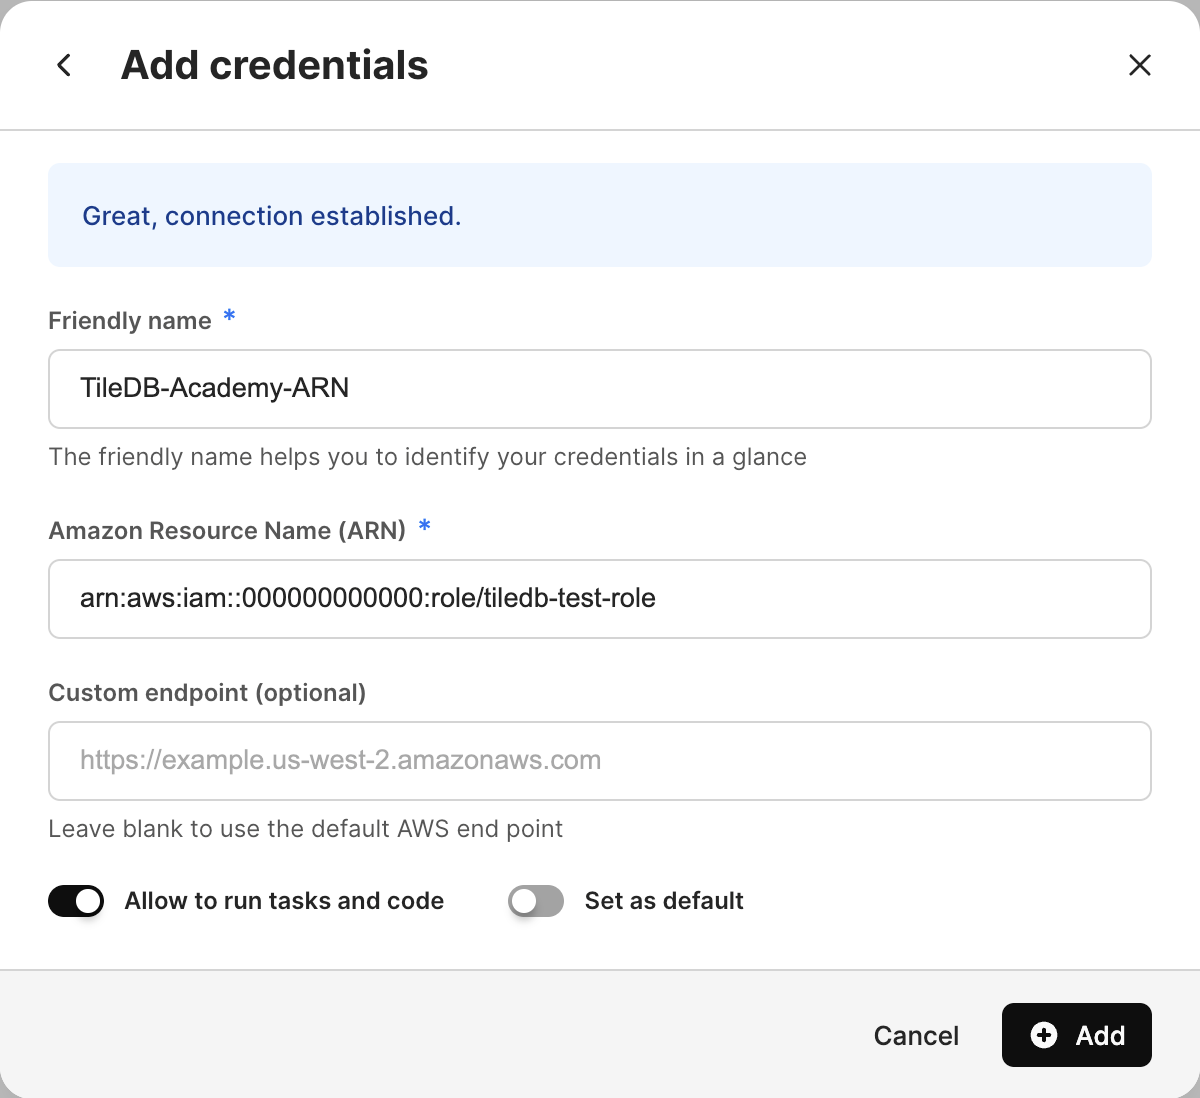
Select Test connection to test the connection. Once the test connection succeeds, you may Add the new credential to your TileDB Cloud SaaS profile.
After saving and re-editing the cloud credential, the ARN display will be truncated to the first 20 characters for security purposes.